25 Bead Crafts for Jewelry, Kids and Home Decor
Put leftover beads to work in bracelets, zipper pulls, pony-bead animals and decorations. Pick a project based on the beads you already have.
By Mustafa Demir
Updated November 9, 2026
Project at a glance
- Time
- About 10 to 60 minutes of hands-on work
- Cost
- Mostly leftover beads and basic supplies, with some specialty hardware
- Skill
- Beginner stringing through small-bead sewing and wirework
- You make
- 25 projects with pony beads, wood beads and more
Pour out a handful of beads and see what you have enough of. One big bead can make a necklace. A few matching wood beads can finish a set of napkin ties. A bag of bright pony beads can turn into a whole row of caterpillars.
Before cutting any cord, pass it through the smallest hole in your pile. If a design doubles back through a bead, try two strands at once. A dish towel under your tray catches most runaways while you sort.
Supervise kids while crafting with beads. Keep loose beads and finished pieces with small parts away from children under three and anyone who still mouths objects. Follow the age guidance on the supplies, and leave sharp tools and wire ends to an adult.
If you’re setting out a bead craft for older kids, give them a shallow tray with just the colors they need. Keep a paper option from the kids’ craft ideas handy for younger siblings. If you came for something to hang or display, the wood-bead projects pair with other DIY home decor ideas.
If I were clearing a corner of the table for this, I’d put out one small dish of beads and let everyone choose a pattern from what’s in it. A bracelet can use up a set of matching beads. The bead that’s been rolling around by itself in the bottom of the box can have a whole necklace to itself.
Bead crafts you can wear
Stretch bracelet
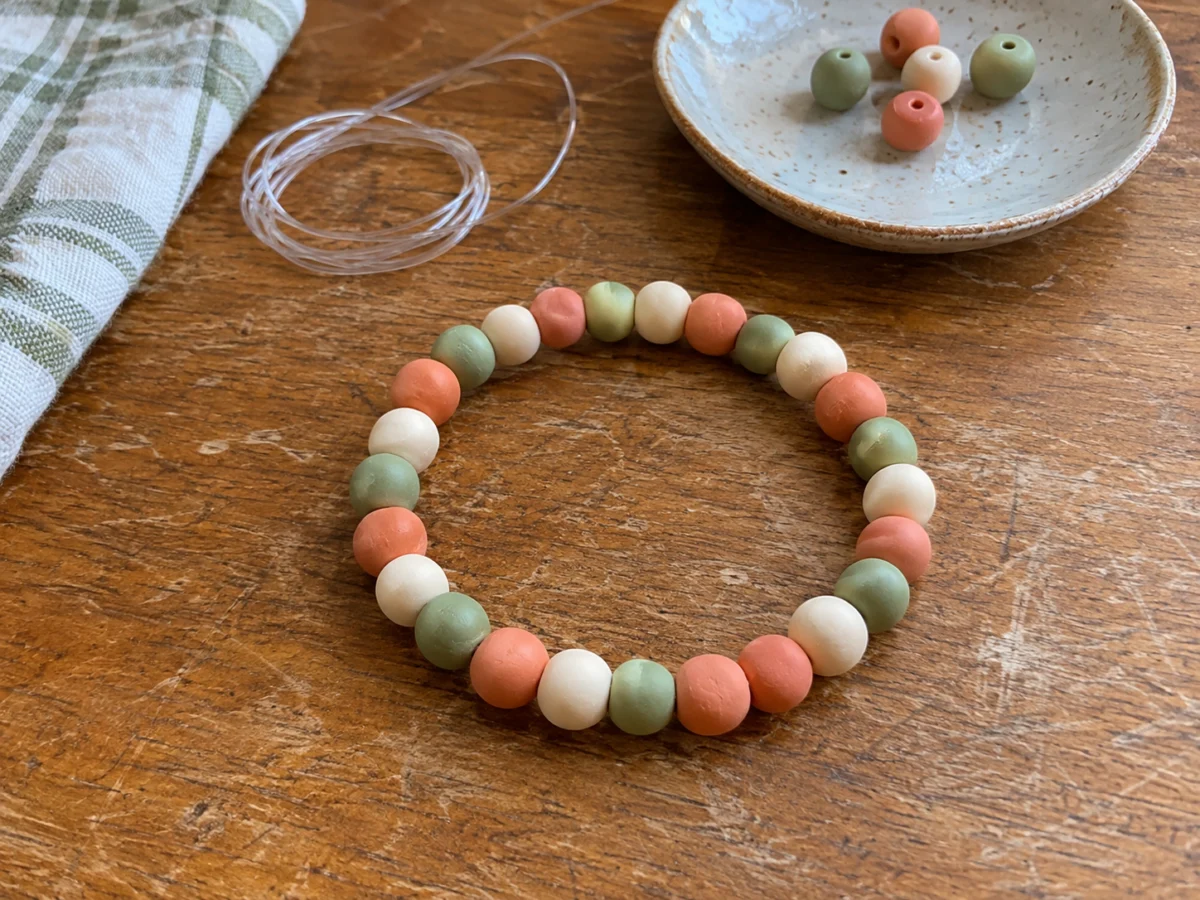
Lay out the pattern around your wrist before you cut the elastic. Use beads with smooth holes, and pre-stretch the cord if its instructions call for it. Save a bead with a slightly wider hole to tuck the knot into.
You need: Round beads, jewelry elastic, scissors, bead stopper
- Clip a bead stopper to one end and string the beads.
- Tie the knot recommended for your elastic, test it with a gentle tug and tuck it into the wider bead.
Single-bead cord necklace
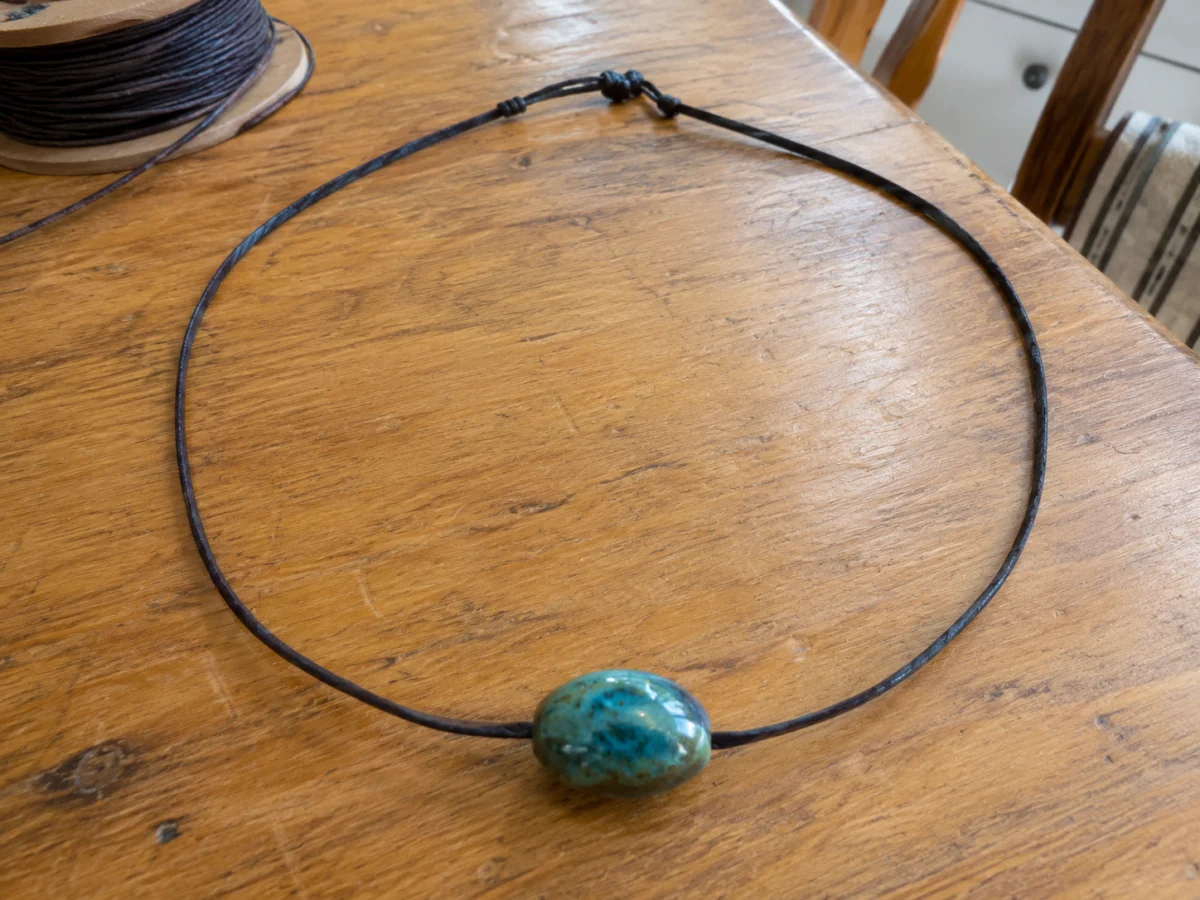
A single large bead can carry the whole design. Slide it onto a cord and tie a knot on each side if you want it to stay centered. For a clasp-free necklace, check that the cord passes comfortably over your head before tying the ends.
You need: Large-hole focal bead, waxed cotton cord, scissors
Stacked bead earrings
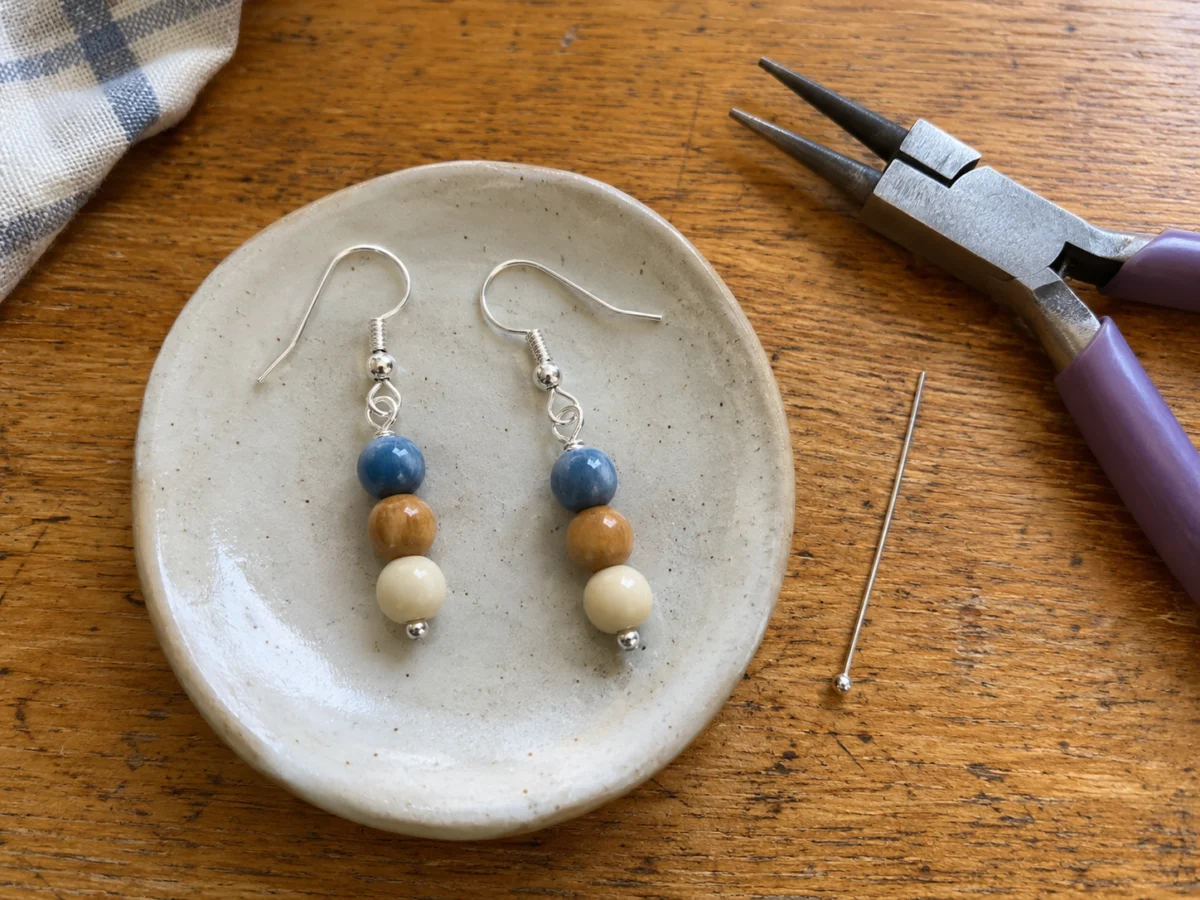
Arrange two or three small beads per earring and compare the stacks side by side. Choose a head pin whose flat end is wider than the lowest bead’s hole. Pick lightweight beads and leave room above the stack for the wire loop.
You need: Lightweight beads, flat-head jewelry pins, earring hooks, round-nose pliers, flush cutters
- Thread the stack onto a head pin.
- Trim and curl the free end into a loop with round-nose pliers.
- Attach an earring hook and close the loop flush.
Seed-bead daisy ring
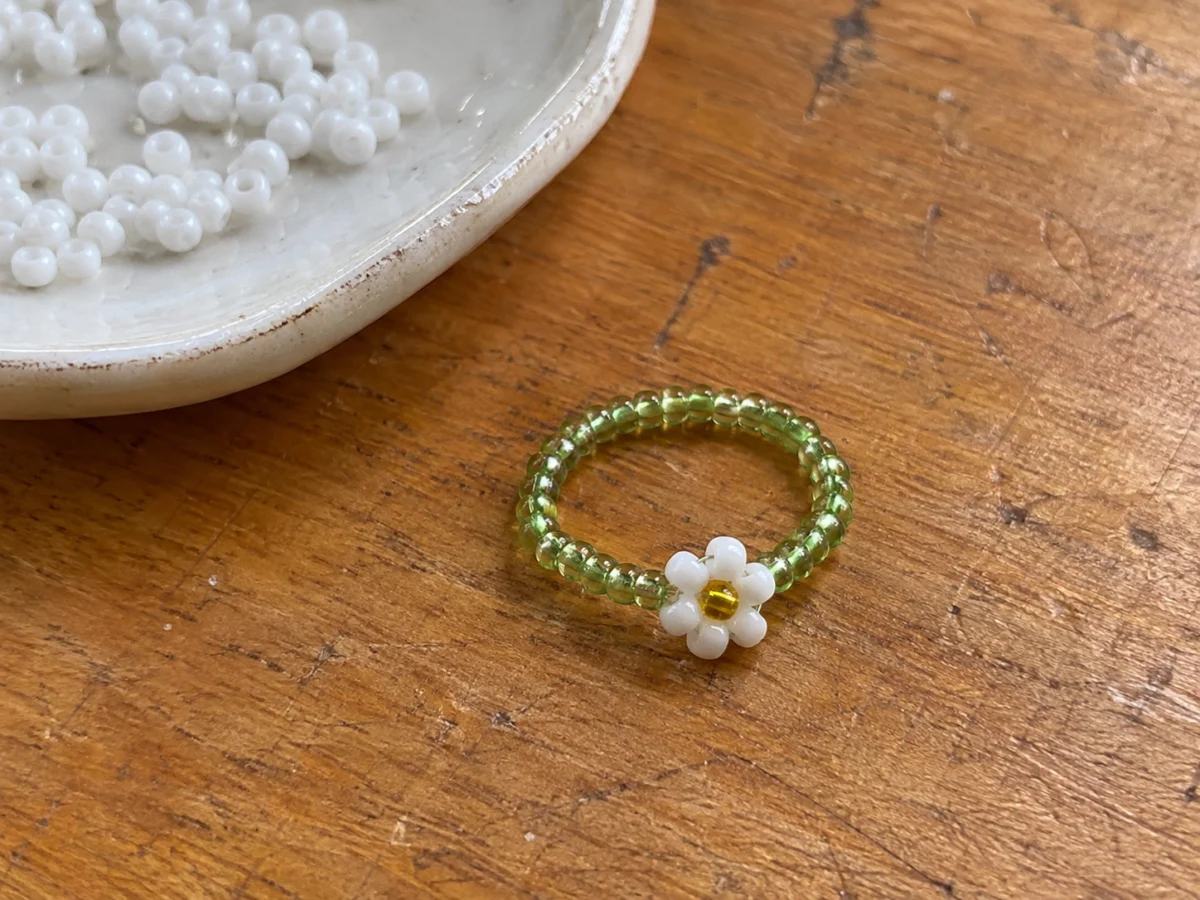
Pick one color for the petals and another for the center. Thread back through the petals so the center bead sits in the opening, then finish the band with plain beads. Check that the ring slides over your knuckle before tying it closed.
You need: Seed beads in two or three colors, fine beading thread, beading needle, scissors
- Pick up six petal beads and pass back through the first to close the circle.
- Add a center bead, then pass through the opposite petal to anchor it.
- Add plain beads to fit, tie the ends and weave the thread tails through nearby beads.
Beaded felt brooch
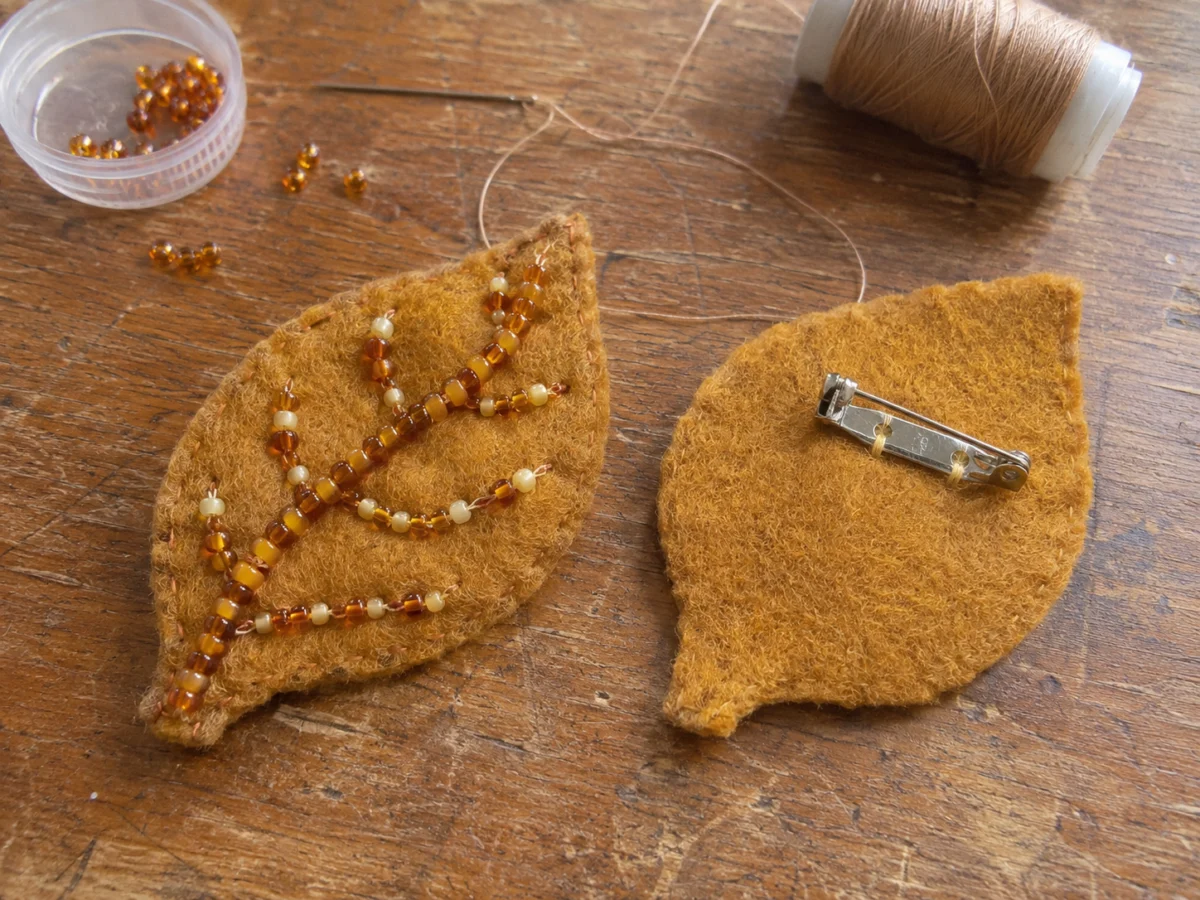
A leaf or a small circle of felt gives you room to stitch without chasing tight corners. Sew the beads to the front layer and the locking pin back slightly above center on the second layer. Stitch the felt shapes together to cover the thread ends.
You need: Two matching felt shapes, small beads, needle, thread, sew-on locking pin back, scissors
Beads for your bag, book or desk
Beaded zipper pull
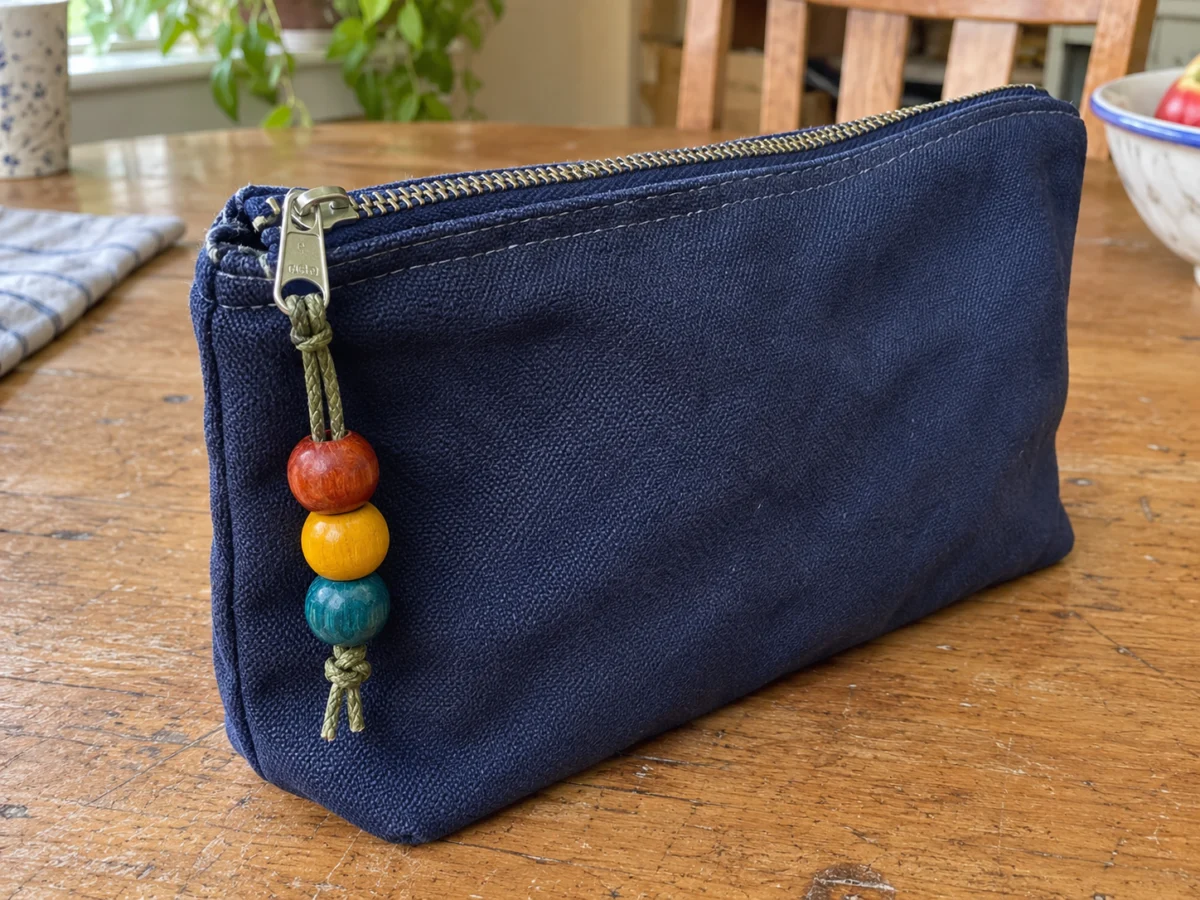
Thread waxed cord through the opening in a zipper tab, then feed both tails through a few large-hole beads. Tie a stopper knot under the last bead and tug on the cord before trimming. Three beads make a handy grip without adding much swing to the zipper.
You need: Waxed cord, three large-hole beads, scissors, zipper with a tab opening
Beaded tassel bookmark
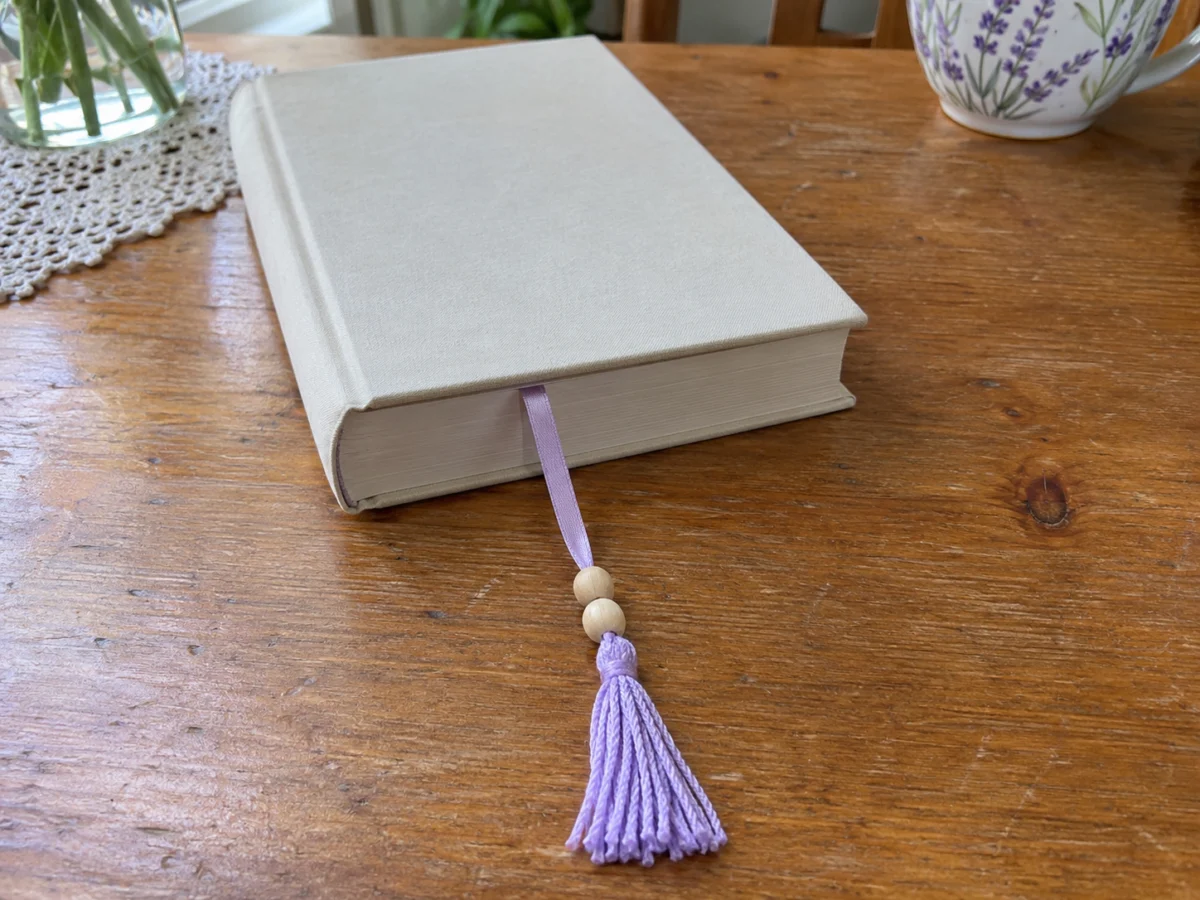
Use a flat ribbon a little longer than the book is tall. Tie a short beaded strand and a thread tassel to one end. Leave both dangling below the book so only the flat ribbon sits between the pages.
You need: Flat ribbon, embroidery floss tassel, beads, strong thread, scissors
Beaded pen
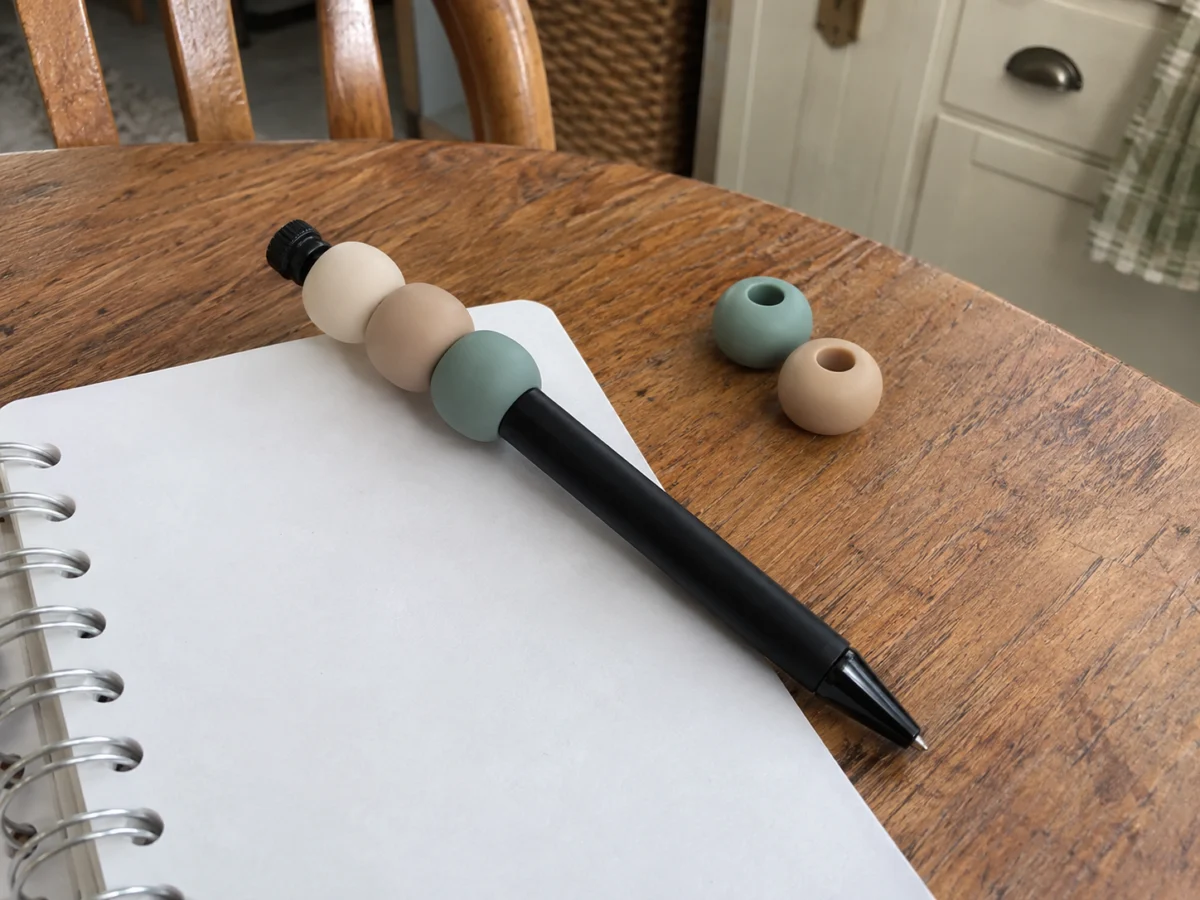
Start with a beadable pen blank that has a removable cap and a rod made to hold beads. Try each bead on the rod before planning the pattern. A thin spacer can steady a short stack that rattles after you screw the cap back on.
You need: Beadable pen blank, beads that fit its rod, spacer bead if needed
Beaded binder-clip note holder
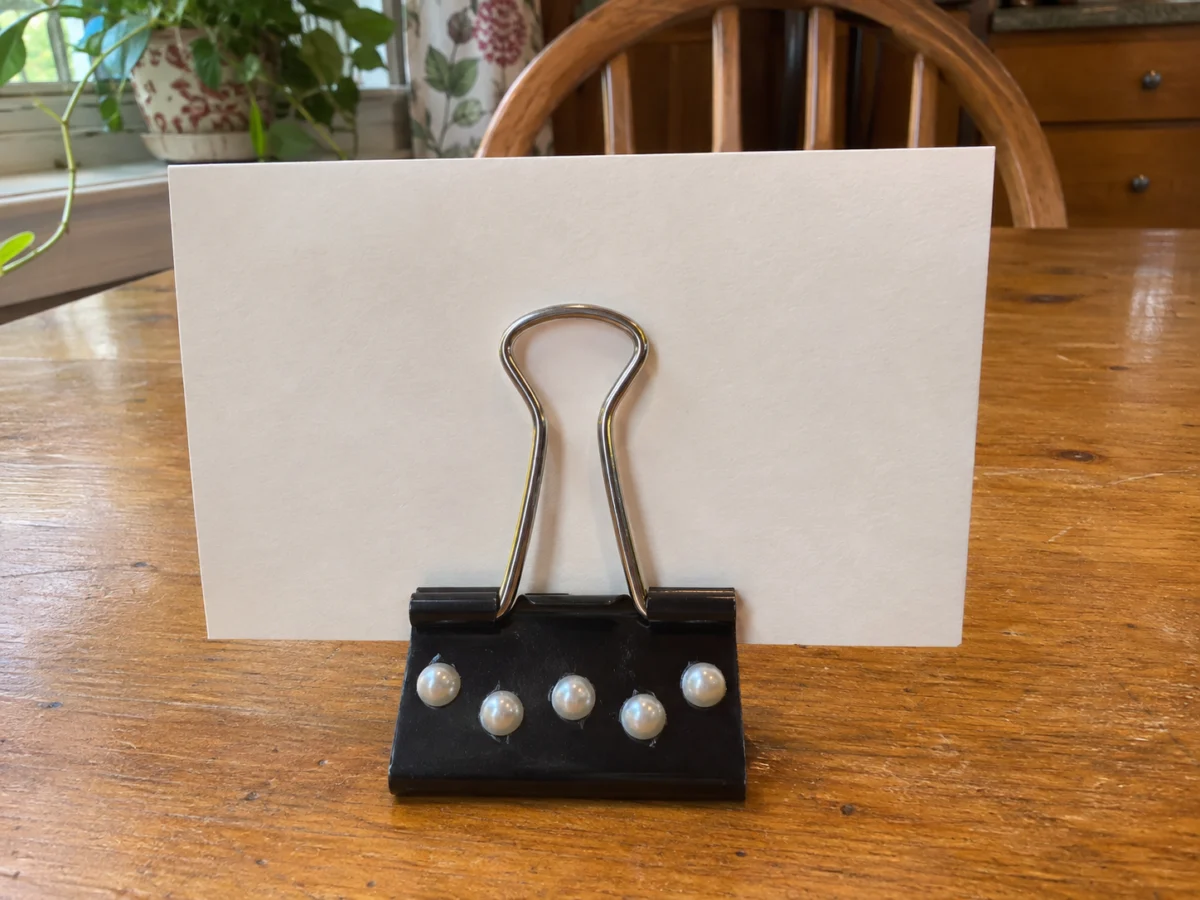
Set a wide binder clip on its flat base and tuck a stiff card into the jaws. Glue a row of flat-back beads to the broad metal face where they won’t block the wire handles. Put a little card with tomorrow’s first task in it while you clear the desk.
You need: Wide binder clip, flat-back beads, craft adhesive rated for metal and the bead material, stiff card
Beaded initials on a pencil pouch
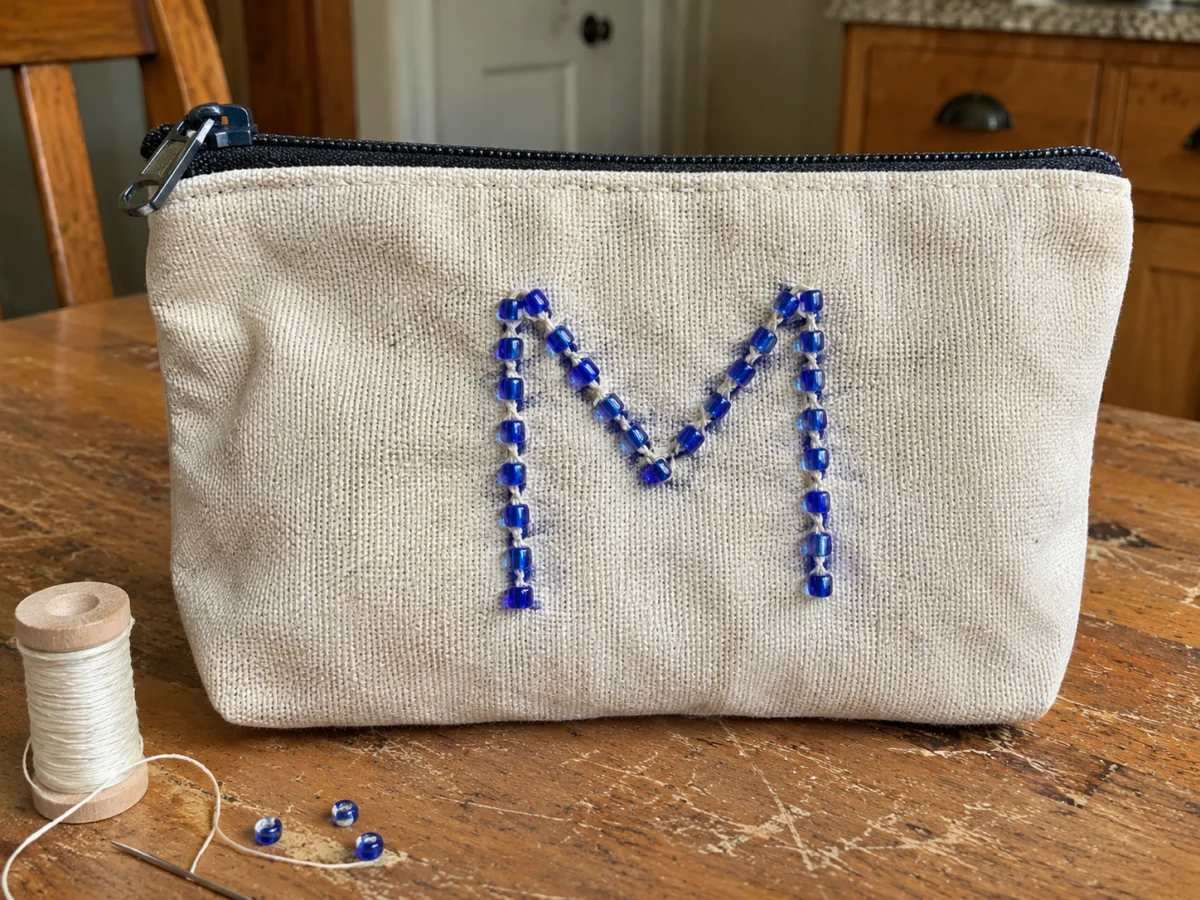
Draw one large initial in removable fabric pencil on a canvas pouch. Slide a piece of cardboard into the pouch to keep the needle from catching the back layer. Sew on one bead at a time along the line so a single loose stitch won’t free a whole row.
You need: Canvas pouch, small sew-on beads, fabric pencil, needle, strong thread, scrap cardboard
Bead crafts for kids with an adult
Pony-bead caterpillar
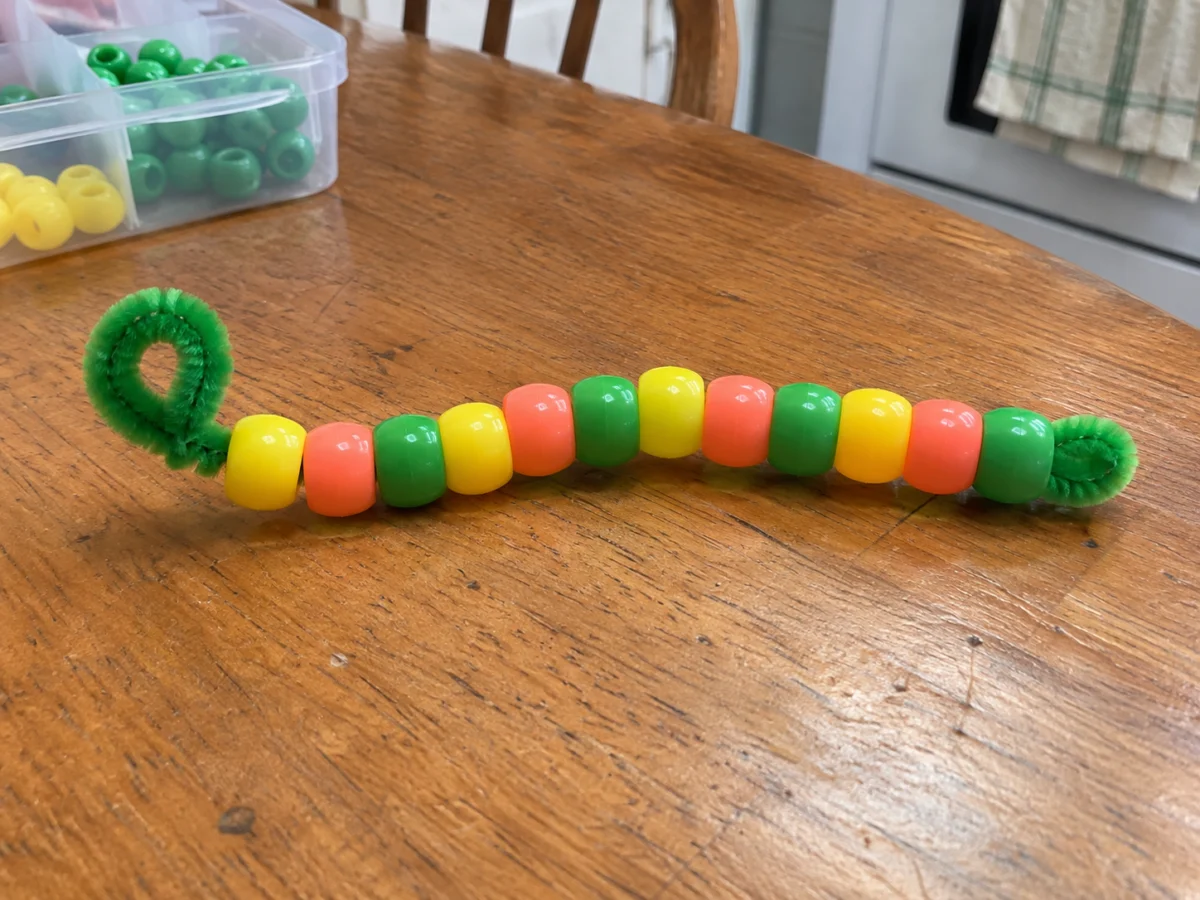
Slide large-hole pony beads onto a chenille stem. Have an adult bend both ends back and tuck in the cut tips so they won’t poke. Try making two caterpillars with the same number of beads but different color patterns.
You need: Pony beads and a chenille stem
Bead-and-lace cardboard picture
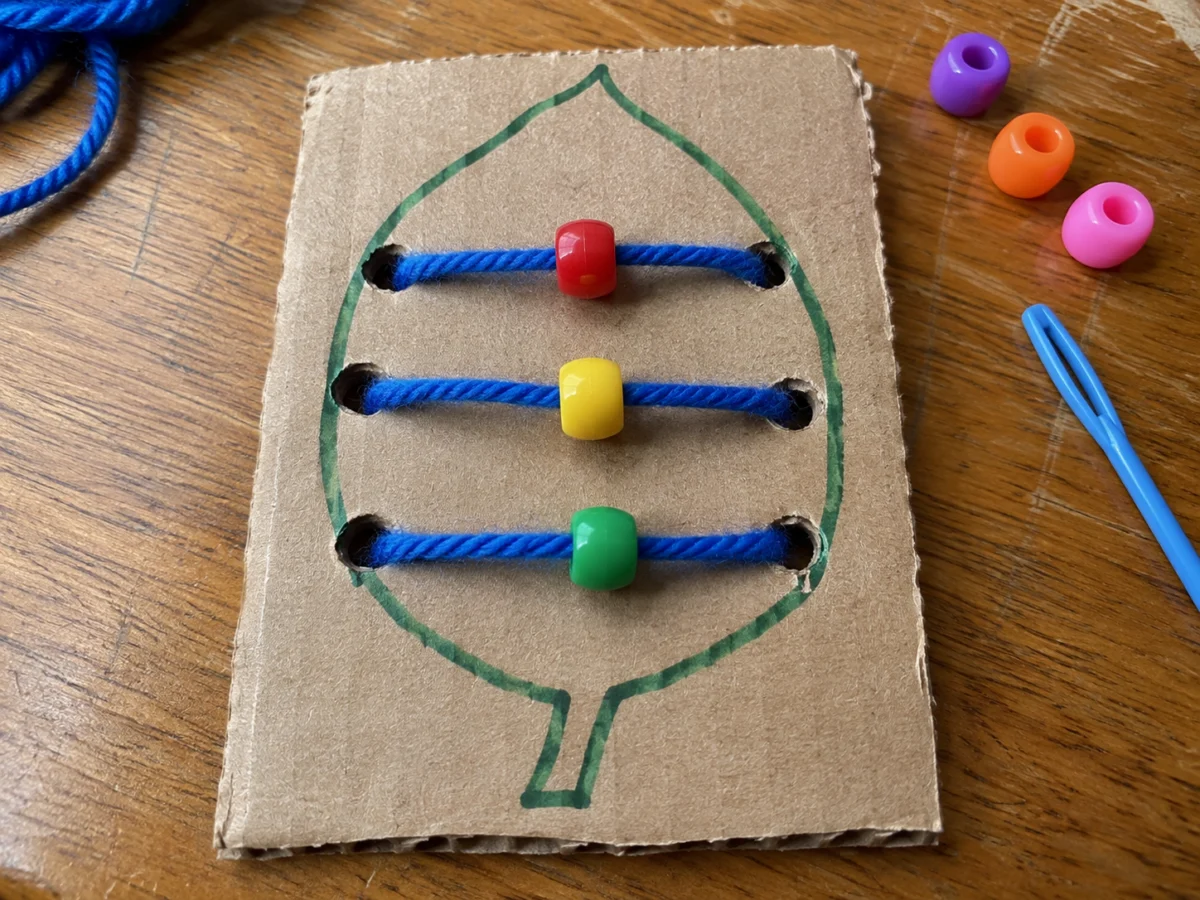
Draw a wide leaf on cereal-box cardboard. Lace thick yarn back and forth across it and add a large-hole bead to each stitch on the front. Wrap the yarn tip in tape if it frays as it passes through the holes.
You need: Cereal-box cardboard, marker, hole punch, yarn, large-hole pony beads, tape, scissors
- Have an adult punch three pairs of holes, one on each side of the leaf for every stitch.
- Tape the starting tail to the back, lace from side to side and secure the other tail on the back.
Flat-back bead mosaic letter
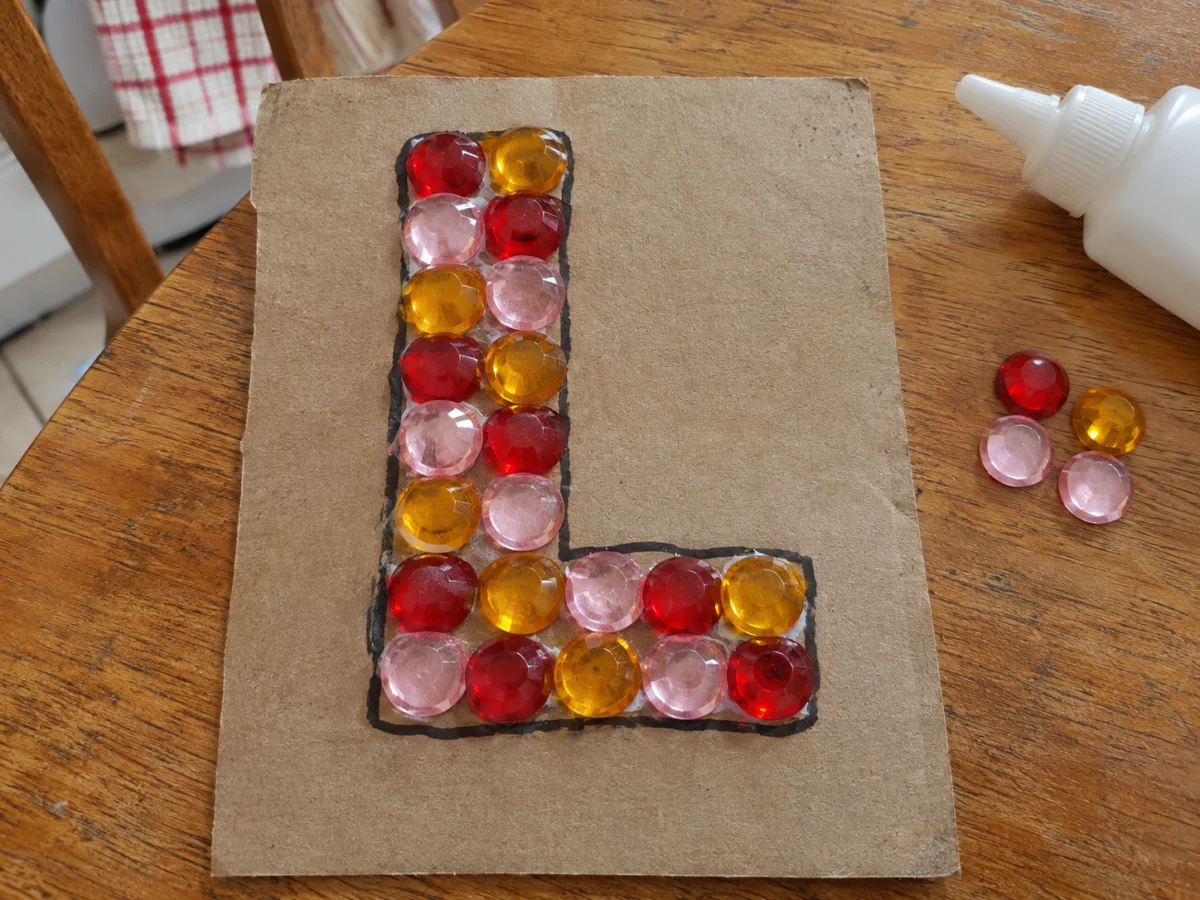
Draw a block letter wide enough to hold two rows of flat-back beads. Let the kids move the beads around on the dry cardboard before you put down any glue. If the cardboard starts to curl, switch to a stiffer scrap and use smaller dabs of glue.
You need: Stiff cardboard, pencil, flat-back craft beads, tacky craft glue suited to the beads
Cardboard jellyfish with beaded tentacles
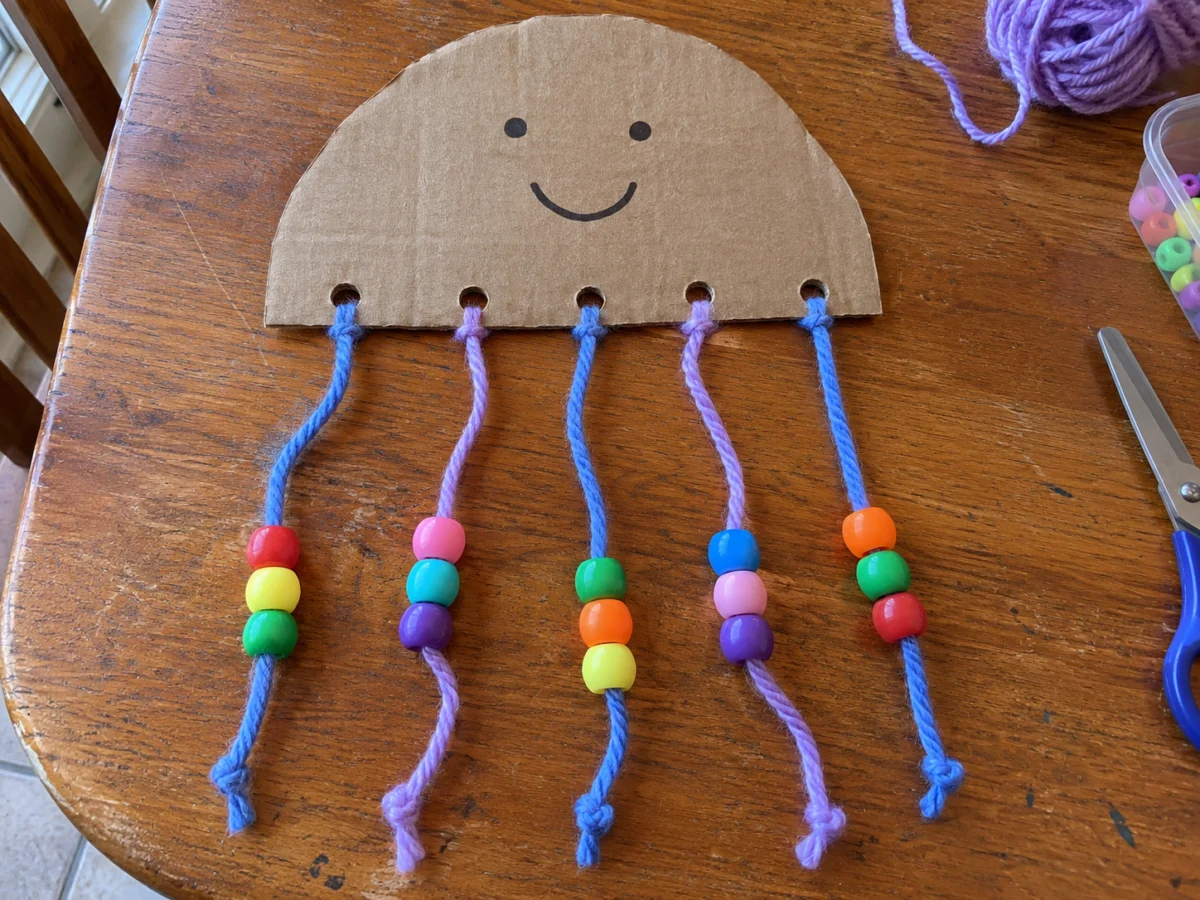
A semicircle of cardboard gives the jellyfish a sturdy top edge. Have an adult punch holes along the flat bottom, then tie on short pieces of yarn in different lengths. Put just a few beads on each strand and make the knot at the end larger than the bead holes.
You need: Stiff cardboard, hole punch, scissors, yarn, large-hole beads, markers
Pony-bead lizard
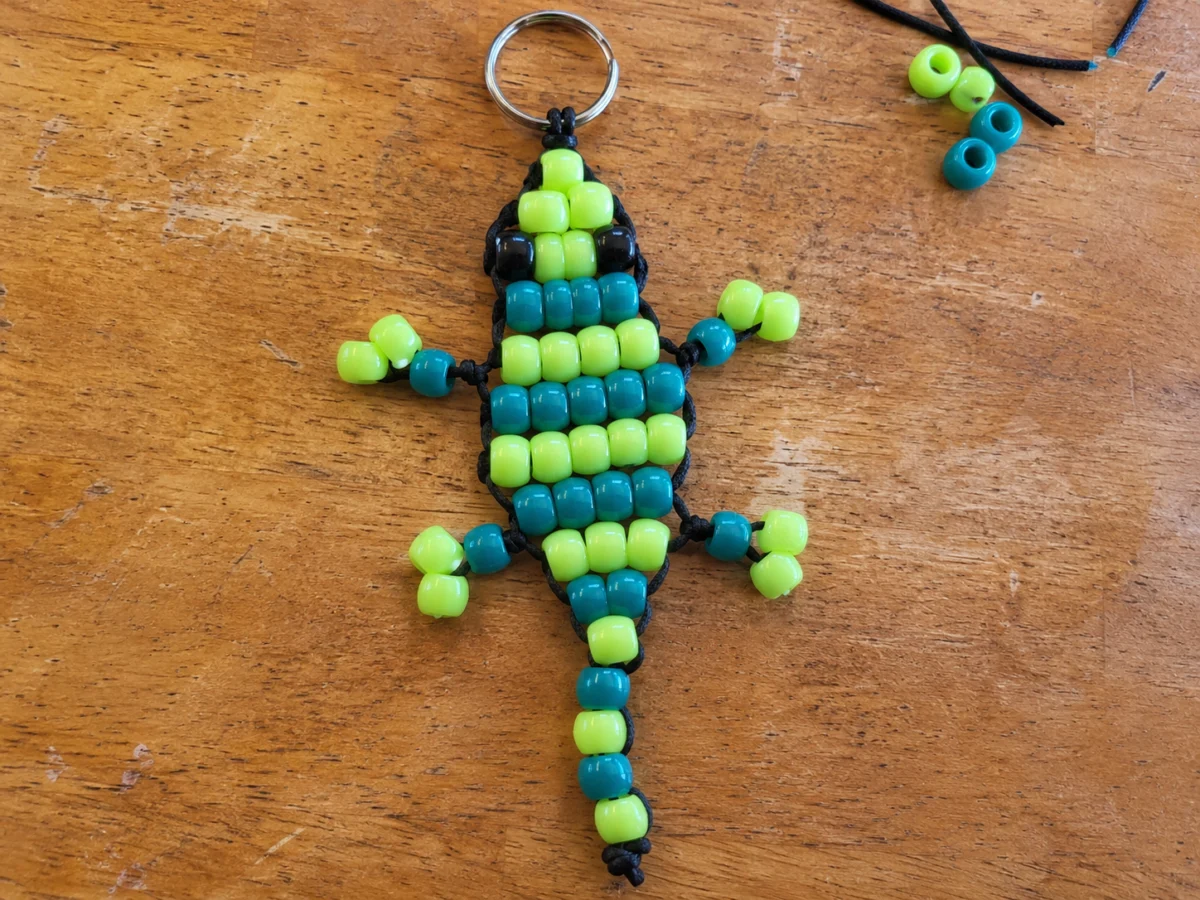
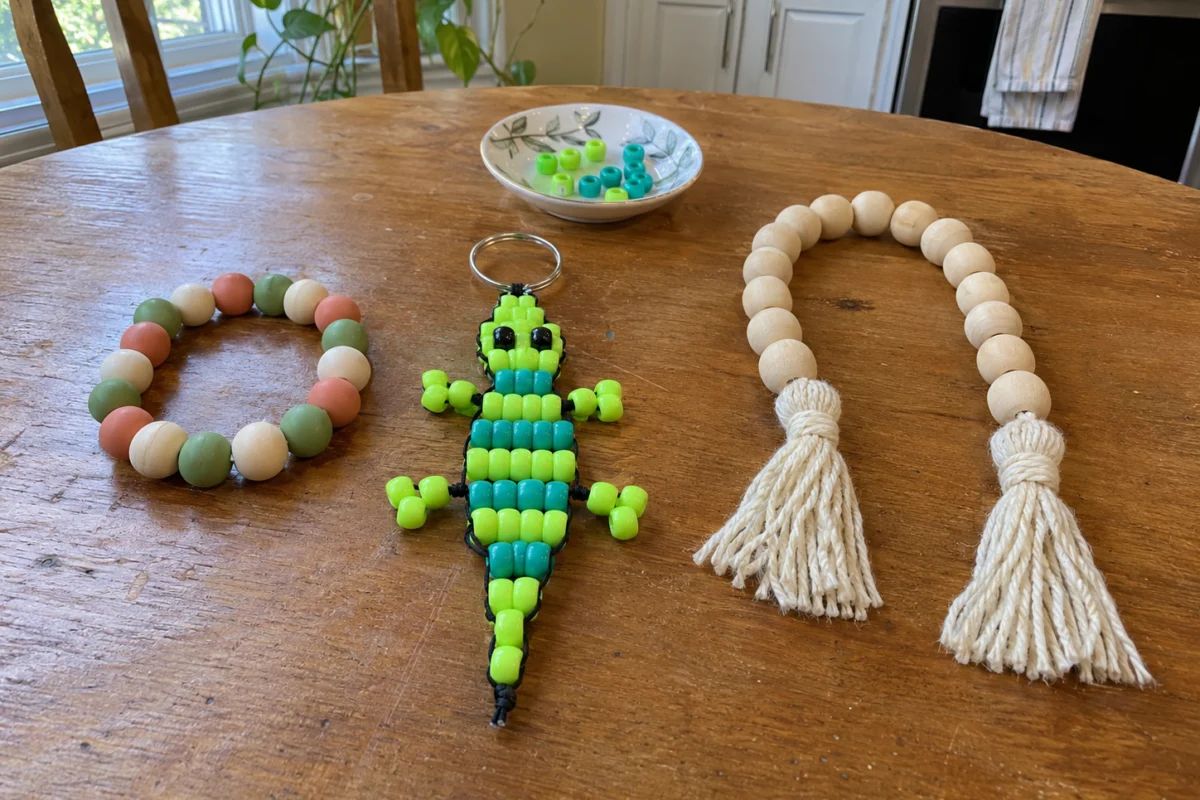
The lizard’s body is a ladder of bead rows. Feed the two ends of the cord through each body row from opposite sides, then pull evenly so the rows sit flat. Two dark beads make eyes, and the tail can taper to a single bead.
You need: Pony beads in two body colors and a dark eye color, thin nylon craft cord, scissors, optional split ring
- For a small lizard, center two nose beads on the cord. Add three beads with dark eyes on the outside, then a neck row of two.
- On each side, string two leg beads and three toe beads. Pass back through the leg beads. Cross three belly rows of three, then repeat the legs.
- Cross two rows of two beads, then five single-bead tail rows. Knot the ends. Add a split ring at the nose if you want a charm.
Wood bead decor and a window suncatcher
Wood bead garland with tassels
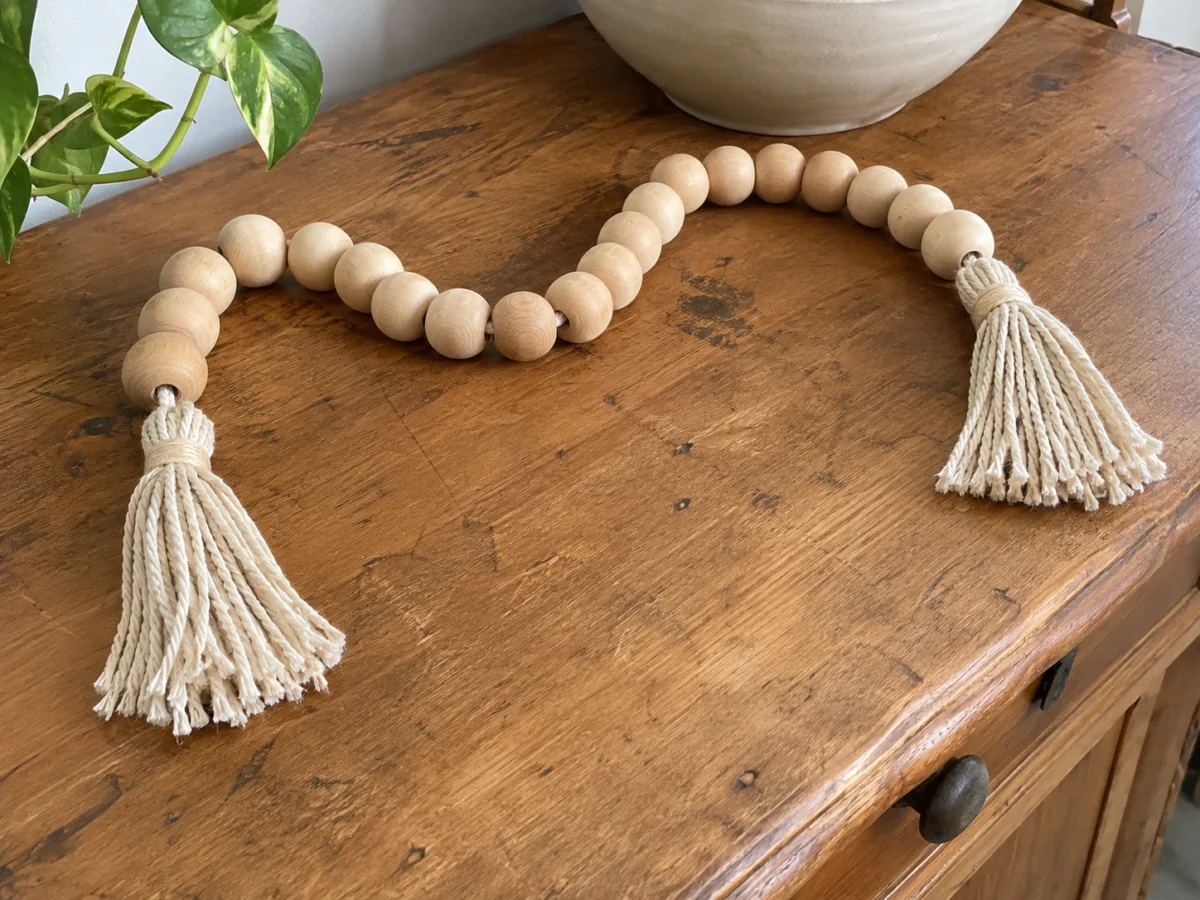
Pick two sizes of unfinished beads and repeat a short pattern on sturdy cotton cord. Leave bare cord at each end to tie on the tassels. Should a tassel slip into the last bead, choose a smaller-hole bead for the end or tie a larger stopper knot.
You need: Round wood beads in two sizes, cotton cord, two yarn tassels, scissors
Beaded embroidery hoop wall hanging
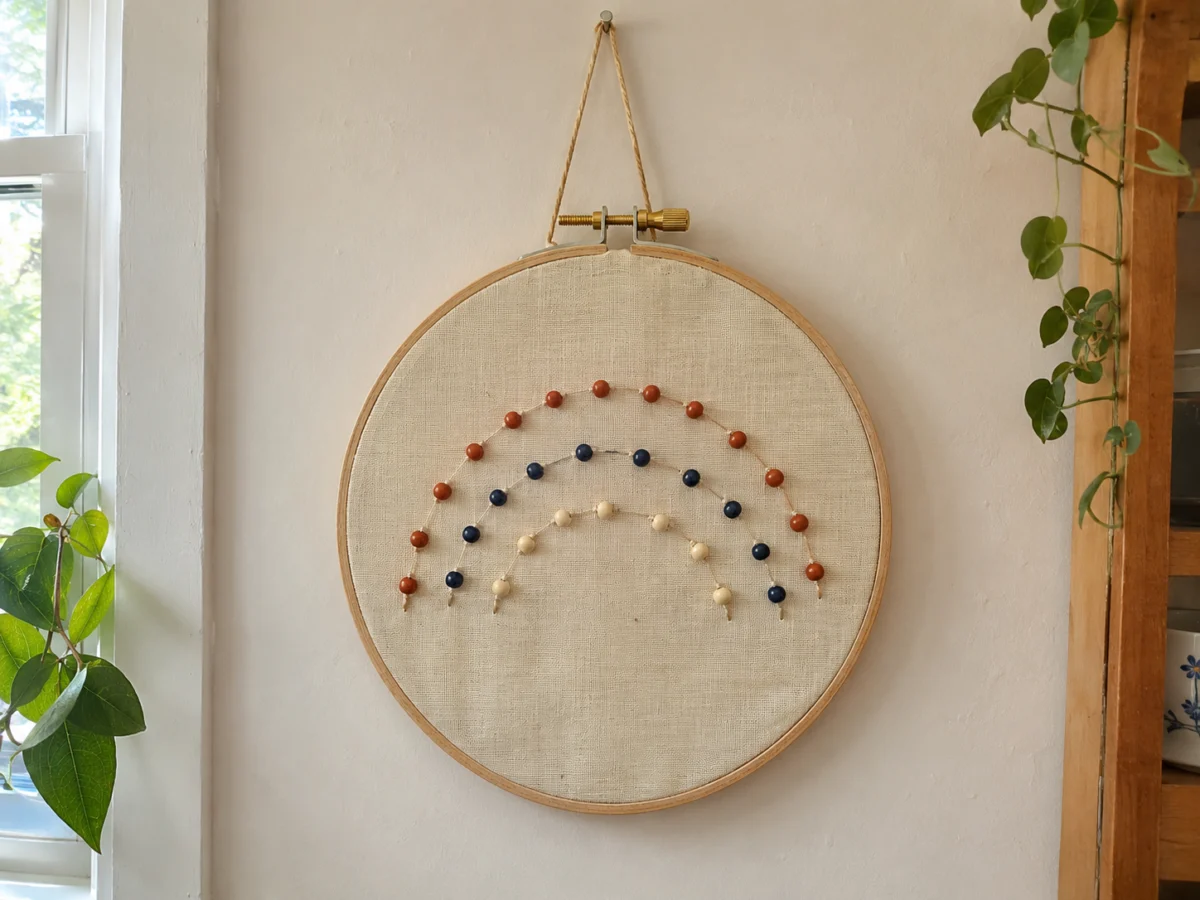
Stretch a scrap of cotton in an embroidery hoop and lightly draw three arches with a fabric pencil. Sew lightweight beads along each line, knotting the thread behind the cloth. If the cotton puckers, ease up on the thread and tighten the fabric in the hoop.
You need: Wood embroidery hoop, cotton fabric, fabric pencil, lightweight sew-on beads, needle, thread, scissors
Bead-rimmed picture frame
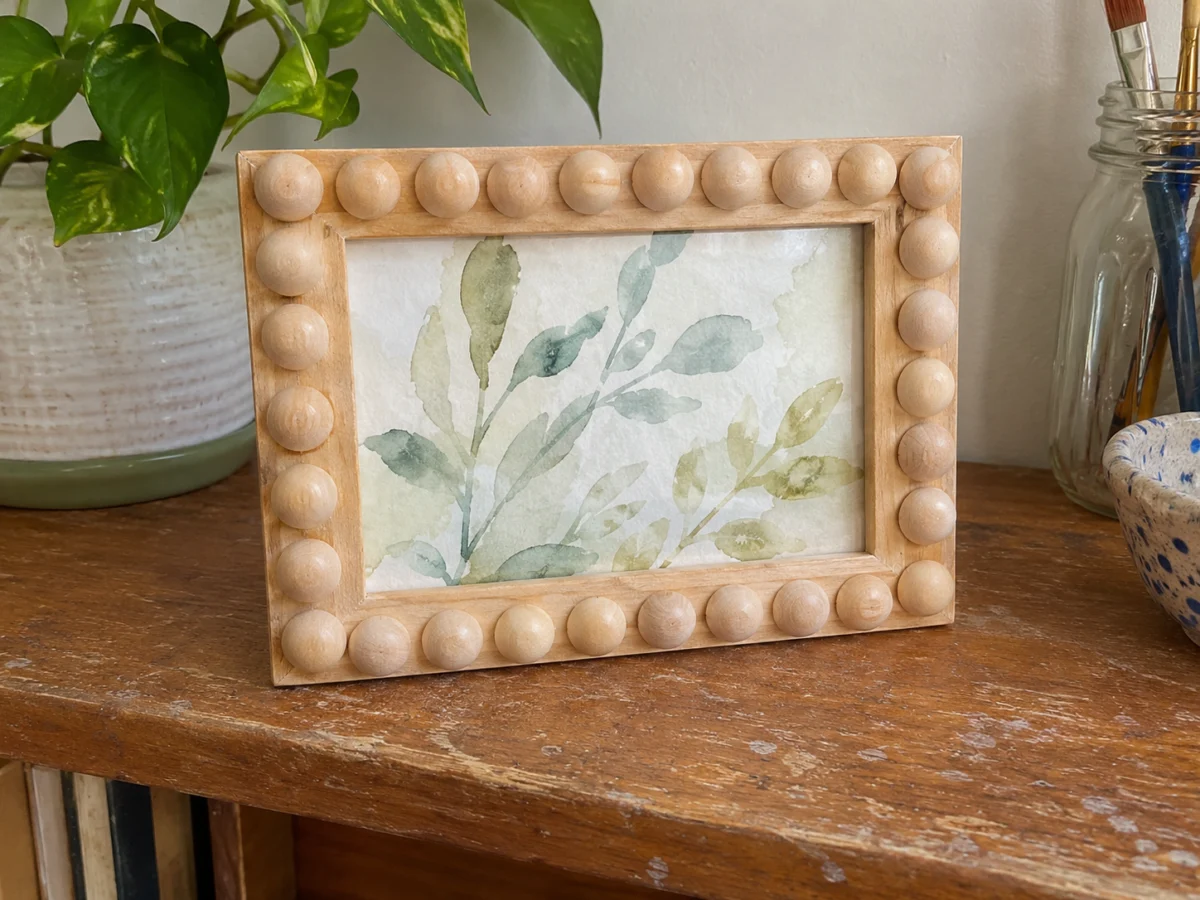
Dry-fit half-round wood beads along the four edges of a plain frame. Move any small gaps toward the corners so the spacing looks deliberate. Take out the glass while you glue the beads, then put it back once the adhesive has set.
You need: Plain wood picture frame, half-round wood beads, wood glue
Wood bead handles for a catchall tray
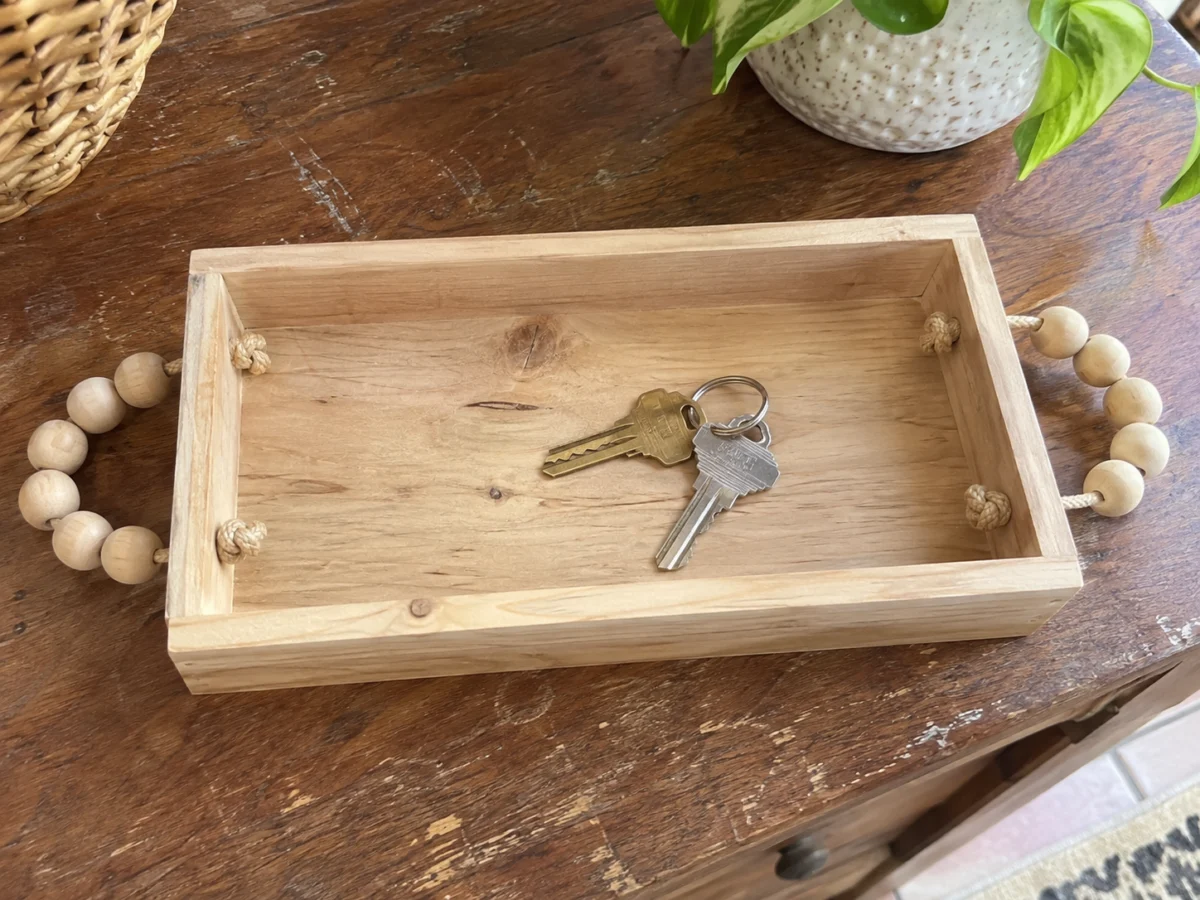
Use a small tray with holes for cord handles. Slip large-hole wood beads onto sturdy cotton cord, pass the ends through the holes and knot them inside. Leave the loops short enough to rest against the sides. Pick up a loaded tray from the base.
You need: Small tray with existing handle holes, sturdy cotton cord, large-hole wood beads, scissors
If your supply bin has tumbling tower blocks as well as beads, save the blocks for a separate Jenga block craft.
Faceted bead window suncatcher
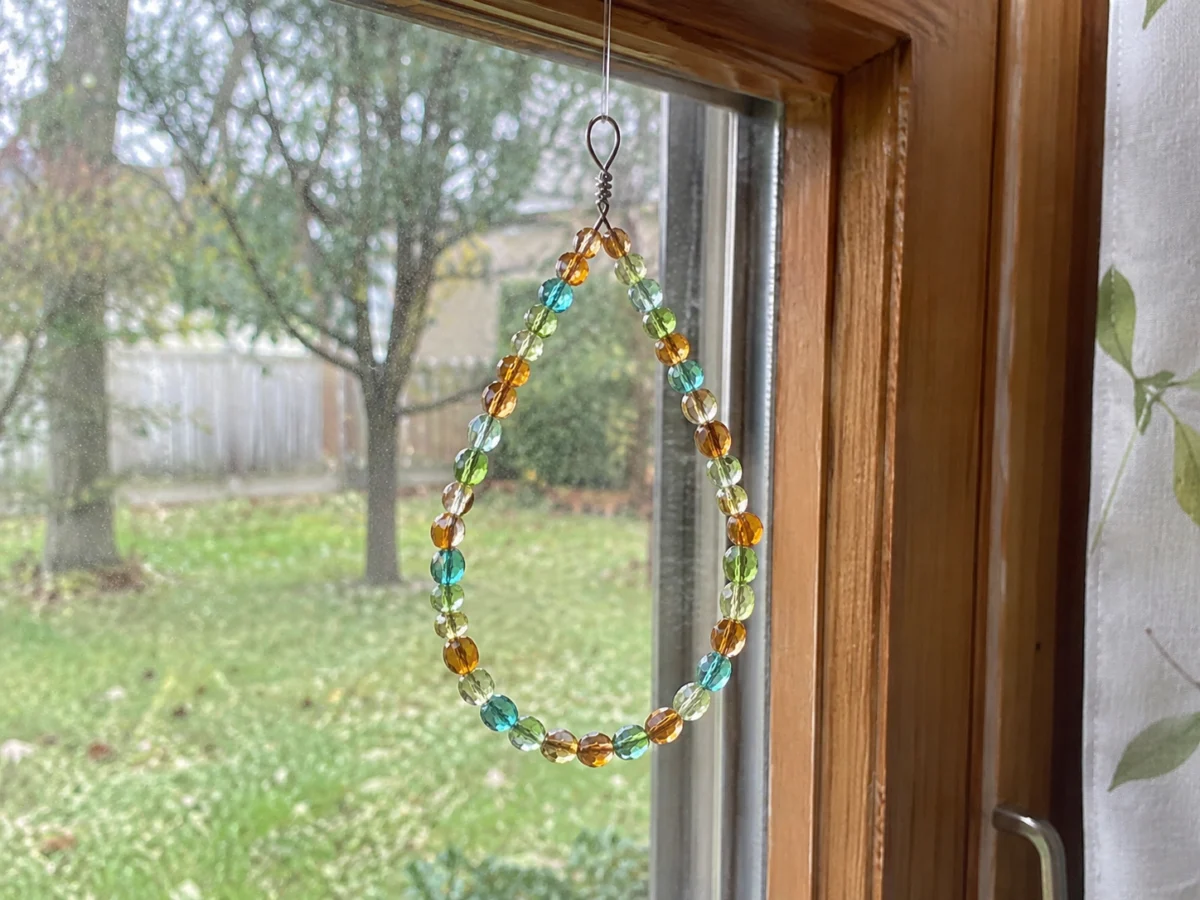
String clear and colored faceted beads on coated beading wire, leaving several inches free at each end. Bring the ends together to make a teardrop. Hang it where daylight can reach it and small children can’t.
You need: Faceted acrylic beads, coated beading wire, crimp beads, crimping pliers, wire cutters, small hanging ring
- Slide a crimp bead onto each end of the wire.
- Loop each end through the same hanging ring, feed it back through its crimp and close the crimp. Tuck the wire tails into nearby beads.
Beaded gifts and decorations
Wood bead snowflake ornament
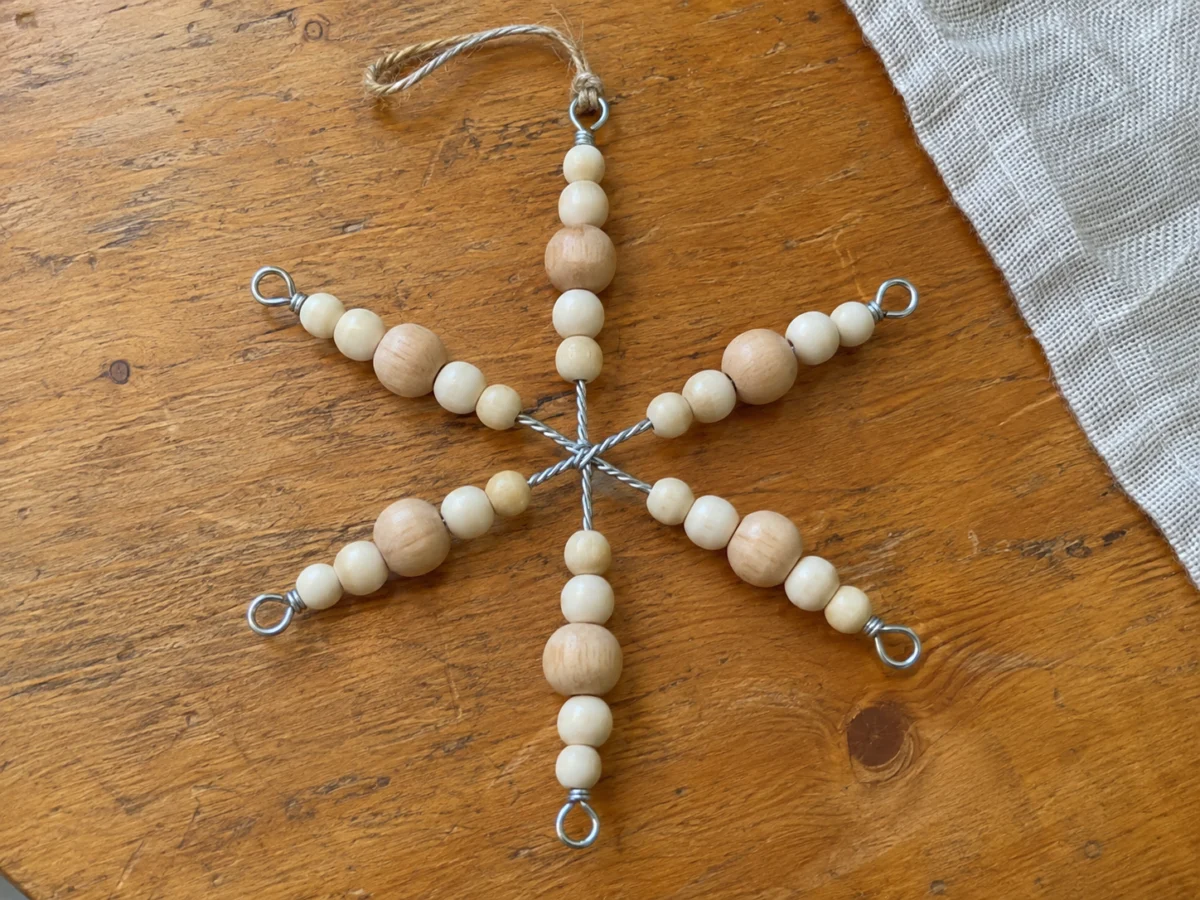
A wire snowflake blank gives you evenly spaced spokes. Repeat the same bead order on each spoke, leaving enough bare wire to curl the tip. An adult can turn the tips in with round-nose pliers before anyone handles the ornament.
You need: Preformed wire snowflake blank, wood beads, round-nose pliers, hanging ribbon
Bead-and-felt gift tag
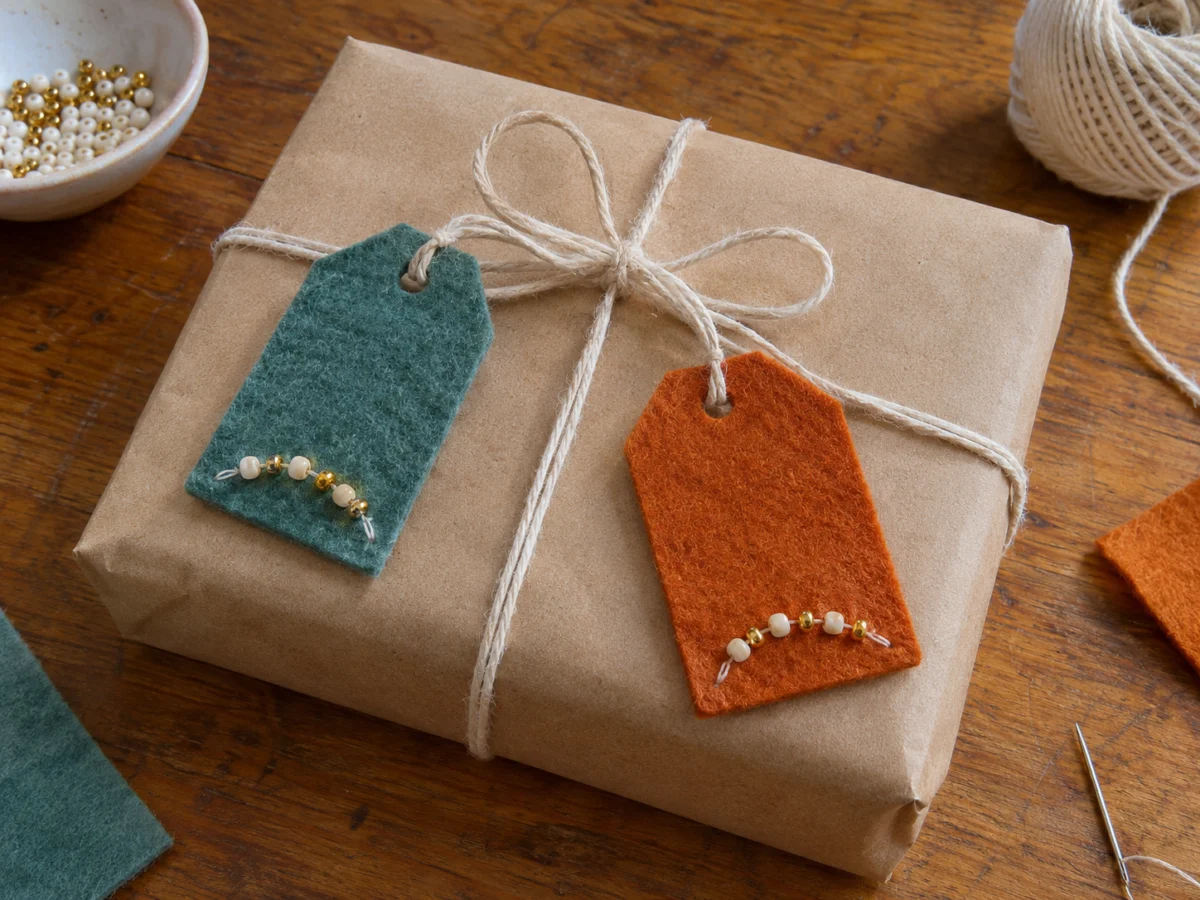
Cut a flat felt star or oval and sew two or three beads near one edge. Put the name on a cardstock tag behind it, then tie the two layers together with twine through a hole at the top. The felt decoration can come off the package and hang on a peg afterward.
You need: Felt scrap, cardstock, beads, needle, thread, cotton twine, scissors, hole punch, pen
Beaded napkin ties
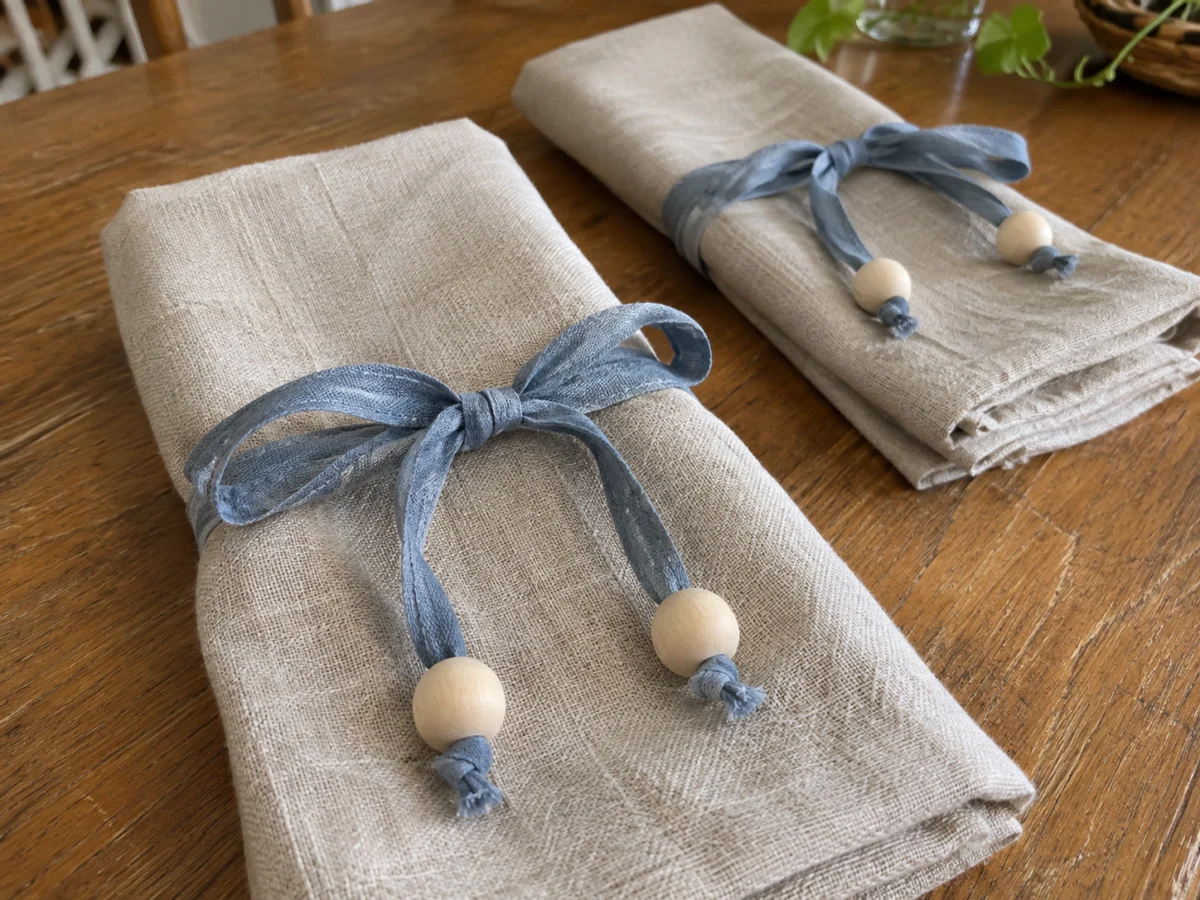
Tie narrow ribbon around a folded cloth napkin and slip a large-hole bead onto each tail. Tie a stopper knot past each bead so it stays on when you untie the ribbon. Set these at adult place settings and remove the ties before using the napkins.
You need: Cloth napkins, narrow ribbon, two large-hole beads per napkin, scissors
Wood bead mini wreath ornament
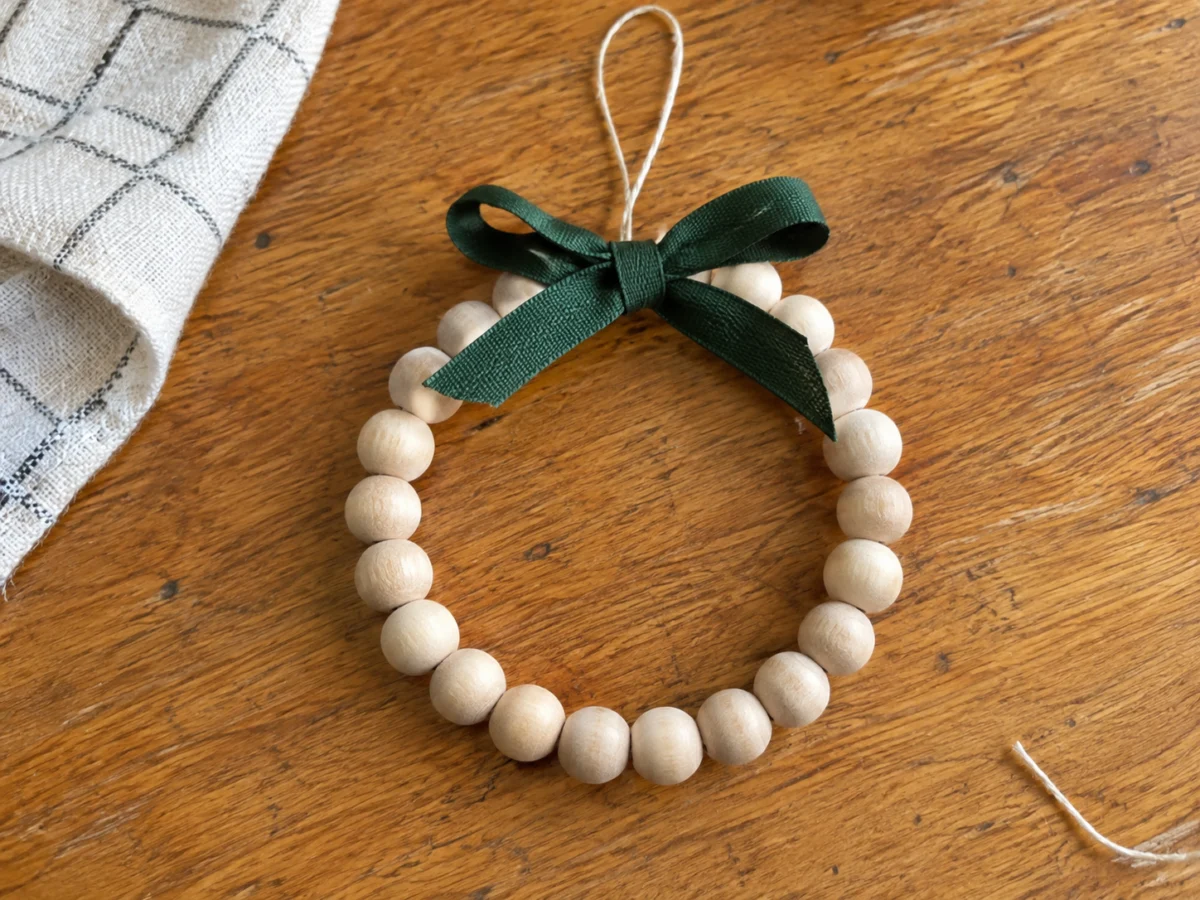
Pick an openable metal craft ring thin enough to fit your wood beads. Thread the beads around the circle, leaving a little space to close the ring without pinching them. Add a twine loop for hanging and tie a ribbon bow over the closure.
You need: Openable metal craft ring, round wood beads, ribbon, cotton twine, scissors
Beaded felt heart keepsake
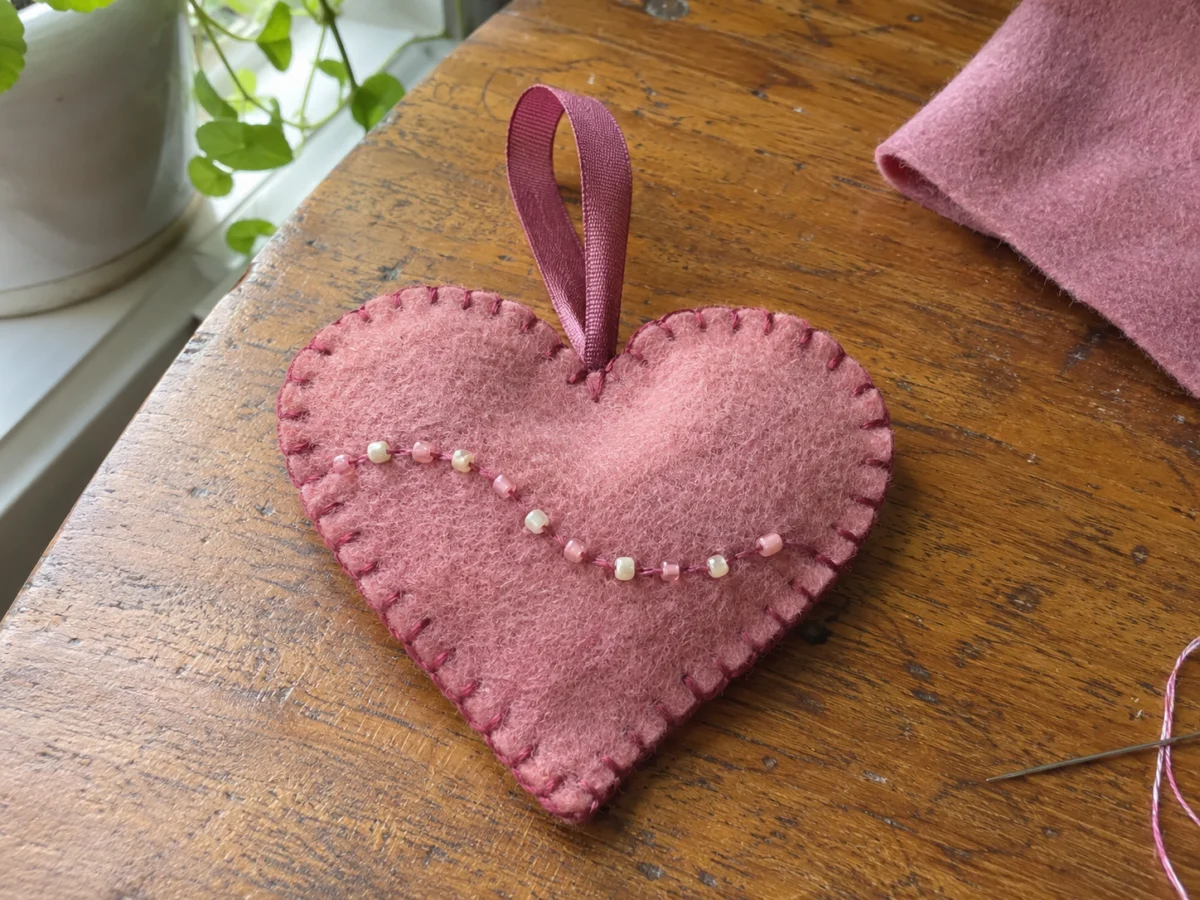
Cut two matching felt hearts and sew a trail of beads onto the front one. Stitch the hearts together around the edge, catching a short ribbon loop between the layers at the top. Use a wider border around the beadwork if the needle keeps snagging as you close the seam.
You need: Two felt hearts, small beads, needle, thread, short ribbon loop, scissors
Pick a bead craft by the supplies you have
| If you have | Try | Time | What to check |
|---|---|---|---|
| A few large-hole beads | Zipper pull | 10 to 15 min | Both cord ends fit |
| Round beads and elastic | Stretch bracelet | 15 to 25 min | One bead can hide the knot |
| Pony beads and a chenille stem | Caterpillar | 10 to 15 min | An adult tucks in the wire ends |
| A bag of wood beads | Tassel garland | 20 to 30 min | Cord fits the smallest holes |
| Seed beads and fine thread | Daisy ring | 30 to 60 min | Thread can pass through twice |
| Beads and felt scraps | Heart keepsake | 30 to 45 min | Ribbon sits between the layers |
Quick answers
What beads are easiest to start with?
Choose large-hole pony beads for stiff stems or thick cord and round wood beads for twine. Check the hole size on the actual beads before cutting anything. Two beads the same width can have very different holes.
What can you make with leftover beads that don’t match?
Pick a bead craft idea that uses small groups, such as a beaded gift tag, mosaic letter or felt brooch. Sort by hole size when you plan to string the beads, or by height if you want them to sit evenly on a glued surface.
How do you stop beads from sliding off as you work?
Clip a bead stopper onto one end of elastic or tape the end of a straight cord to the table. Keep the work flat on a towel while you check the length and get ready to tie it.
Which adhesive works for gluing beads?
Check the label for both surfaces, such as plastic and cardboard or wood and wood. Flat-back beads have a broader contact area than round beads. Set the piece flat and leave it there for the adhesive’s full cure time.
Made it? Tell us how it went