20 Jenga Block Crafts for Kids
Turn one tumbling tower set into 20 colorful wooden block crafts kids can paint, play with, display and give as gifts.
By Mustafa Demir
Updated November 9, 2026
Project at a glance
- Time
- 15 to 60 minutes, plus drying
- Cost
- about $3 to $12 with one block set
- Skill
- beginner, ages 3 to 10 with adult help
- You make
- 20 animals, games, learning crafts and gifts
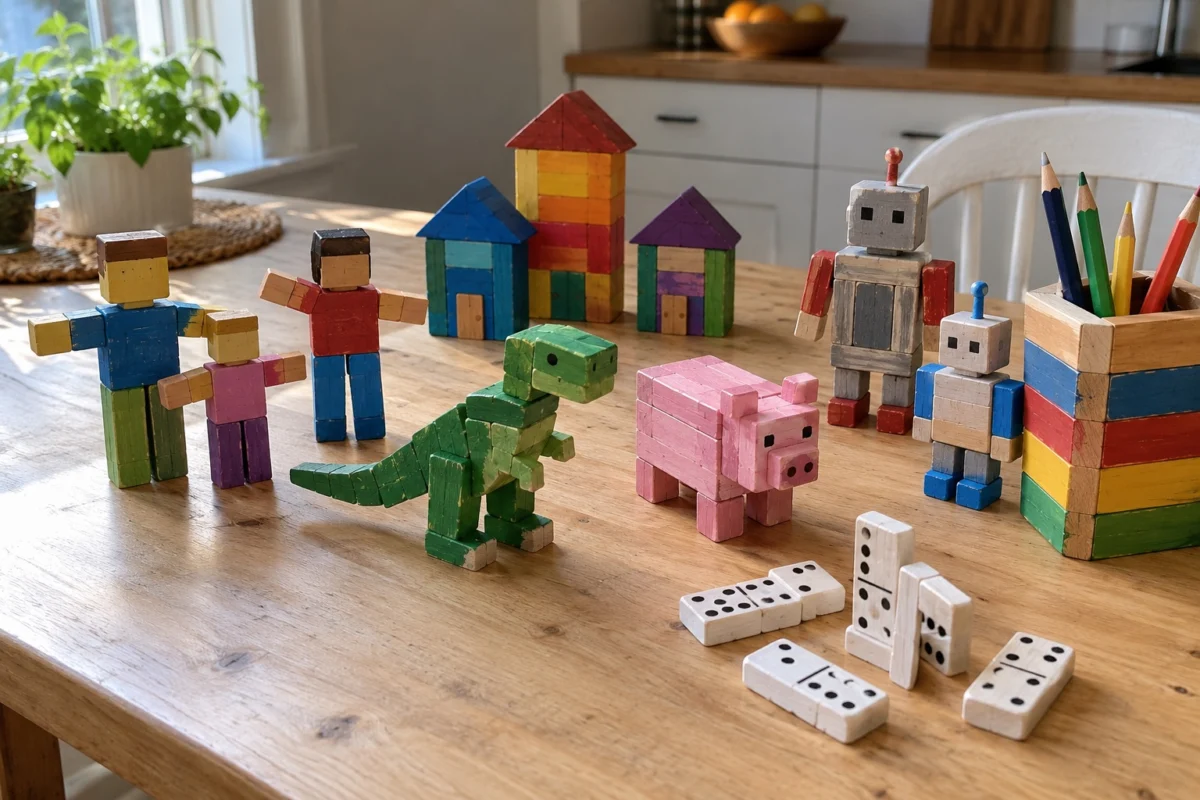
These 20 Jenga block crafts for kids turn a wooden tumbling tower set into painted animals, homemade games, learning toys and handmade gifts. Most take 15 to 60 minutes of crafting time, suit ages 3 to 10 with adult help and use inexpensive supplies you may already own.
Smooth, sometimes waxy blocks need a little preparation. Lightly sand the finish, wipe off the dust and apply thin coats of acrylic paint or use acrylic paint pens. Paint often feels dry in 30 to 60 minutes, but needs longer to cure. For stronger joints, leave contact surfaces bare, apply wood glue and hold pieces with painter’s tape while the glue cures, usually about 24 hours. Hot glue is for adults only and works better for decorations than rough-play toys.
Start with animals for younger children, then try games, number blocks or gifts as their skills grow. Keep small decorations away from children who put objects in their mouths. You can find more kids crafts for rainy afternoons or explore other wood crafts using everyday supplies.
Little Block People and Animals
Painted Wooden Block People
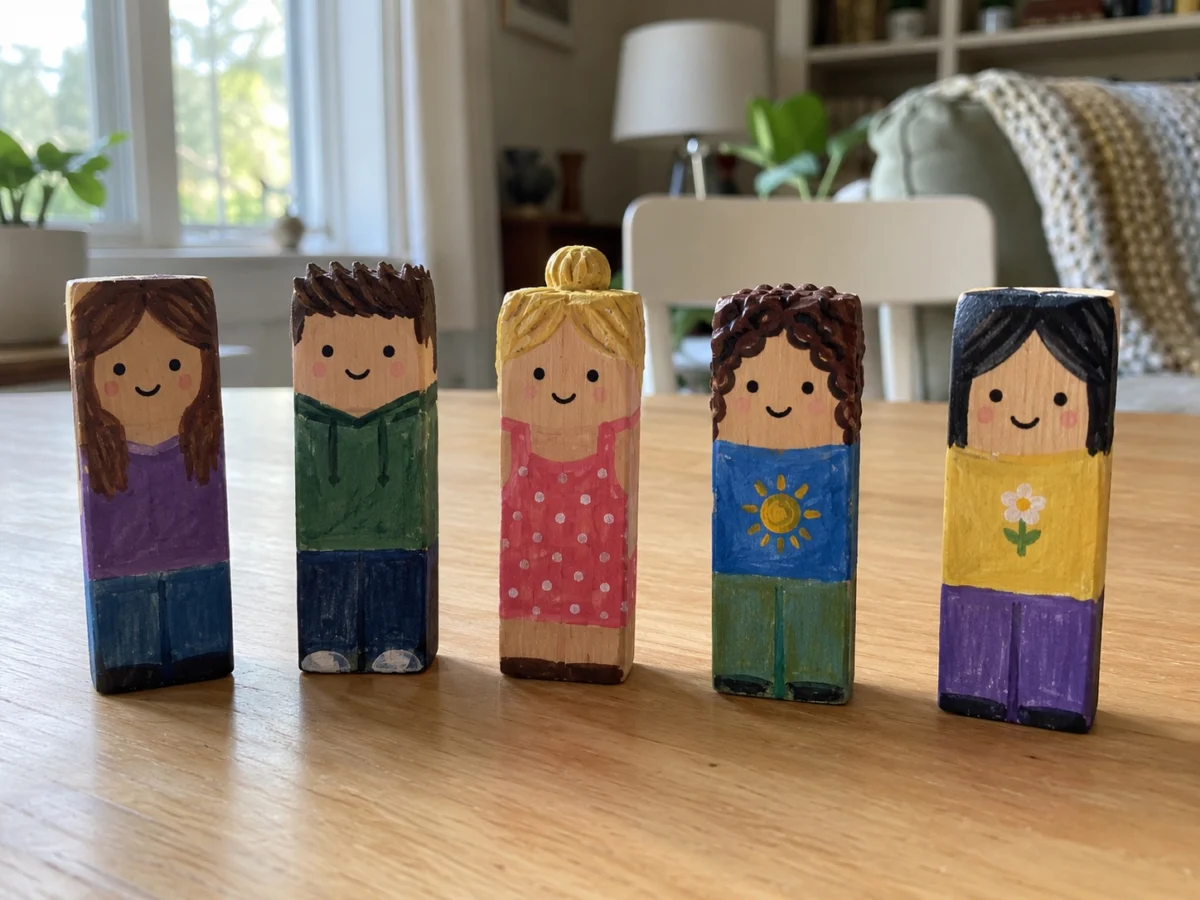
Five wooden blocks become a family of tiny characters with colorful shirts, friendly faces and different hairstyles. Children ages 4 and up can invent names and stories while the flat-bottomed figures stand on a tabletop.
You need: 5 Jenga-style blocks, acrylic paint, fine-tip paint pens, brush, fine-grit sandpaper
- Lightly sand the blocks and paint the lower sections as colorful outfits.
- After 30 to 60 minutes of drying, draw faces and hairstyles with paint pens, then let them cure.
Stackable Wooden Block Robots
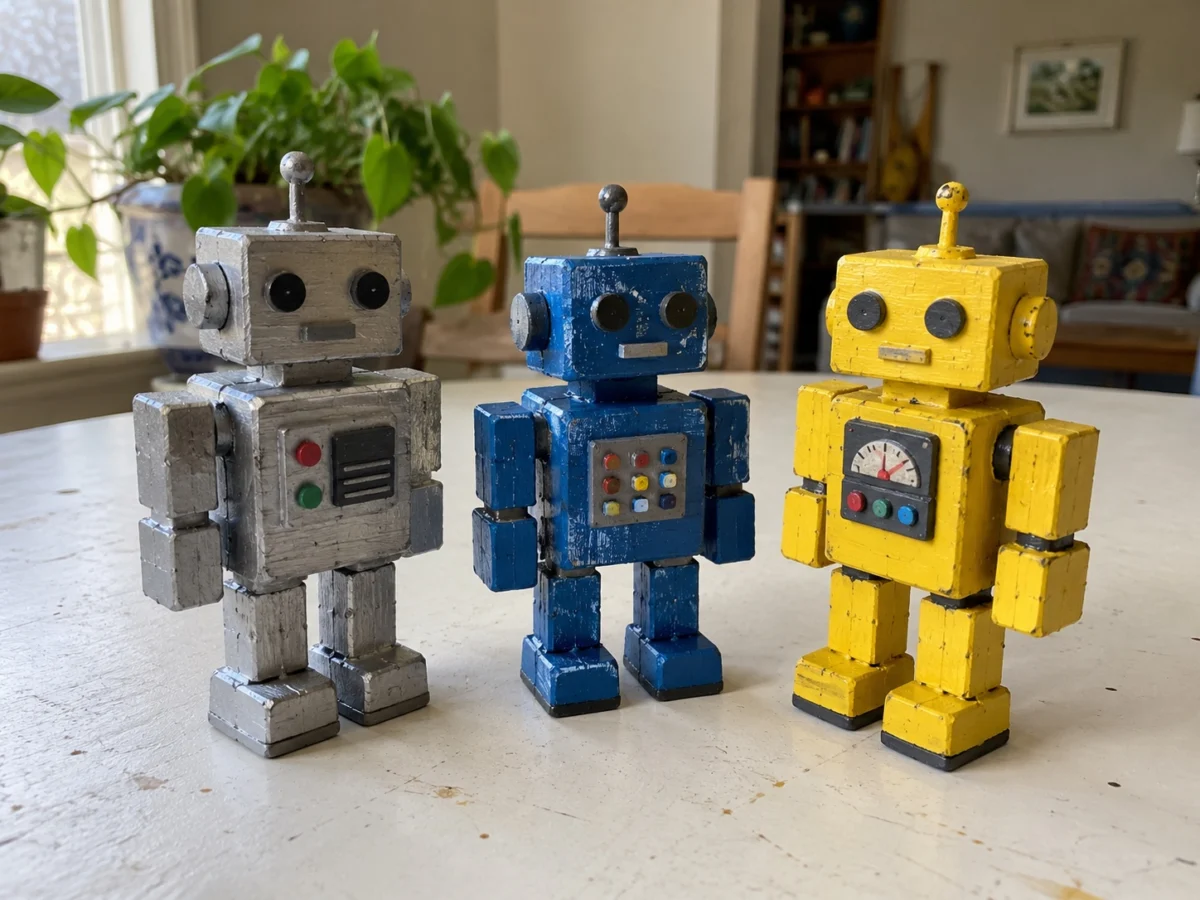
Build three chunky robots with silver bodies, colorful control panels and funny expressions. Kids ages 5 to 10 can plan the shapes before an adult helps secure the wooden joints.
You need: 12 Jenga-style blocks, silver and blue acrylic paint, black paint pen, wood glue, painter’s tape
- Arrange three or four blocks per robot with wide bases, then glue bare wooden contact points and secure with painter’s tape.
- Let the glue cure for about 24 hours, following the label, then paint bodies, buttons and faces.
Tiny Wooden Block Farm Animals
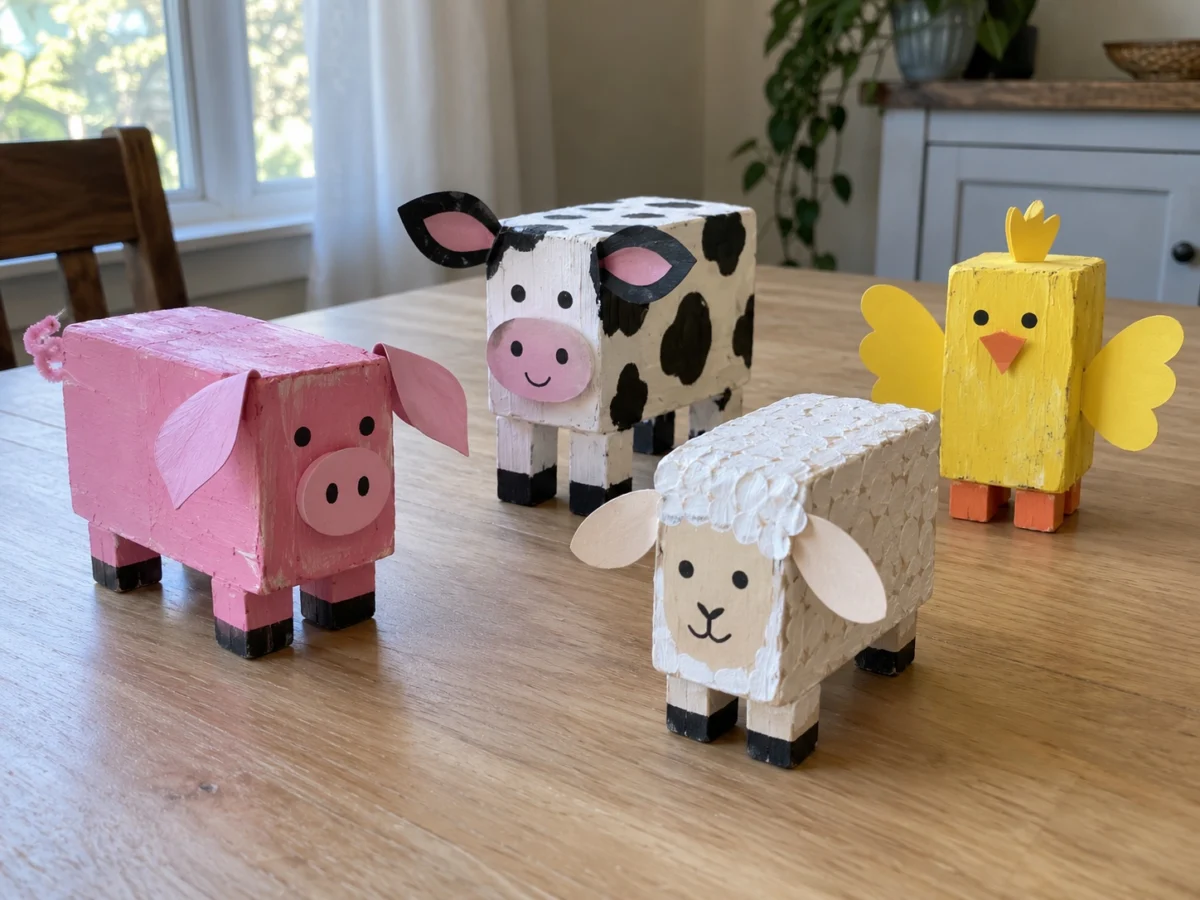
A pink pig, spotted cow, white sheep and yellow chick each start with one wooden block. Younger children can paint the bodies while an adult cuts large paper ears and wings.
You need: 4 Jenga-style blocks, pink white yellow and black acrylic paint, construction paper, markers, craft glue
- Paint four blocks as a pig, cow, sheep and chick, then let the colors dry.
- Draw eyes and noses, then attach large paper ears, wings or wool shapes with craft glue.
Colorful Block Caterpillar
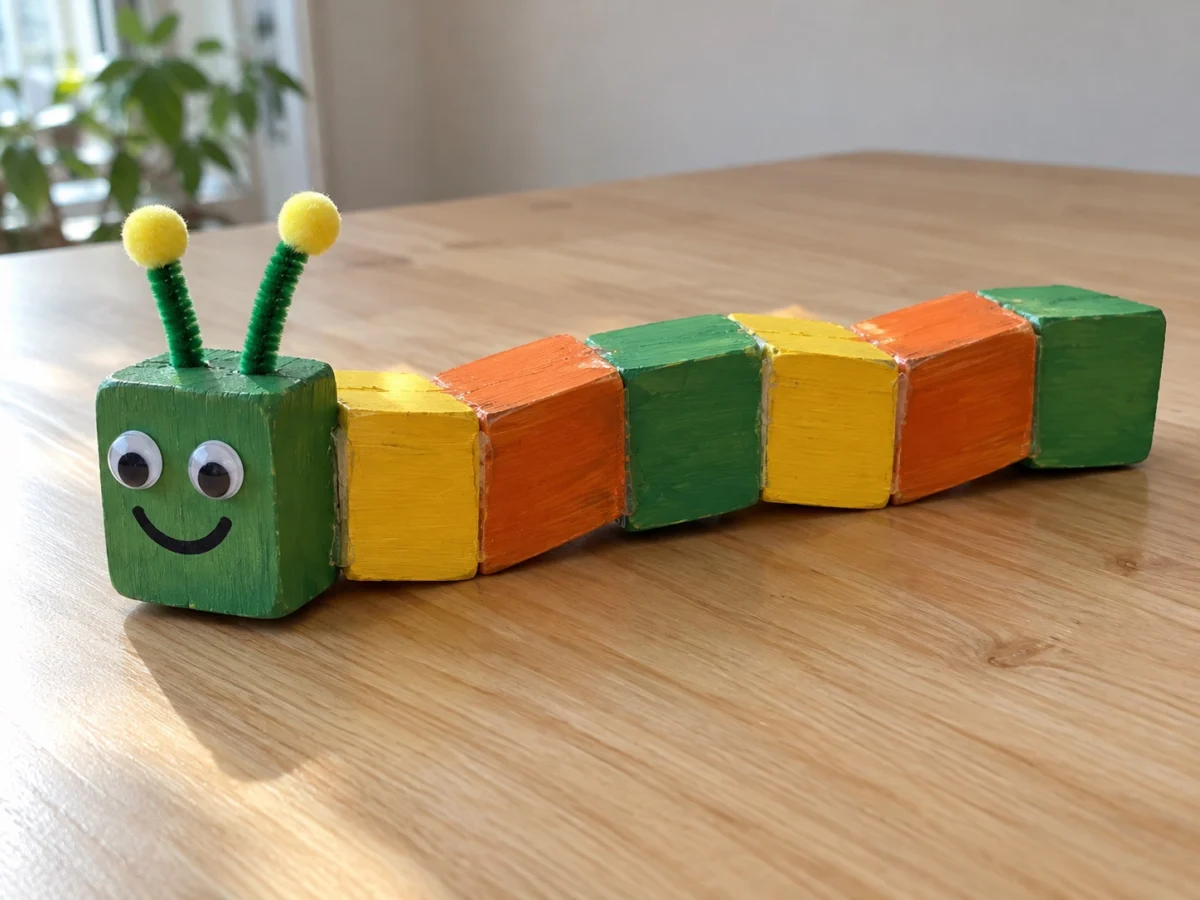
Seven overlapping wooden blocks make a cheerful caterpillar for a bedroom shelf. Alternating green, yellow and orange segments create a striped body with a smiling face.
You need: 7 Jenga-style blocks, green yellow and orange acrylic paint, black paint pen, wood glue, painter’s tape
- Arrange seven blocks in a gentle zigzag and paint the exposed surfaces, leaving joining areas bare.
- Glue the overlaps, secure with tape until cured and draw a smiling face on the front block.
Wooden Block Dinosaur Friends
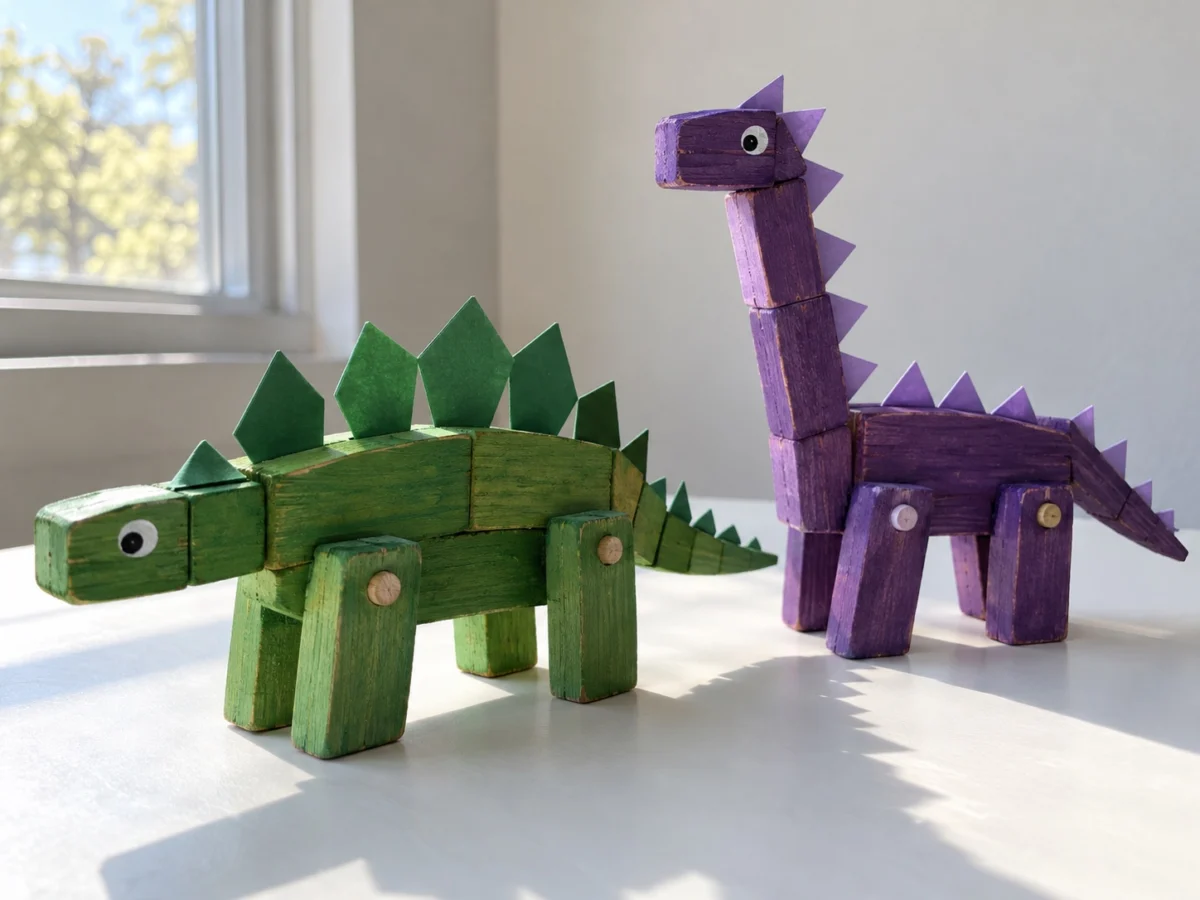
Make two little dinosaurs with painted wooden bodies and cardstock spikes. Kids ages 5 to 9 can experiment with different shapes before gluing the blocks together.
You need: 8 Jenga-style blocks, green and purple acrylic paint, colored cardstock, wood glue, craft glue, black paint pen
- Arrange four blocks per dinosaur into low, balanced shapes, then glue the bare wood joints and let them cure.
- Paint the bodies, attach cardstock spikes and draw eyes, nostrils and toes.
Block Toys and Games
Homemade Wooden Block Dominoes
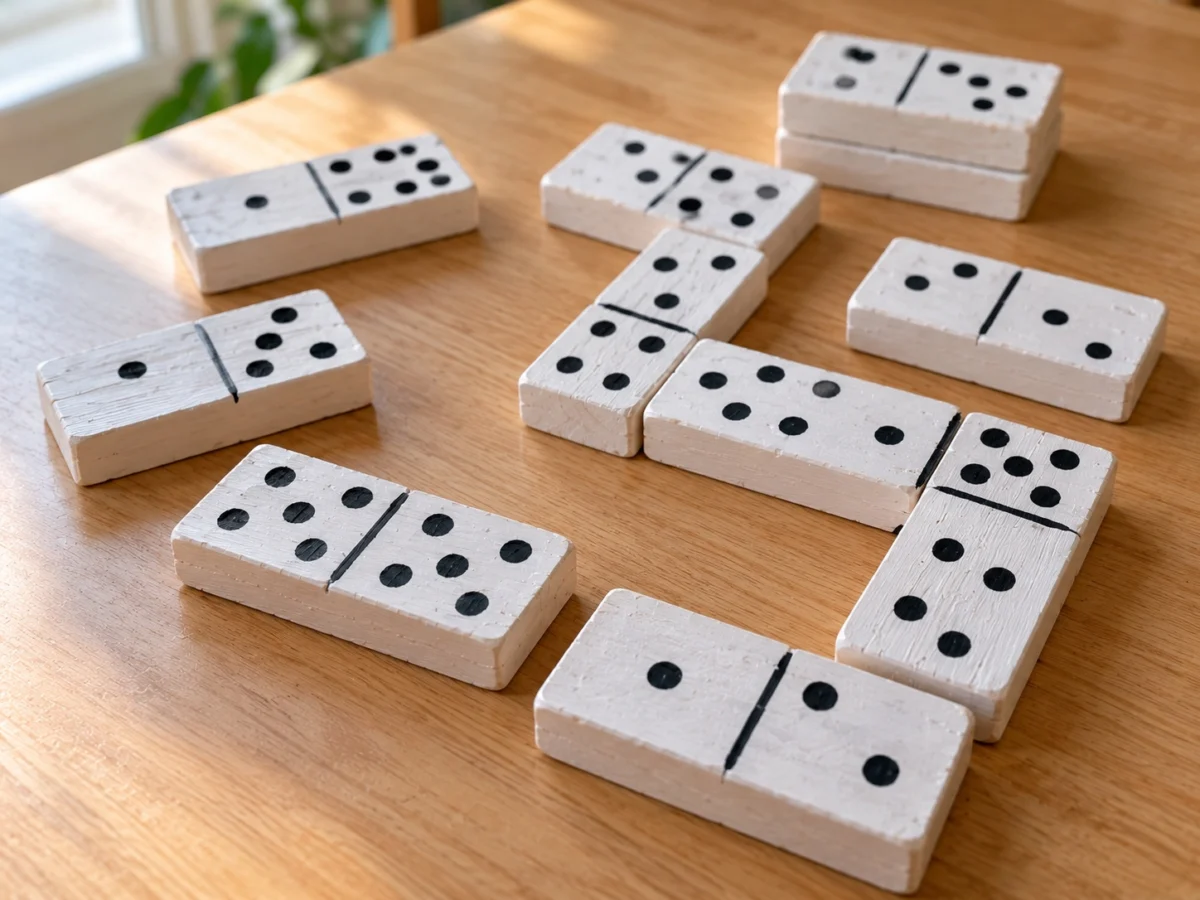
Twelve white-painted blocks become six matching pairs of dominoes. Kids can practice counting dots, matching patterns and taking turns during a reusable memory game.
You need: 12 Jenga-style blocks, white acrylic paint, black paint pen, ruler, optional water-based craft sealer
- Paint the blocks white and draw a center line across each broad face.
- Add black dot patterns from zero to six to make six matching pairs, then dry fully before playing.
Colorful Wooden Balance Game
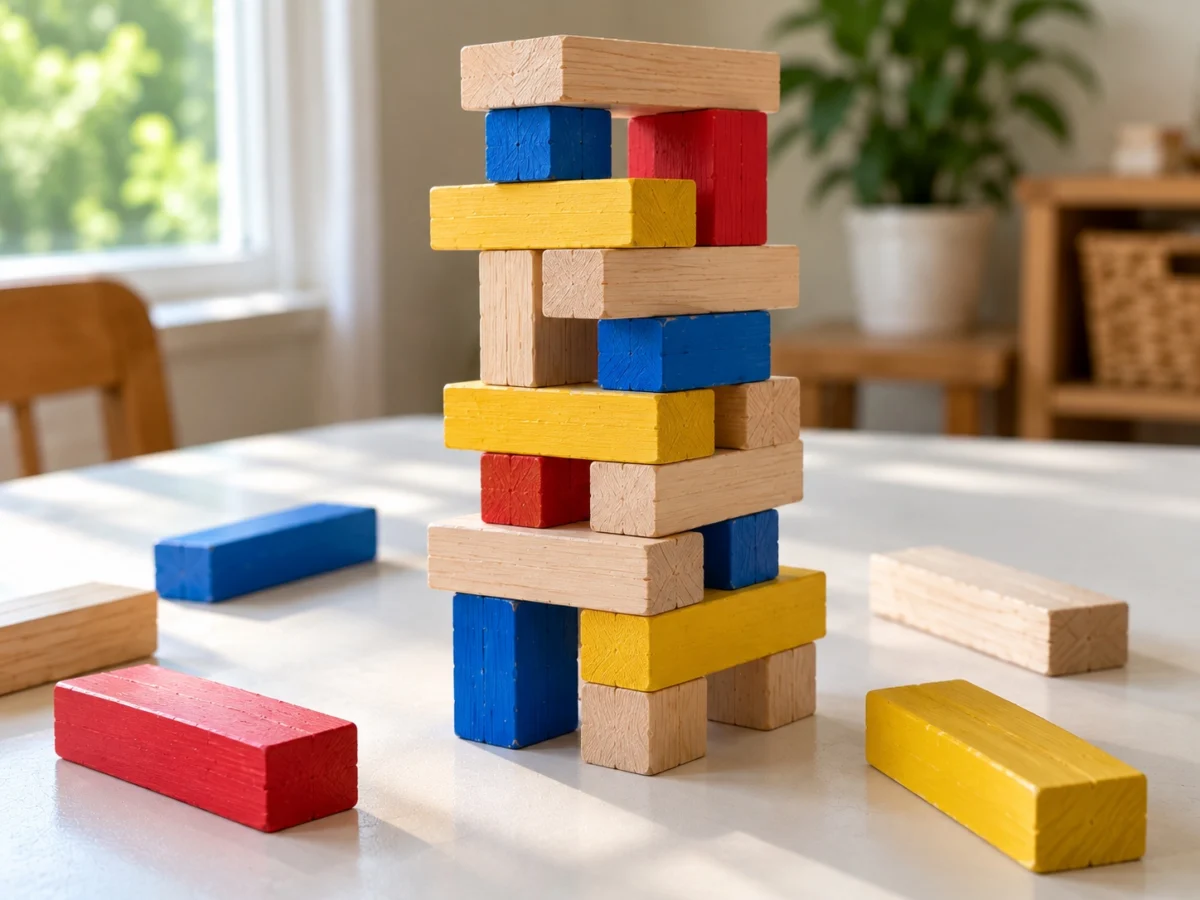
Give the familiar stacking game a colorful twist with six painted blocks among natural ones. Children ages 6 to 10 can compete to build the tallest balanced tower.
You need: 15 Jenga-style blocks, red blue and yellow acrylic paint, brush, fine-grit sandpaper
- Lightly sand and paint six blocks in three colors, leaving nine natural, then let the paint cure.
- Lay one block flat as a starting platform and take turns stacking the remaining pieces without tipping.
Mini Wooden Block Car Racetrack
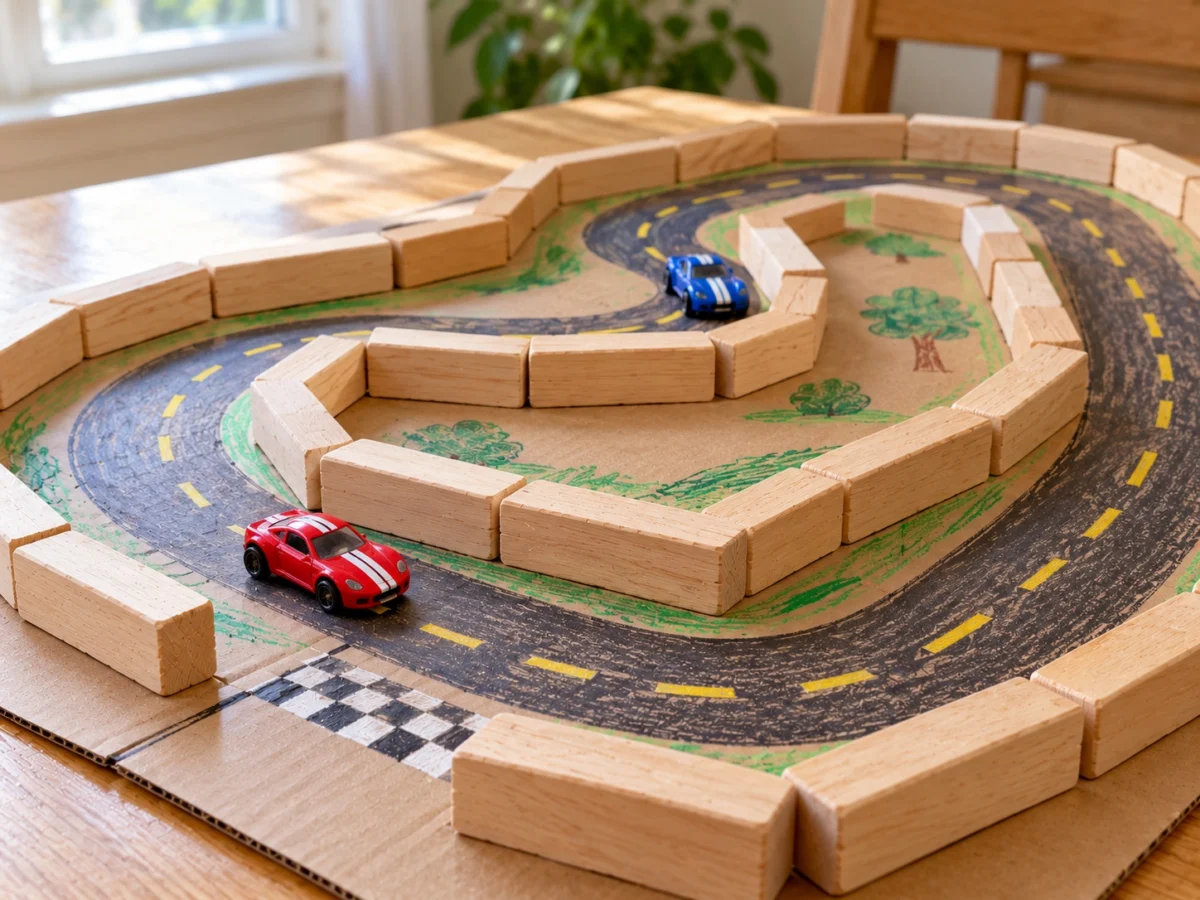
Loose wooden blocks make moveable barriers for a racetrack drawn on cardboard. Kids can race toy cars, rearrange corners and create new courses without permanent glue.
You need: 20 Jenga-style blocks, large cardboard sheet, washable markers, painter’s tape, small toy cars
- Draw a winding road on cardboard and tape the sheet to the table.
- Line both sides with wooden blocks, keeping the road at least 3 inches wide, then race toy cars.
Wooden Block Tic Tac Toe
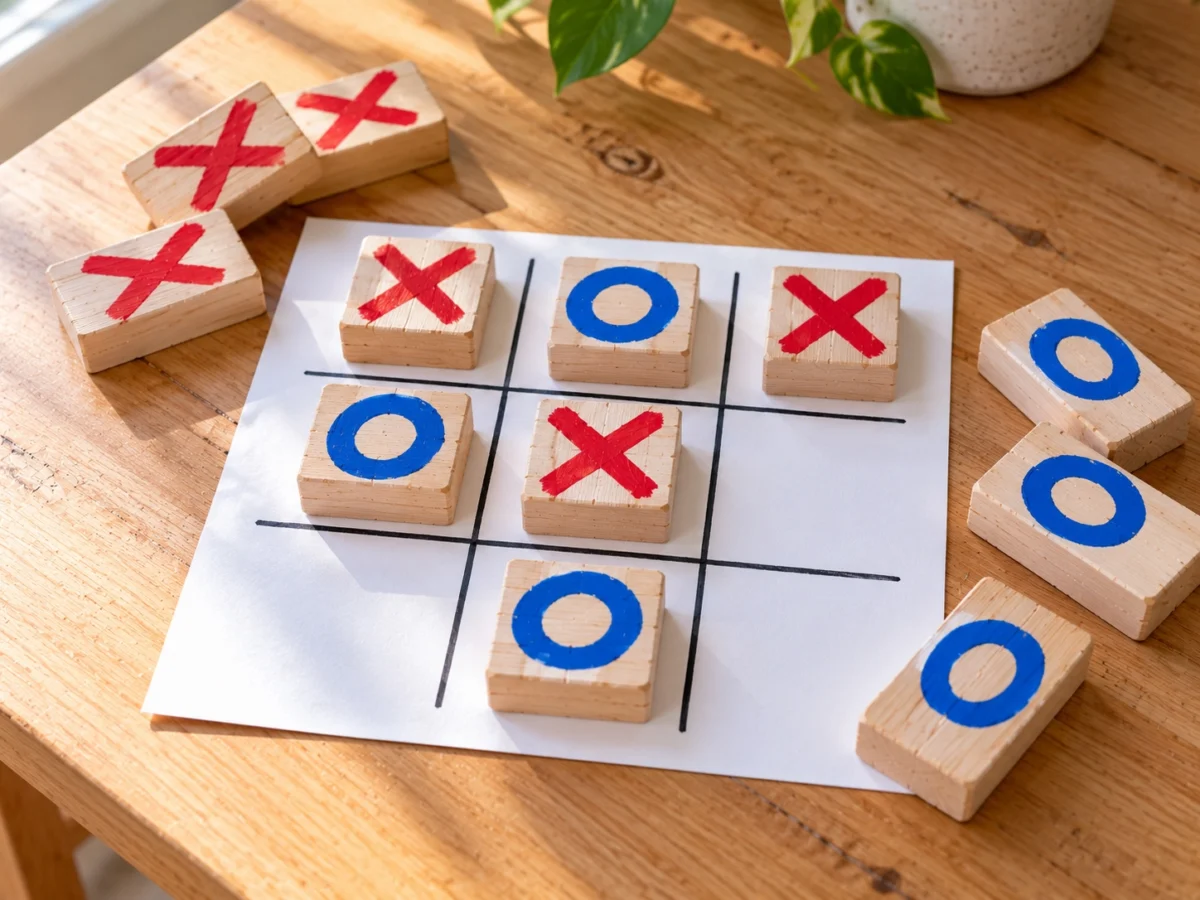
Ten painted blocks and a paper grid make a game children can keep in a small storage bag. The large X and O pieces are straightforward for kids ages 5 and up to move.
You need: 10 Jenga-style blocks, red and blue paint pens, cardstock, black marker, small bag
- Draw a three-by-three grid with squares about 3 inches wide on cardstock.
- Paint red X symbols on five blocks and blue O symbols on five, then let them dry before playing.
Wooden Block Building Challenges
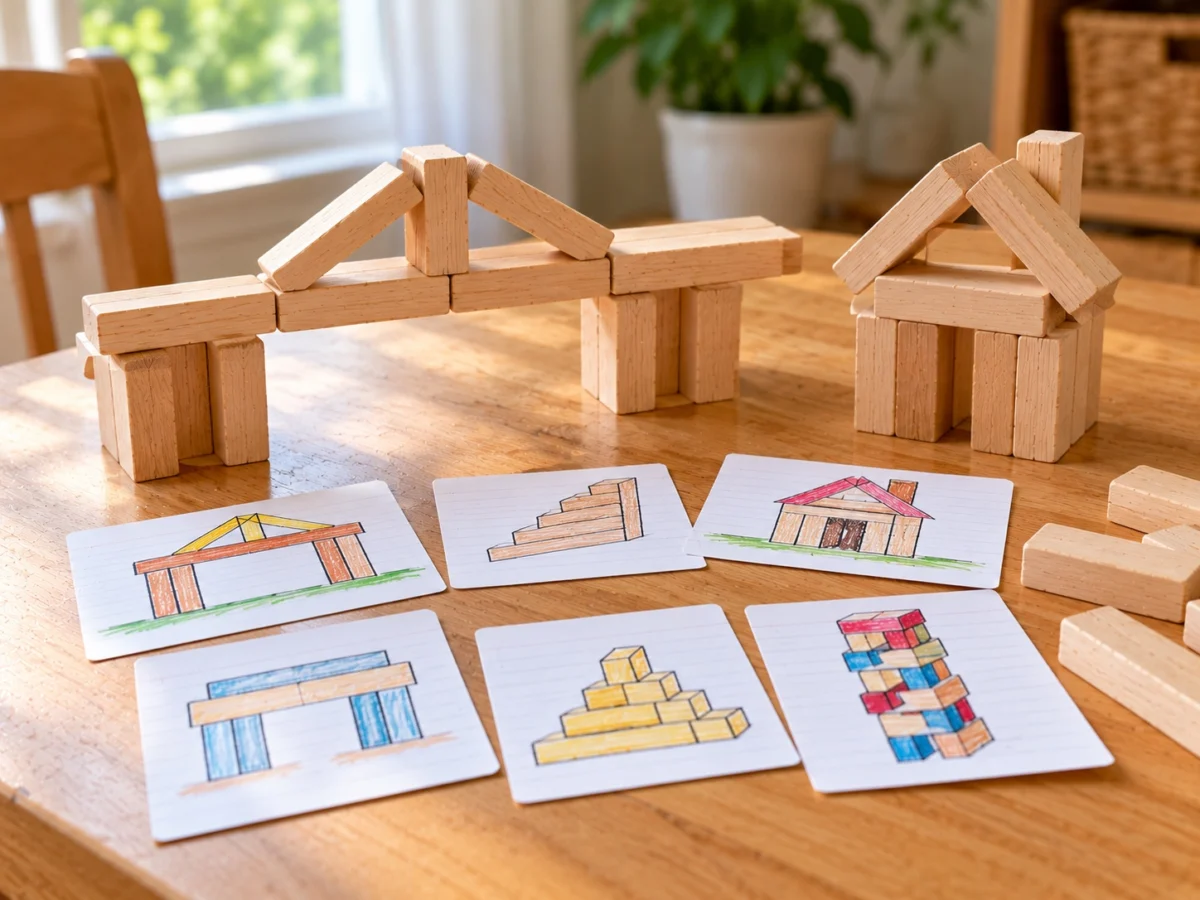
Picture cards turn one block set into repeated building challenges. Draw bridges, staircases and houses for children to copy, adjusting the block limit for different ages.
You need: 20 to 30 Jenga-style blocks, index cards, colored markers, pencil
- Draw six structures on separate index cards, each using five, ten or fifteen blocks.
- Let children choose a card, build the pictured structure and attempt another version with fewer blocks.
Picture a rainy afternoon over Thanksgiving break. I’d put a handful of blocks in the middle of the kitchen table and let the kids start a domino trail while I get the robot pieces ready. If everyone wants a turn painting, I’d give each kid one block to decorate and save the glued build for whoever wants to stick around. That way nobody has to sit and watch glue dry.
How I’d tackle the first build: I’d set the robot’s arms and feet in place while the blocks are still bare, then make a pencil mark where each piece meets the body. It’s tempting to paint everything first, especially when the kids have already picked their colors. I’d let them paint a spare block while I mark the joints. That way the glue has bare wood to grab, and we can paint the robot once it holds together.
If an arm starts to slide after gluing, I’d lay the robot flat and use painter’s tape to hold the arm against the body while the glue cures. For the dominoes and counting games, I’d keep a separate pile of blocks loose. Those are the pieces I’d hand over first if the kids want something to play with while the robot dries.
Learning With Wooden Blocks
Alphabet Letter Matching Blocks
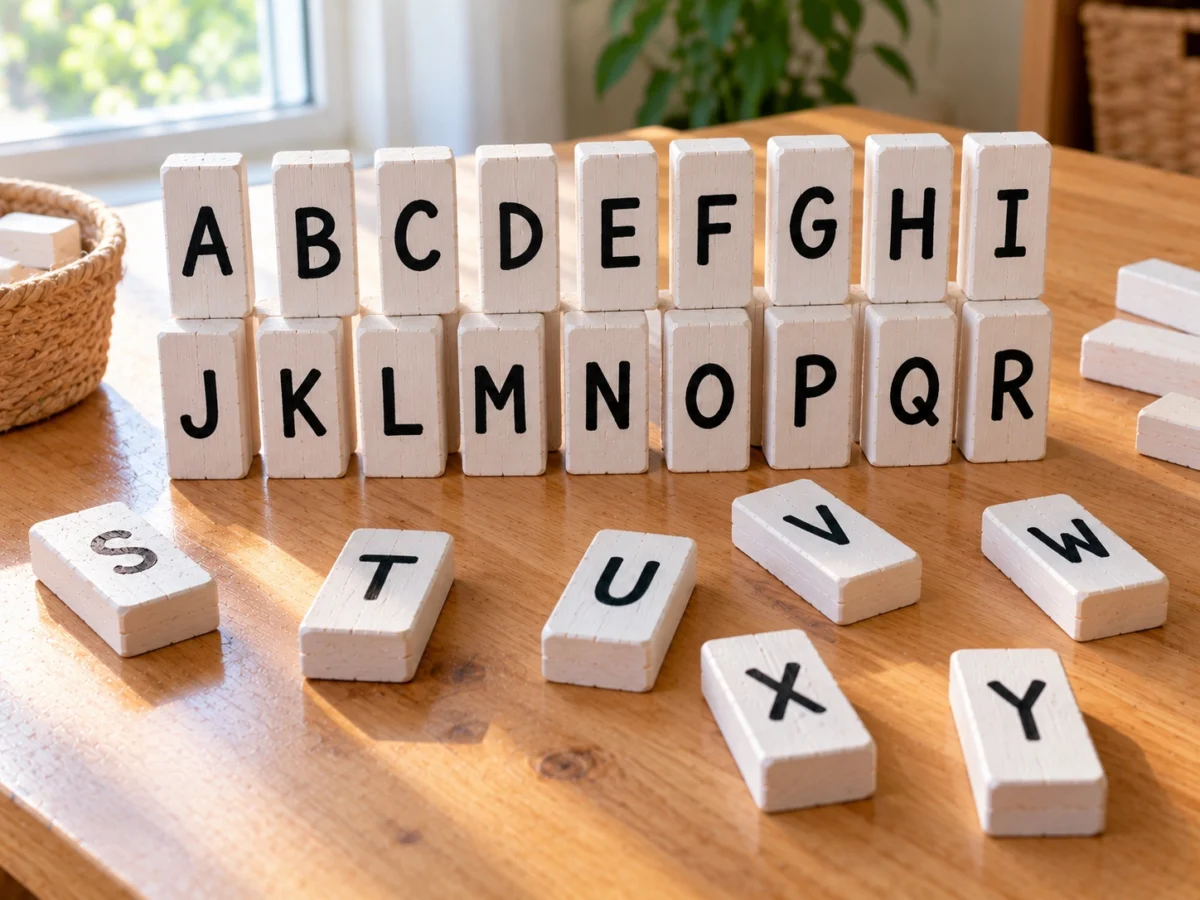
Use 26 blocks to make an alphabet set with uppercase letters on one face and lowercase letters on the reverse. Young readers can match letter forms or arrange the alphabet in order.
You need: 26 Jenga-style blocks, white acrylic paint, black paint pen, colored paint pens, sandpaper
- Lightly sand and paint 26 blocks white, allowing the base coat to dry.
- Write uppercase letters on the fronts and matching lowercase letters on the backs, then let the lettering cure.
Counting Block Number Train
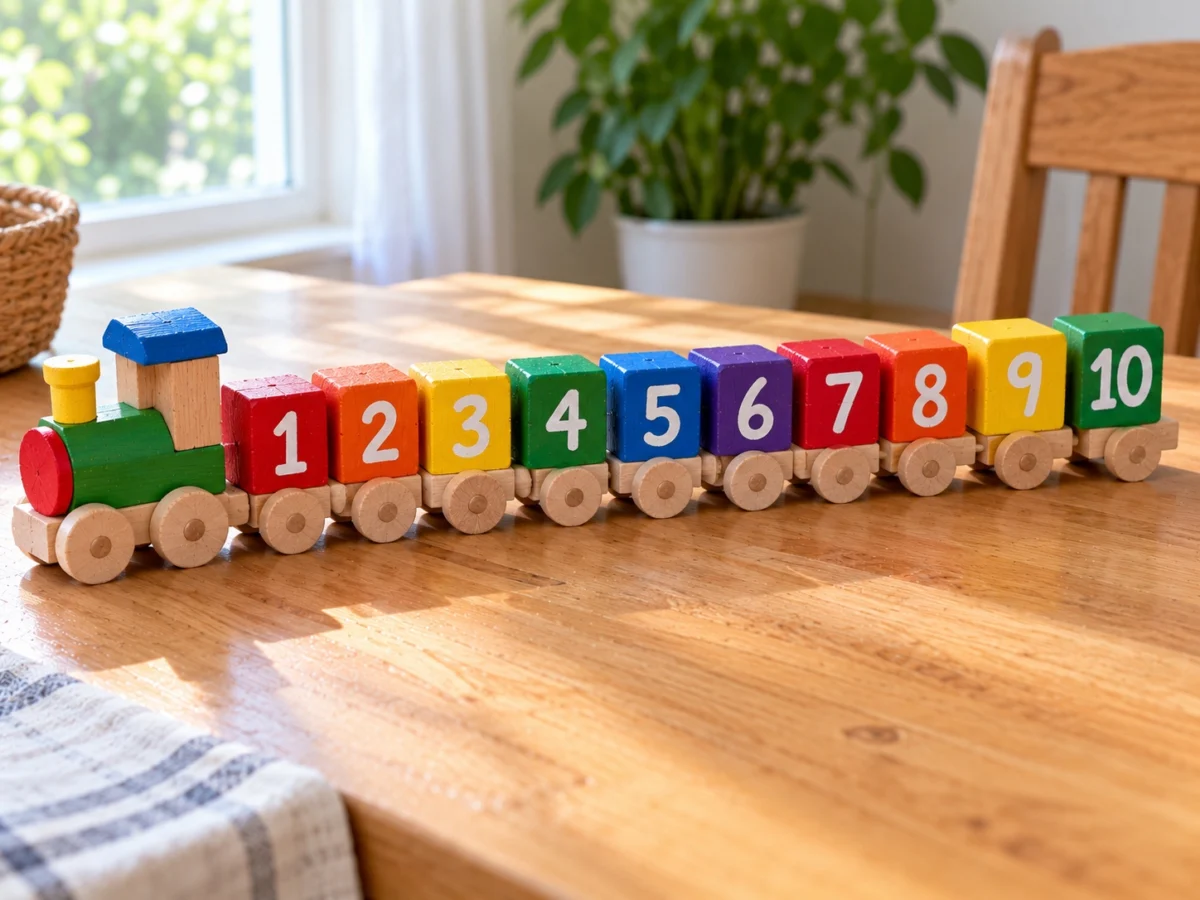
Ten colorful wooden blocks line up like train cars to teach numbers from one to ten. Numerals on one side and matching dots on the other help younger children practice counting.
You need: 10 Jenga-style blocks, colorful acrylic paint, black paint pen, round sponge dauber
- Paint ten blocks in alternating colors and write the numbers 1 through 10 on their fronts.
- Add matching quantities of dots on the backs, then let the paint dry and line the blocks up in order.
Wooden Block Shape Puzzle
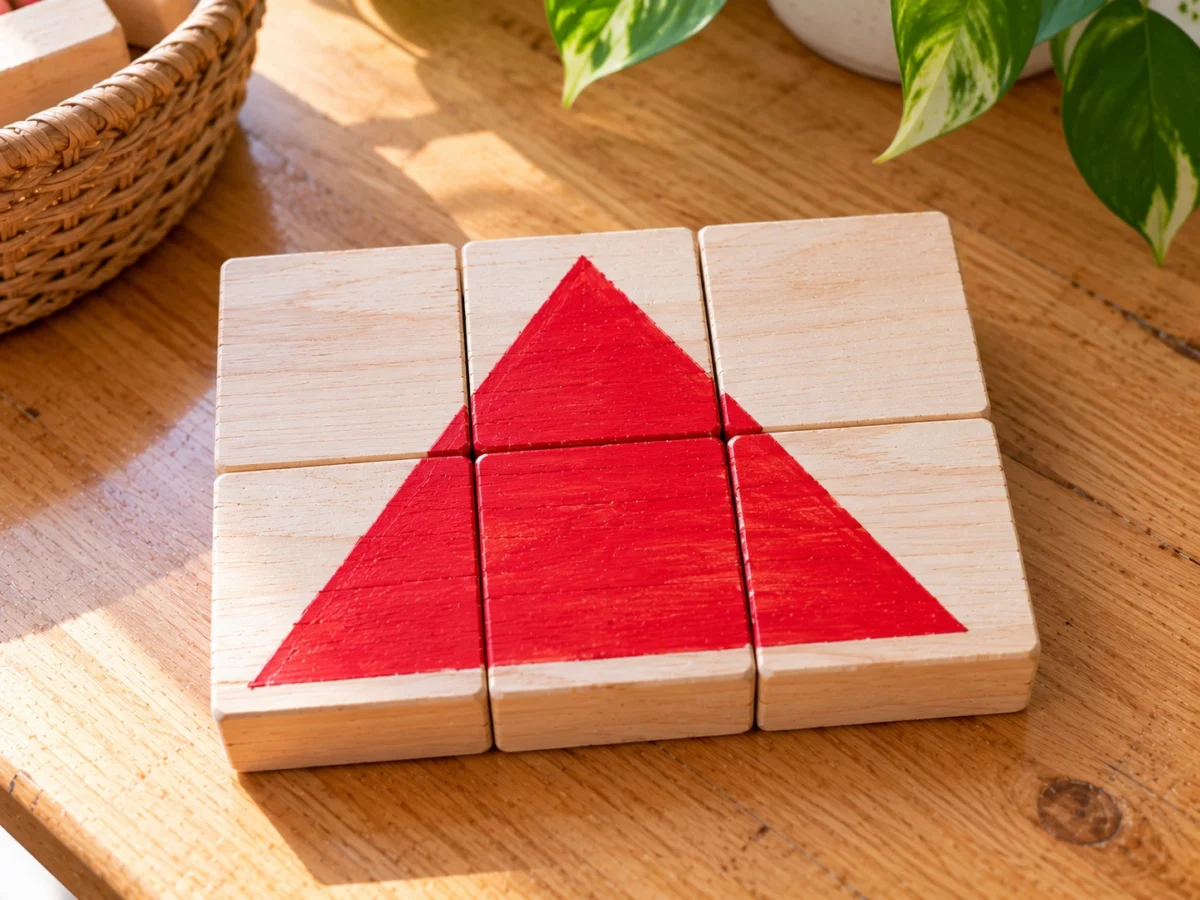
Six blocks become a two-sided puzzle with one large shape spread across their faces. Children ages 4 to 7 can rebuild a triangle on one side or a circle on the other.
You need: 6 Jenga-style blocks, red and blue acrylic paint, pencil, ruler, fine brush
- Align six blocks into a rectangle, draw a large triangle across them and paint it red.
- After drying, turn the blocks over, paint a blue circle across their reverse faces and mix the pieces for matching.
Addition and Subtraction Blocks
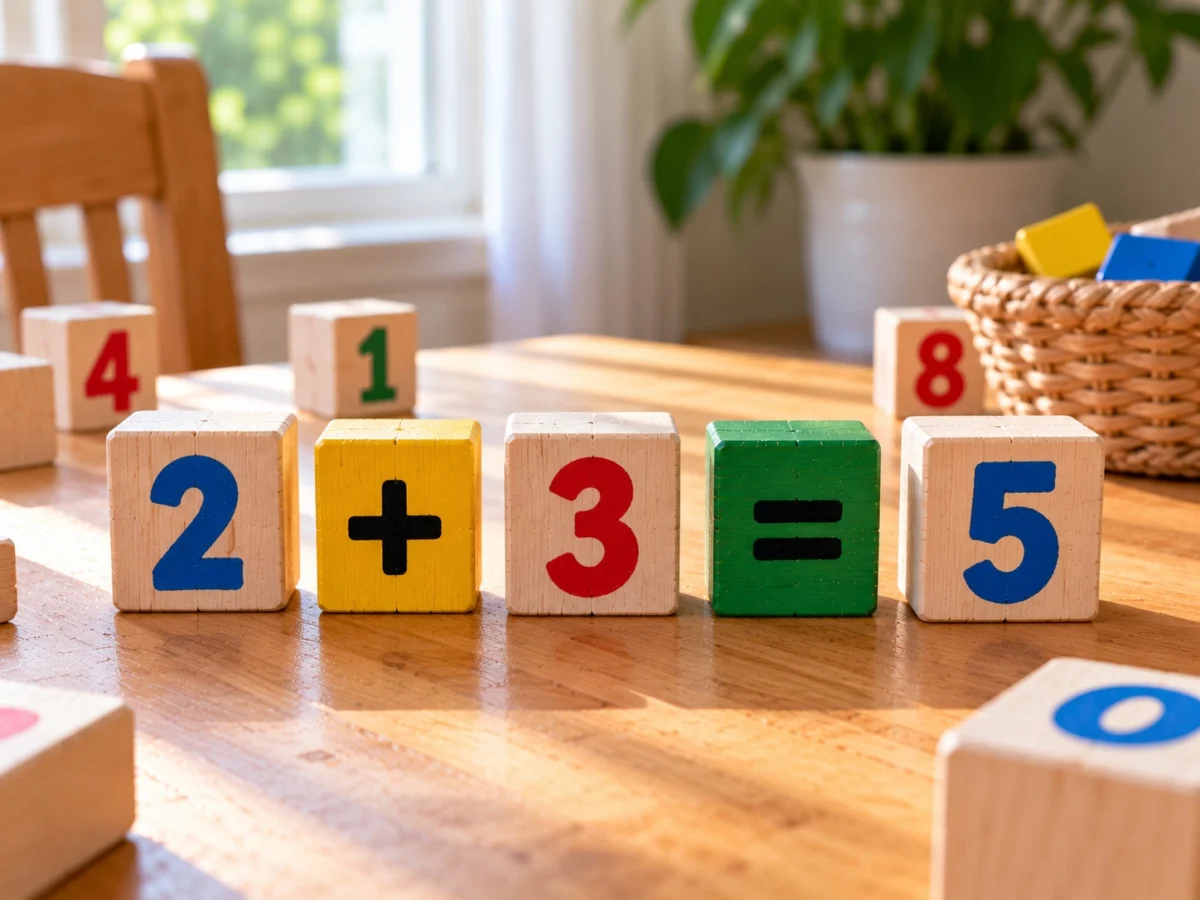
Paint numbers and math symbols onto sixteen wooden blocks for reusable equations. Kids ages 6 to 10 can move the pieces around to practice addition and subtraction.
You need: 16 Jenga-style blocks, white acrylic paint, black paint pen, brush, paper, pencil
- Paint all blocks white, number ten from 0 to 9 and add two plus, two minus and two equals symbols.
- Let the markings dry, then build equations and write answers on paper when extra number pieces are needed.
Rainbow Color Sorting Blocks
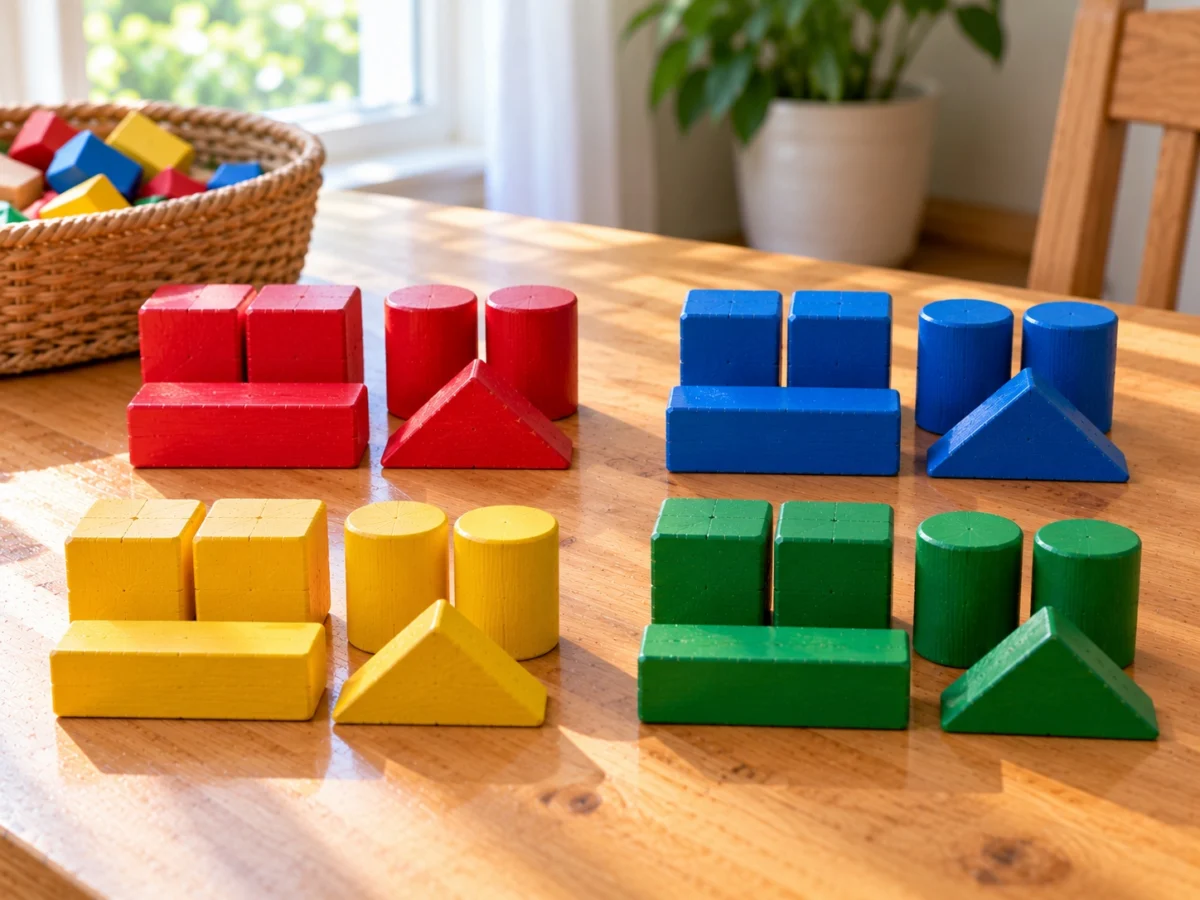
Sixteen painted blocks become a color sorting and pattern activity for preschoolers. Start with matching four colors, then build repeating sequences as children gain confidence.
You need: 16 Jenga-style blocks, red blue green and yellow acrylic paint, brush, four colored paper sheets
- Paint four blocks each in red, blue, green and yellow, then allow the paint to dry.
- Sort blocks onto matching paper sheets and build two-color patterns for children to continue.
Block Gifts and Room Decor
Handpainted Block Photo Holder
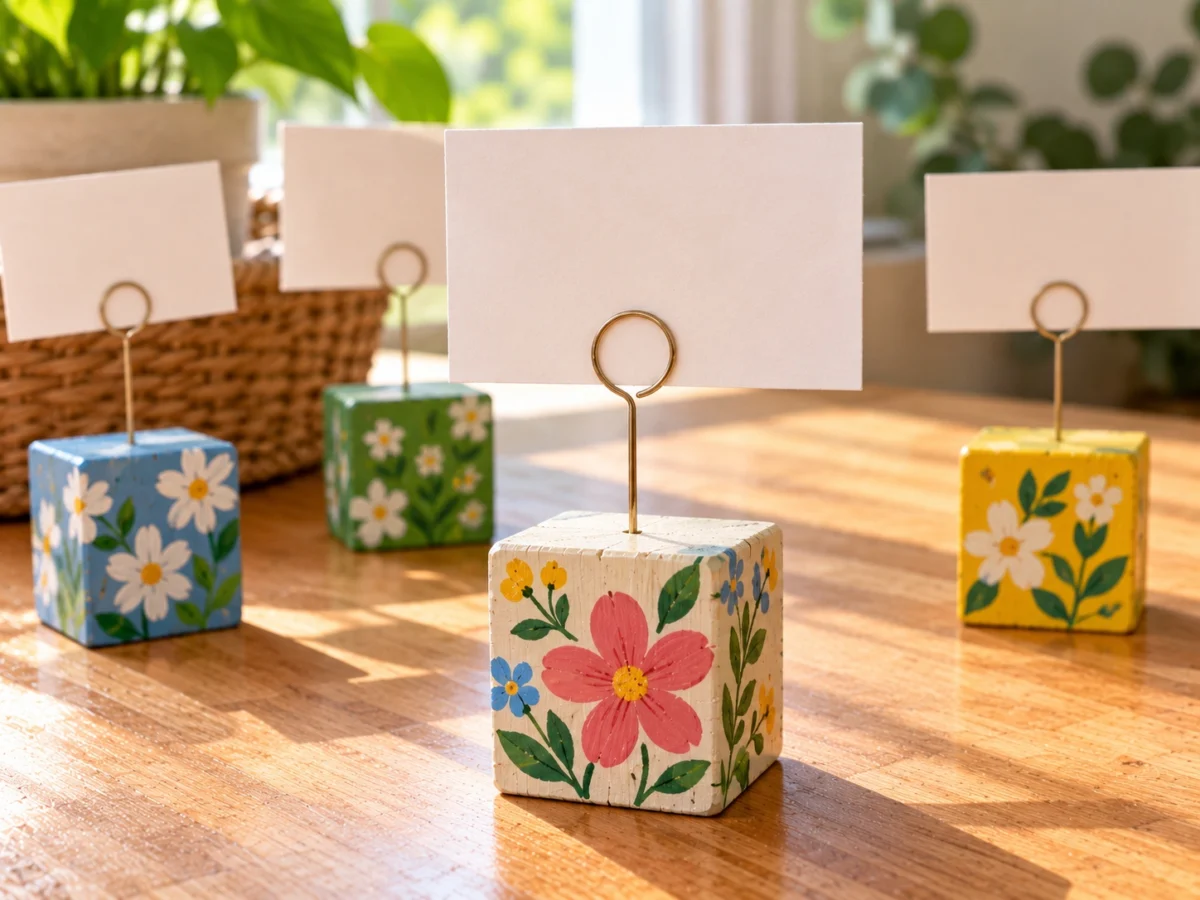
Three decorated blocks form a small photo holder for a parent or grandparent. Kids can paint flowers or stripes while an adult attaches the metal clip.
You need: 3 Jenga-style blocks, acrylic paint, wood glue, painter’s tape, metal photo clip, adhesive for wood and metal, small photo
- Glue three blocks side by side, secure them with painter’s tape and allow the wood glue to cure.
- Paint the base and have an adult attach a photo clip with suitable adhesive, allowing it to cure before use.
Mini Wooden Block Bookshelf
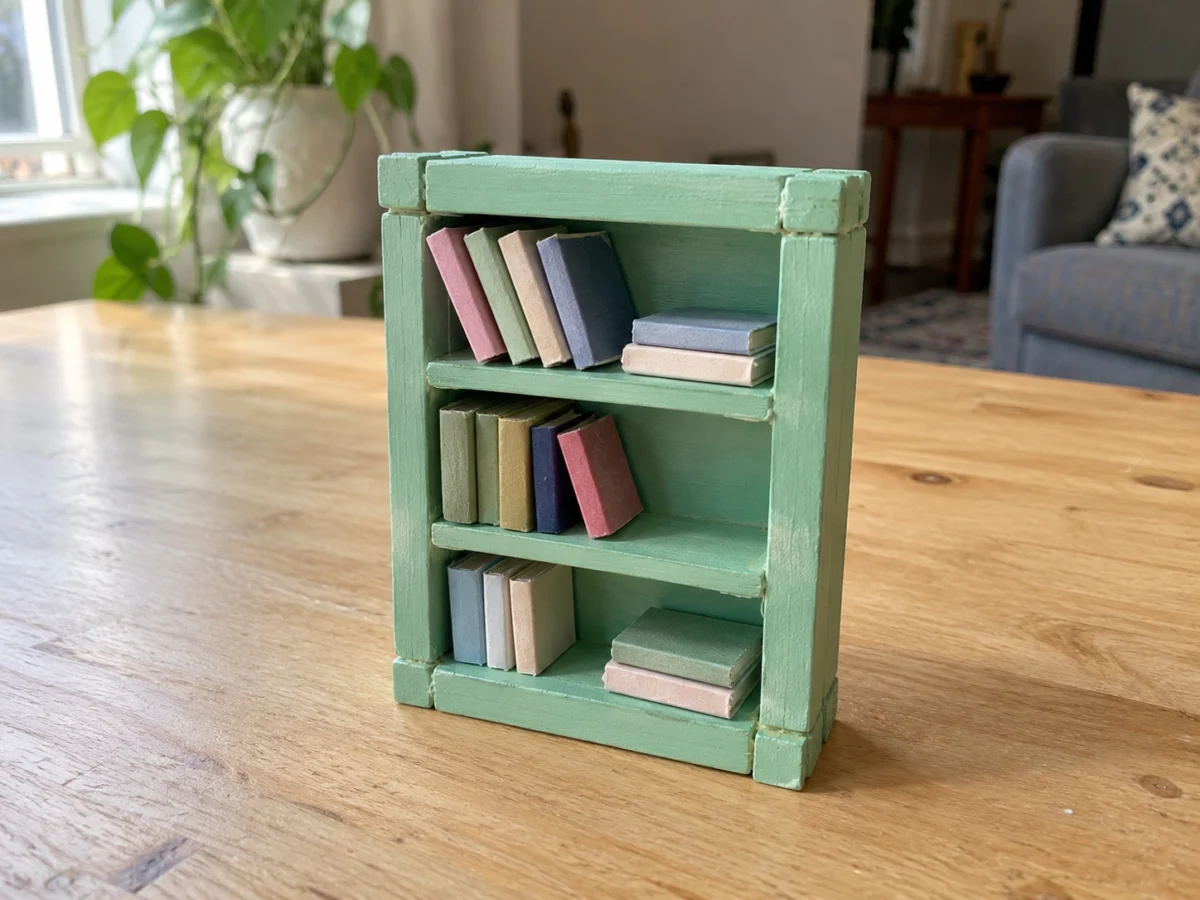
Eight blocks create a tiny bookshelf for dollhouse accessories or handmade paper books. Kids ages 6 to 10 can paint the shelf a favorite color after the structure is assembled.
You need: 8 Jenga-style blocks, wood glue, acrylic paint, painter’s tape, fine-grit sandpaper
- Arrange the blocks into a low bookshelf with side walls, two shelf levels and a supported base.
- Glue bare wood contact points, secure until cured and paint the finished shelf before adding lightweight paper books.
Rainbow Wooden Block Name Sign
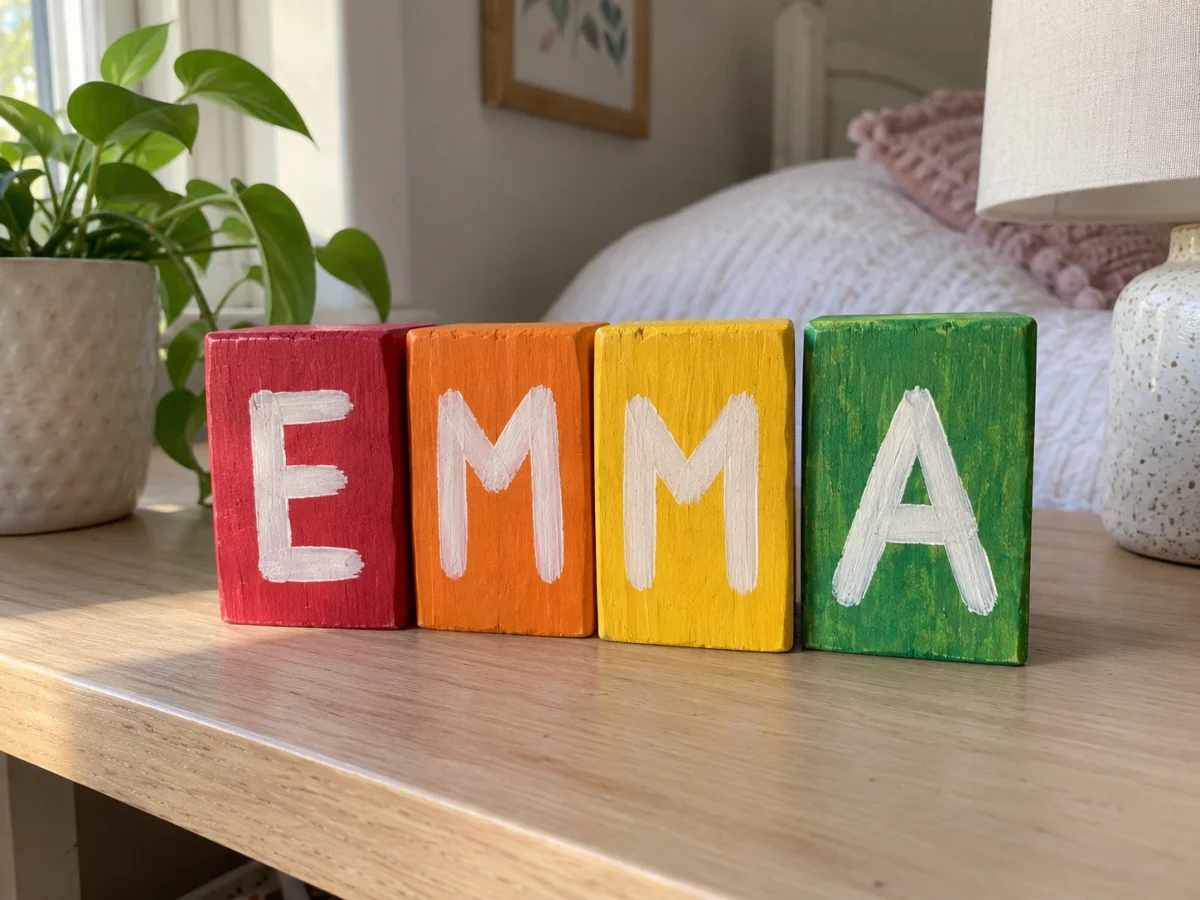
One painted block per letter creates a personalized bedroom shelf sign. Children can choose rainbow colors and rearrange the separate pieces whenever they like.
You need: 4 to 10 Jenga-style blocks, rainbow acrylic paints, white paint pen, brush, sandpaper
- Choose one block per letter, lightly sand and paint each block a different color.
- After drying, write large white letters on the broad faces and stand the blocks together to spell the name.
Wooden Block Pencil Cup
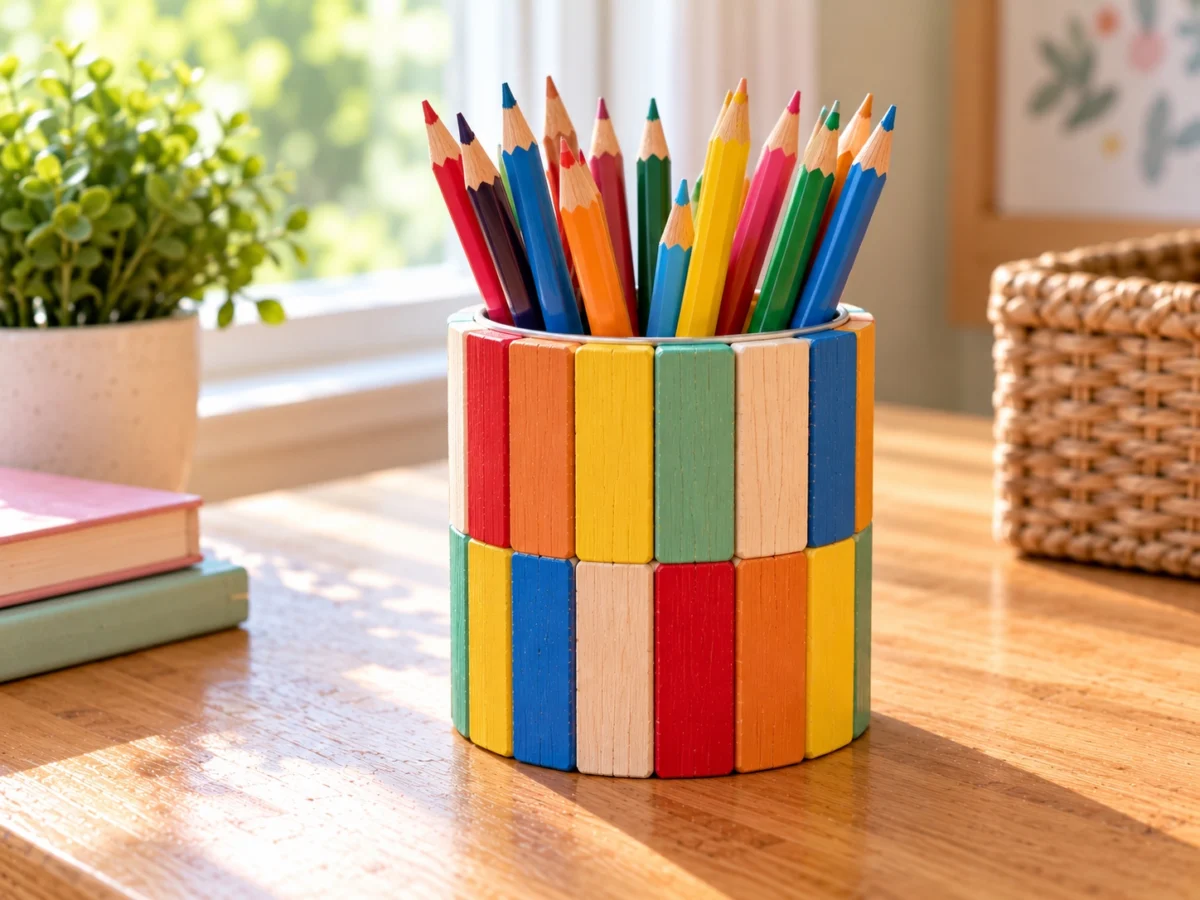
A recycled cardboard tube surrounded by painted wooden blocks becomes a desk pencil holder. Kids can decorate the outside with stripes, dots or tiny flowers.
You need: 12 to 16 Jenga-style blocks, cardboard tube, thick cardboard base, wood glue, cardboard craft glue, acrylic paint
- Have an adult cut a cardboard tube to about 3 inches tall, attach a base and arrange upright blocks around it.
- Glue neighboring wooden blocks together and secure the surround to the cardboard base, then let the adhesives cure before painting.
Painted Block Mini House Village
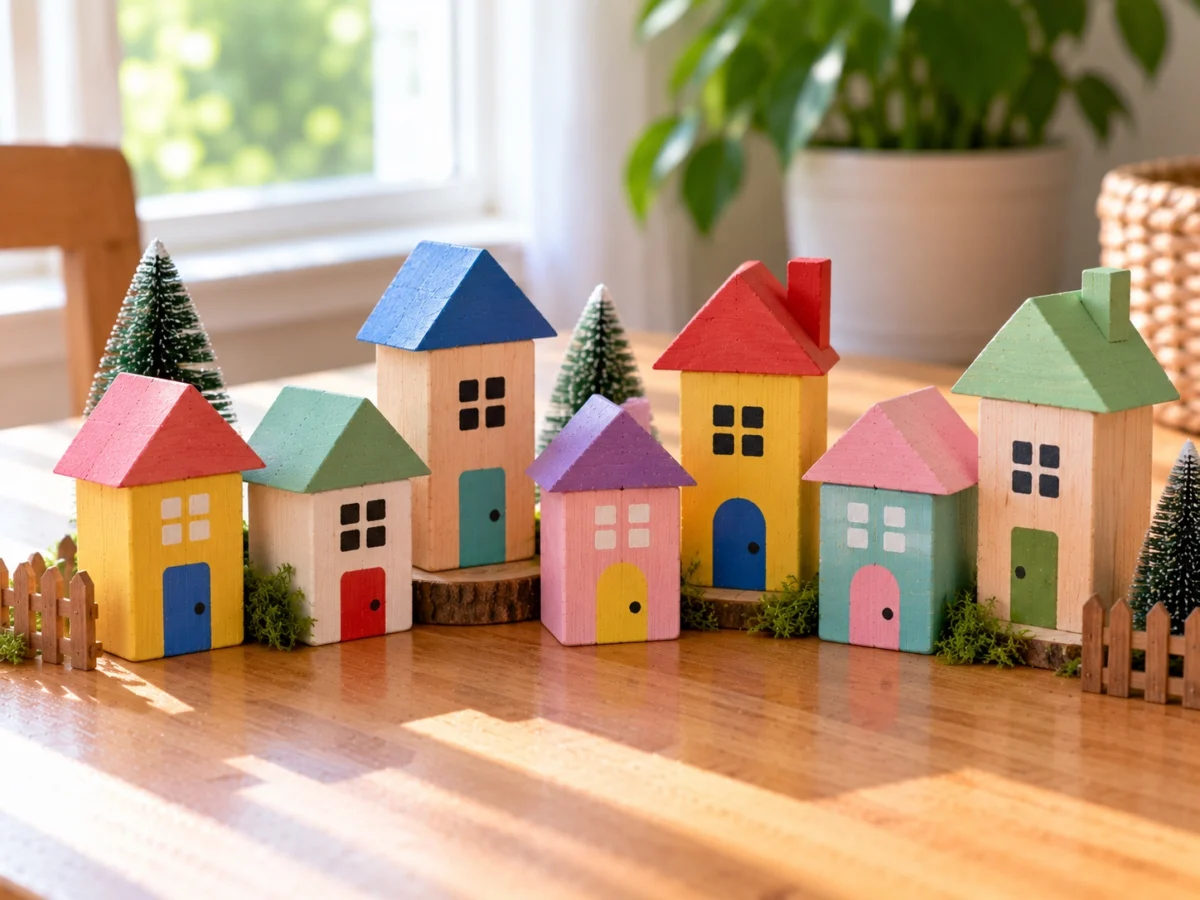
Ten painted blocks make a charming row of miniature houses with paper roofs. Children ages 5 to 10 can create colorful cottages or an entire tiny neighborhood for display.
You need: 10 Jenga-style blocks, acrylic paint, black and white paint pens, colored cardstock, craft glue
- Stand ten blocks upright, paint them different house colors and add windows and doors after drying.
- Fold cardstock into small roof shapes, glue them onto the blocks and arrange the finished houses into a village.
Which Wooden Block Crafts Fit Your Child’s Age?
| Age group | Ideas that fit | What kids can do | What an adult should do |
|---|---|---|---|
| Ages 3 to 4 | Farm animals, number train, color sorting | Paint broad areas, count and sort | Supervise closely, cut paper and keep blocks away from children who mouth objects |
| Ages 5 to 6 | Block people, caterpillar, alphabet blocks, tic tac toe | Paint details, match letters and arrange pieces | Help with sanding, glue and drying |
| Ages 7 to 8 | Dinosaurs, robots, dominoes, shape puzzle, name sign | Design shapes, paint patterns and assemble | Check joints and handle hot glue |
| Ages 9 to 10 | Math blocks, building challenges, photo holder, bookshelf, pencil cup | Measure, design, assemble and decorate | Cut sturdy materials, attach hardware and supervise adhesives |
Age ranges are approximate. Keep loose blocks and small decorations away from children who mouth objects. Acrylic paint may feel dry in 30 to 60 minutes but needs longer to cure. Wood glue commonly requires about 24 hours. Follow product labels.
Questions people ask
What paint works best on Jenga blocks?
Acrylic craft paint and acrylic paint pens work well on wooden tumbling blocks. Lightly sand the smooth finish, remove dust and apply thin coats. Allow about 30 to 60 minutes between coats, following the paint label, and let the finish cure before stacking heavily.
What glue should you use for Jenga block crafts?
Wood glue works well on bare wooden joints. Hold pieces with painter’s tape and allow about 24 hours to cure, following the label. Only adults should use hot glue, which is better for decorations than rough-play toys.
Are Jenga block crafts safe for preschoolers?
Preschoolers who no longer mouth objects can try painting, counting and sorting blocks with close adult supervision. Avoid small detachable decorations, beads and metal clips. Adults should handle hot glue guns, sharp tools and cutting.
How many crafts can you make from one tumbling tower set?
A common 54-block set can supply several projects. Twenty-six alphabet blocks, ten counting blocks, ten tic tac toe blocks and an eight-block bookshelf use exactly 54 pieces. Reusable building games stretch the same set further.
Made it? Tell us how it went