Decoupage for Beginners: How to Get a Smooth Finish
Learn how decoupage works on thrift store finds, from choosing napkins or paper to applying Mod Podge without wrinkles, bubbles or peeling edges.
By Mustafa Demir
Updated October 30, 2026
Project at a glance
- Time
- 30 to 60 minutes hands-on, plus drying
- Cost
- about $5 to $12
- Skill
- beginner
- You make
- Decorating surfaces with glued paper
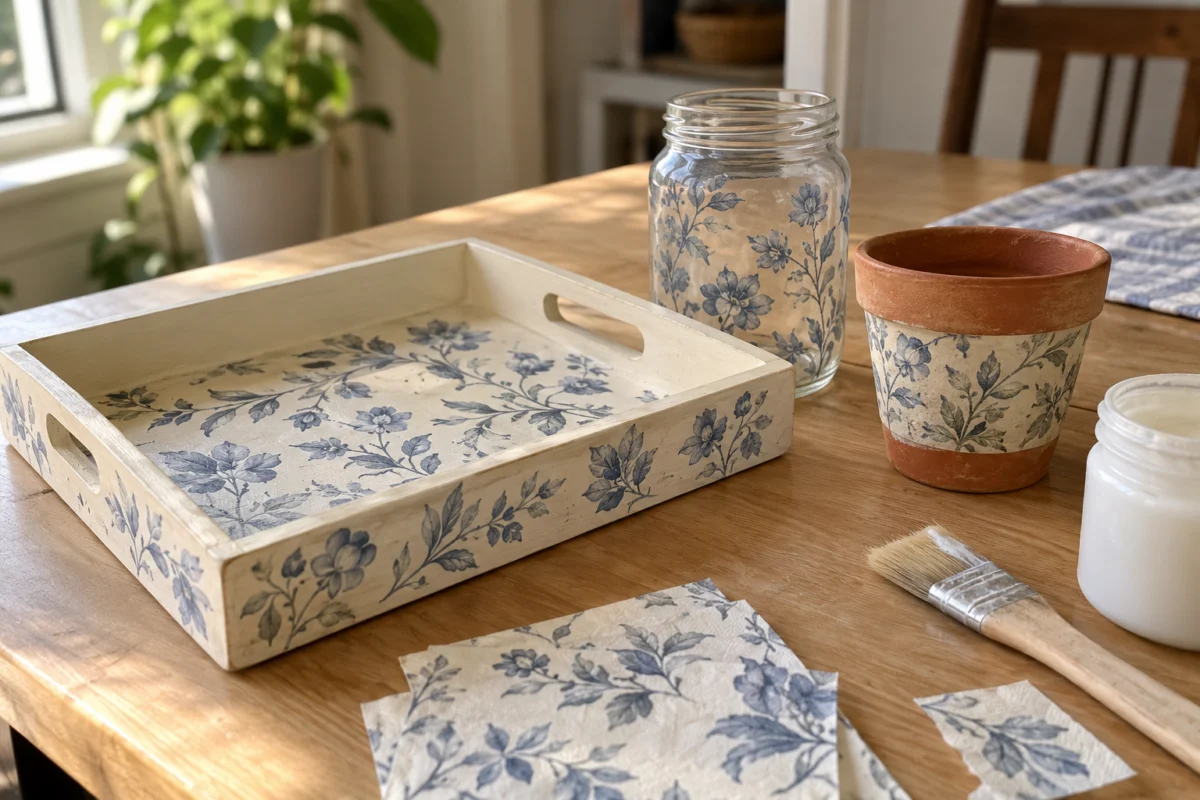
Decoupage is a craft technique that uses adhesive to attach decorative paper to an object, creating a smooth, finished surface. With Mod Podge, a thrift store tray, glass jar or flowerpot can become a personalized decoration in about 30 to 60 minutes of hands-on work, plus drying time.
The challenge is keeping thin paper flat. Napkins tear, tissue wrinkles, and thick paper traps air. This guide explains which paper to choose, how to prepare wood, glass and terracotta, and how to prevent bubbles and peeling edges. You can use the same technique on many small pieces of DIY home decor.
Supplies and cost
- Mod Podge Matte or Satin 1 small jar craft store
- Decorative paper napkins 2 to 4 dollar store
- Tissue paper or scrapbook paper 1 to 2 sheets craft store
- Wooden tray, glass jar or terracotta pot 1 piece thrift store
- White acrylic craft paint 1 small bottle craft store
- Fine-grit sandpaper 1 sheet, 220 grit hardware store
- Rubbing alcohol small amount pharmacy
- Soft flat paintbrush
- Foam brush
- Small scissors
- Clean lint-free cloth
- Plastic wrap
- Soft foam sponge
- Wax paper
Step by step
Choose the Right Paper
Paper napkins blend into painted surfaces because their printed layer is extremely thin. Tissue paper bends around curved jars but wrinkles easily. Scrapbook paper is sturdier and works best on flat wood. For your first decoupage project, choose one small napkin design and a wooden tray.
| Paper | Best for | Watch out for |
|---|---|---|
| Napkins | Painted wood, soft painted look | Tears when wet, peel every backing layer |
| Tissue paper | Curved jars and pots | Wrinkles fast, use small pieces |
| Scrapbook paper | Flat trays and boxes | Too stiff for tight curves |
Prepare Your Craft Surface
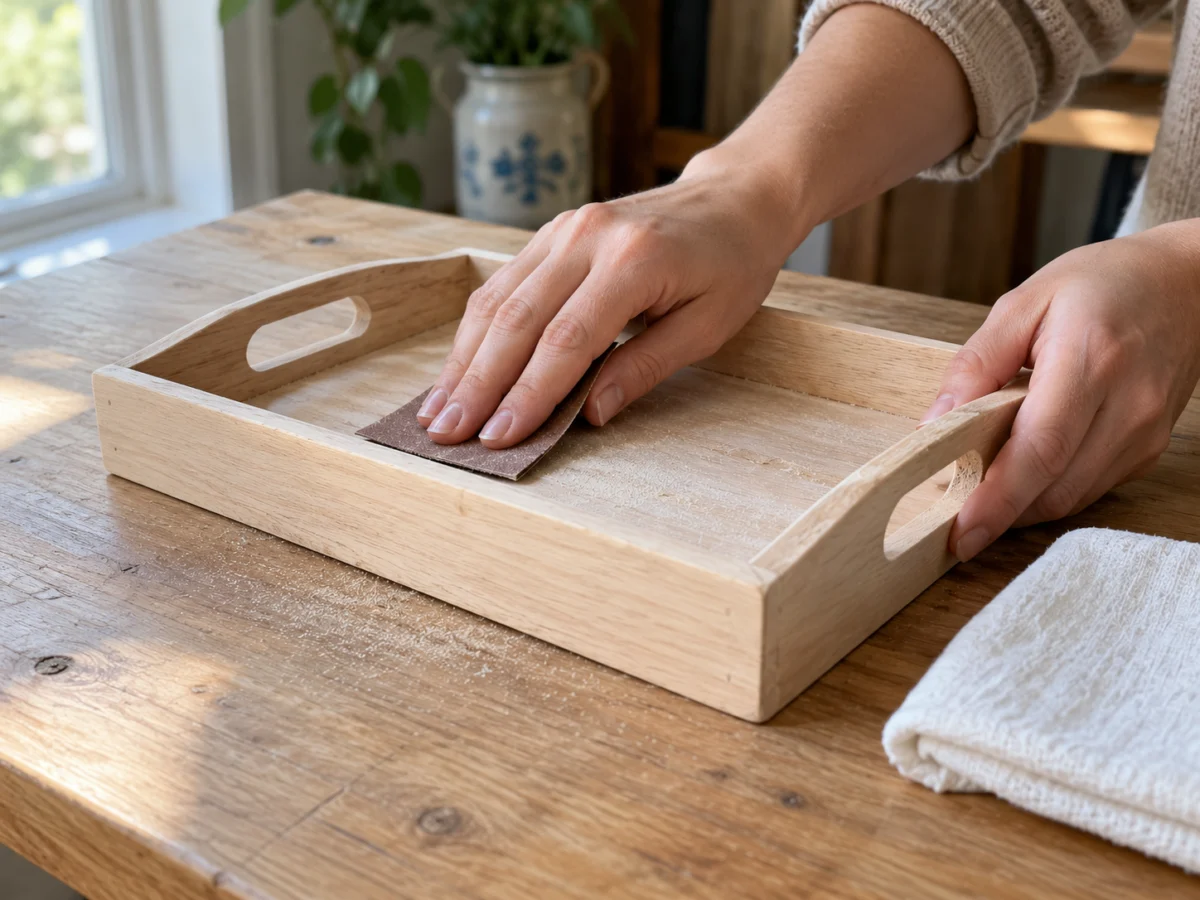
Lightly sand unfinished wood with 220-grit sandpaper and wipe away the dust. Wash glass, dry it, then remove fingerprints with rubbing alcohol. Terracotta must be clean, fully dry and prepared with a suitable sealer to reduce uneven absorption. Adhesive sticks poorly to grease, dust and loose paint.
| Surface | Prep | Good to know |
|---|---|---|
| Wood | Sand with 220-grit, wipe off dust | Thin glue coats, raw wood drinks adhesive |
| Glass | Wash, dry, wipe with rubbing alcohol | Pick a glue formula made for glass |
| Terracotta | Clean, dry fully, seal first | Keep finished pots away from standing water |
Add a Light Basecoat
Paint wood or terracotta white or cream if you want delicate napkin colors to remain visible. Apply one or two thin coats of acrylic paint, allowing each to dry completely. Leave glass transparent if you prefer a translucent design. Never apply paper over damp paint.
Separate the Napkin Layers
Decorative napkins usually contain two or three layers. Carefully peel away every plain backing layer until only the printed sheet remains. Work slowly near the corners to prevent tearing. Tissue paper and scrapbook paper normally need no separation.
Corner trick: Press a small piece of tape onto one napkin corner and pull. The plain backing layer usually comes away with the tape while the printed sheet stays in your hand.
Cut and Arrange Designs
Cut around printed flowers or gently tear napkin edges for a softer transition. Arrange the pieces on your dry surface before applying glue. Use smaller motifs on curved glass and terracotta because large sheets are harder to position without folds.
Apply a Thin Adhesive Layer
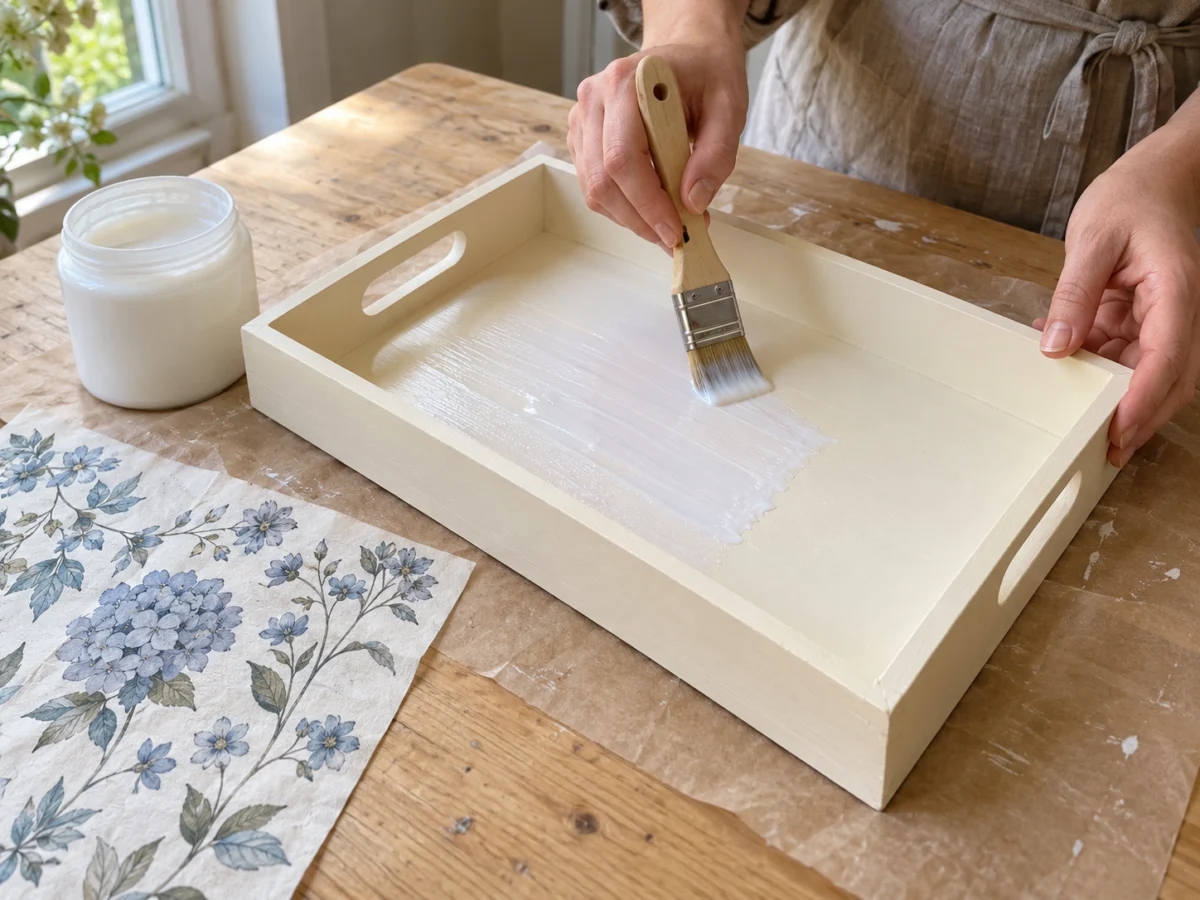
Brush a thin, even coat of Mod Podge over an area slightly larger than the paper design. Avoid visible puddles and thick ridges. Work in sections about 3 to 4 inches wide so the adhesive stays workable while you position each piece.
Drying and curing times change from one Mod Podge formula to the next, so check the label or the maker’s product pages before you start. Mod Podge maker Plaid
Place and Smooth Paper
Lower one edge of the paper onto the adhesive, then gradually lay down the remaining section. Smooth gently from the center outward. For fragile napkins, place loose plastic wrap over the design and smooth through it with your fingertips. Lift the plastic carefully before the adhesive dries.
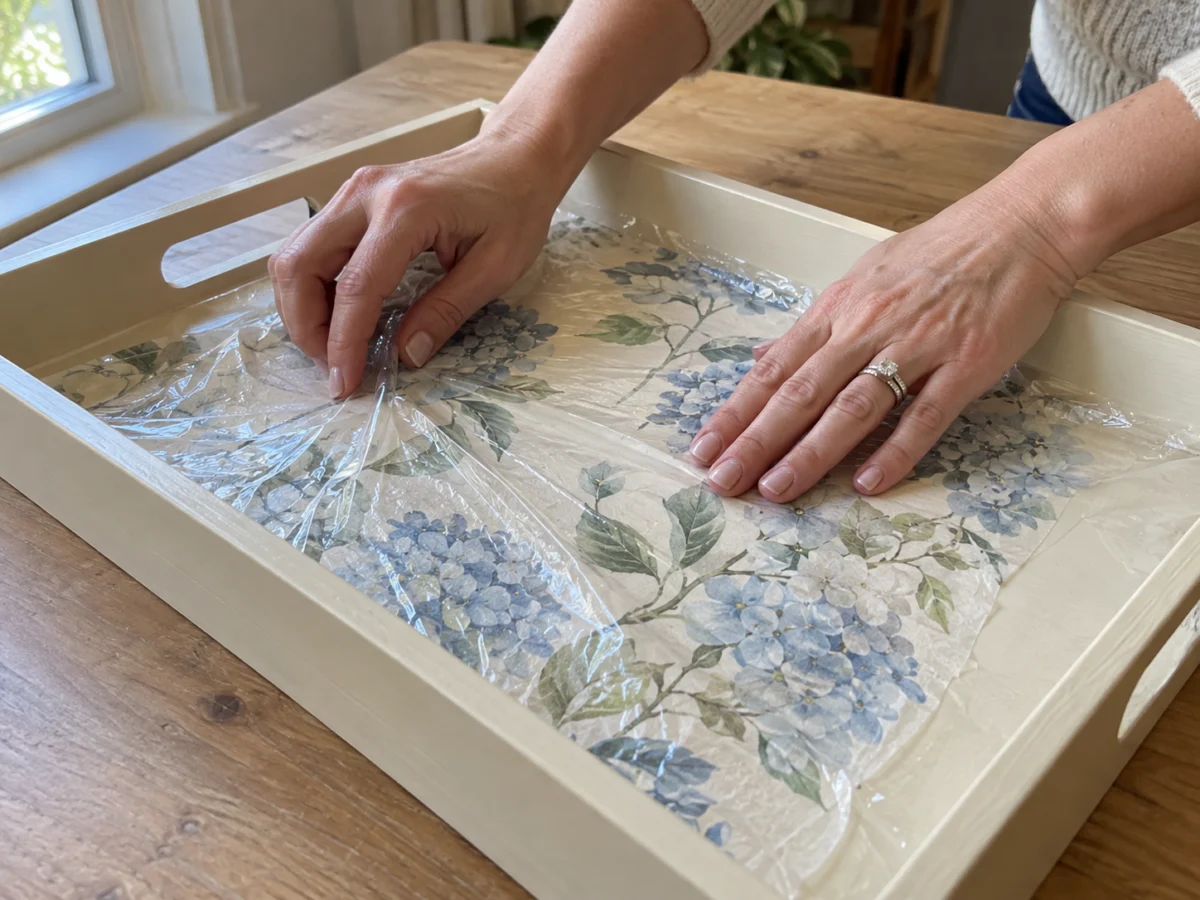
Picture this: You lay a napkin rose on wet glue and one petal folds over itself. Do not tug the paper. Put a scrap of plastic wrap on top, roll a fingertip from the fold outward, and the petal usually settles flat again.
Remove Trapped Air Bubbles
Push small air bubbles toward the nearest paper edge using light pressure from a soft sponge. If a large wrinkle forms on curved glass, lift the unattached portion and reposition it. Stop smoothing if the wet paper stretches or begins tearing.
Allow the Adhesive to Dry
Leave the first decoupage layer undisturbed until dry. Thin Mod Podge coats may feel dry after about 20 to 30 minutes, but humidity and paper thickness affect the timing. Follow the product label and avoid brushing wet napkins repeatedly.
Humid day? On a sticky summer afternoon the same thin coat can take twice as long to dry. Set the piece near a fan, skip the hair dryer, and start cutting motifs for your next project while you wait.
Seal the Finished Design
Brush a thin topcoat of Mod Podge over the dried paper. Let it dry according to the label, then add another coat if needed. Cover the entire decorated surface for consistent sheen. Standard Mod Podge is not waterproof, so avoid prolonged moisture exposure.
| Mod Podge finish | Look | Good for |
|---|---|---|
| Matte | Flat, no shine | Farmhouse trays and boxes |
| Satin | Soft glow | Most beginner projects |
| Gloss | Shiny, glass-like | Jars and bright prints |
| Outdoor | Weather resistant | Porch pots and planters |
Let the Finish Cure
Trim dry overhanging paper with sharp scissors. Leave the finished object in a clean, ventilated area until fully cured according to the adhesive instructions. Some Mod Podge formulas require several weeks for full curing, even though they feel dry much sooner.
Troubleshooting Wrinkles, Bubbles and Peeling Decoupage
Wrinkles usually appear when lightweight paper absorbs excessive adhesive or stretches during smoothing. Apply less Mod Podge and use gentle outward strokes. For large napkin designs, lower the paper gradually instead of pressing the entire sheet down at once.
Air bubbles form when pockets of air remain beneath the paper. While the adhesive is wet, move bubbles toward an open edge with a soft sponge. Avoid pulling up dried napkins because the printed layer can tear. A tiny pinhole may help flatten a stubborn bubble in thicker paper, although the mark can remain visible.
Peeling edges often mean the surface was dusty, greasy or too absorbent. Sand wooden objects, degrease glass and prepare porous terracotta before decorating. Apply a small amount of adhesive beneath a loose edge, press it flat and let it dry before adding a topcoat.
Cloudy or sticky finishes may result from heavy coats, trapped moisture or incomplete curing. Give the project additional drying time in a ventilated room. Avoid using high heat to speed drying. Check the manufacturer’s instructions before applying another sealer.
Common questions
What is decoupage?
Decoupage is a decorating technique that attaches paper designs to wood, glass, terracotta and other objects using adhesive. A protective topcoat helps create a consistent finish. Thin paper can blend into the background so the design resembles painted decoration.
What paper works best for decoupage?
Decorative napkins work well for delicate designs on painted surfaces. Tissue paper is flexible enough for curves but wrinkles easily. Thin scrapbook paper is sturdier and works well on flat objects. Beginners often find small napkin motifs easier than large sheets.
How do you decoupage without wrinkles?
Apply a thin adhesive layer, position the paper gradually and smooth from the center toward the edges. Use small paper pieces on curved objects. Plastic wrap can protect delicate napkins while smoothing. Avoid excessive glue and repeated brushing over wet paper.
Can you decoupage wood, glass and terracotta?
Yes, decoupage works on properly prepared wood, glass and terracotta. Sand and clean wood, remove grease from glass, and prepare porous terracotta with a suitable sealer. Choose an adhesive formula compatible with the surface and protect ordinary finishes from prolonged moisture.
Made it? Tell us how it went