Craft Room Design Ideas for a Corner, Closet or Spare Room
Choose a craft corner, closet workspace or spare room layout around the projects you actually make. Give everyday tools, refill supplies and unfinished work a place to go.

By Mustafa Demir
Updated November 13, 2026
Project at a glance
- Time
- Start with one sorting session, then try the layout before buying storage
- Cost
- Reuse a stable table and containers first; spend on a measured problem
- Skill
- Sorting, measuring and arranging furniture
- You make
- Three layouts for a shared corner, closet or separate room
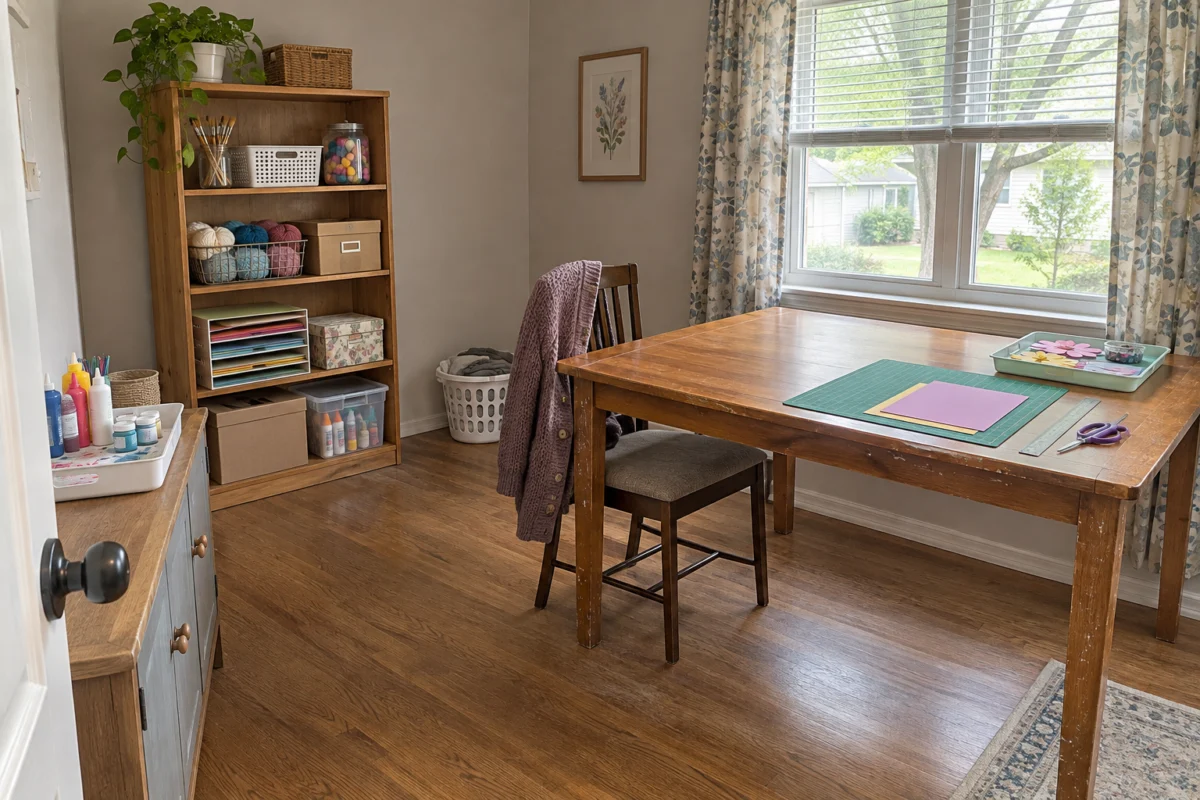
A craft room should have somewhere to put the project you are making today. That sounds obvious until the table holds a sewing machine, three bags of supplies and a basket of things waiting to be put away. Start by clearing enough room for one complete task, then plan the storage around it.
These craft room design ideas cover three situations: a corner that shares space with daily life, a closet that can close and a spare room with separate work areas. Choose by the space you can keep available, rather than the amount of storage you hope to fit. A small setup that is ready to use can serve you better than a full room that takes half an hour to clear.
Before moving furniture, sort supplies into four groups: current work, tools you use often, refill supplies and things you no longer want. Keep only useful scraps, and choose one container as their limit. Look through your next few crafts for adults and plan around those materials instead of every craft you might try someday.
I’d start by clearing enough space for the project I want to make next, rather than trying to organize every supply in one afternoon. A tray for the unfinished work and one reachable spot for the tools can make that first session easier to start. The rest of the storage can follow what actually gets used.
Choose the layout you can keep usable
| Available space | Start here | Keep close | Skip at first |
|---|---|---|---|
| A shared corner | Stable compact desk or an existing table | One project tray and everyday tools | A large collection of matching bins |
| A reach-in closet | Freestanding desk checked against door and chair clearance | Shallow storage you can reach from the chair | A deep cabinet that crowds your legs |
| A spare room | A work surface sized for your largest regular task | Active projects and tools by work area | Wall-to-wall storage before planning the floor |
1. Give a shared corner a quick reset
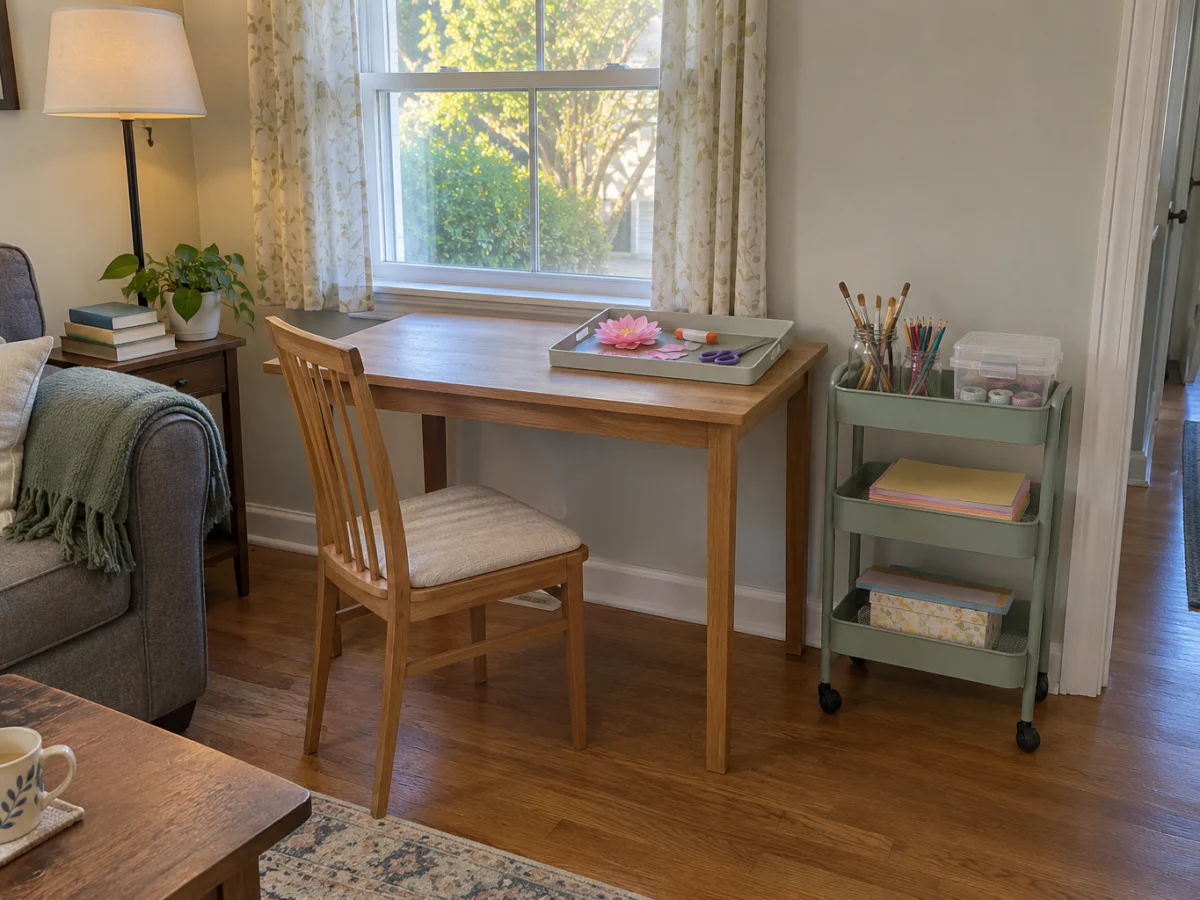
Choose this arrangement if the room still needs to work as a living room, dining room or home office. A permanent compact desk suits crafts that can stay out. If you need the dining table back at dinner, spend your effort on a portable project tray and a nearby storage spot instead.
Start with the surface and your chair. Sit down, spread out the largest project you regularly make and reach for the tools. A cart earns its floor space only if you can reach it without moving the chair or blocking a door. Put scissors, a ruler and the adhesive you use most in a small caddy; keep refill packs in a lidded box below or nearby.
Leave the project together
Use a shallow tray that fits the shelf where it will wait. A partly assembled paper card, its cut pieces and the glue stick can move as one unit. Put a loose sheet of paper over delicate pieces before carrying the tray. For small bead crafts, use a divided container with a closing lid inside the tray so a bumped corner does not scatter the next few steps.
Try this before shopping: Pack away the setup once using a spare tray and a shoebox. If the awkward part is carrying loose pieces, buy a better project container. If it is walking across the room for every tool, move the everyday tools closer. Each problem calls for a different purchase.
2. Plan a closet around the working chair
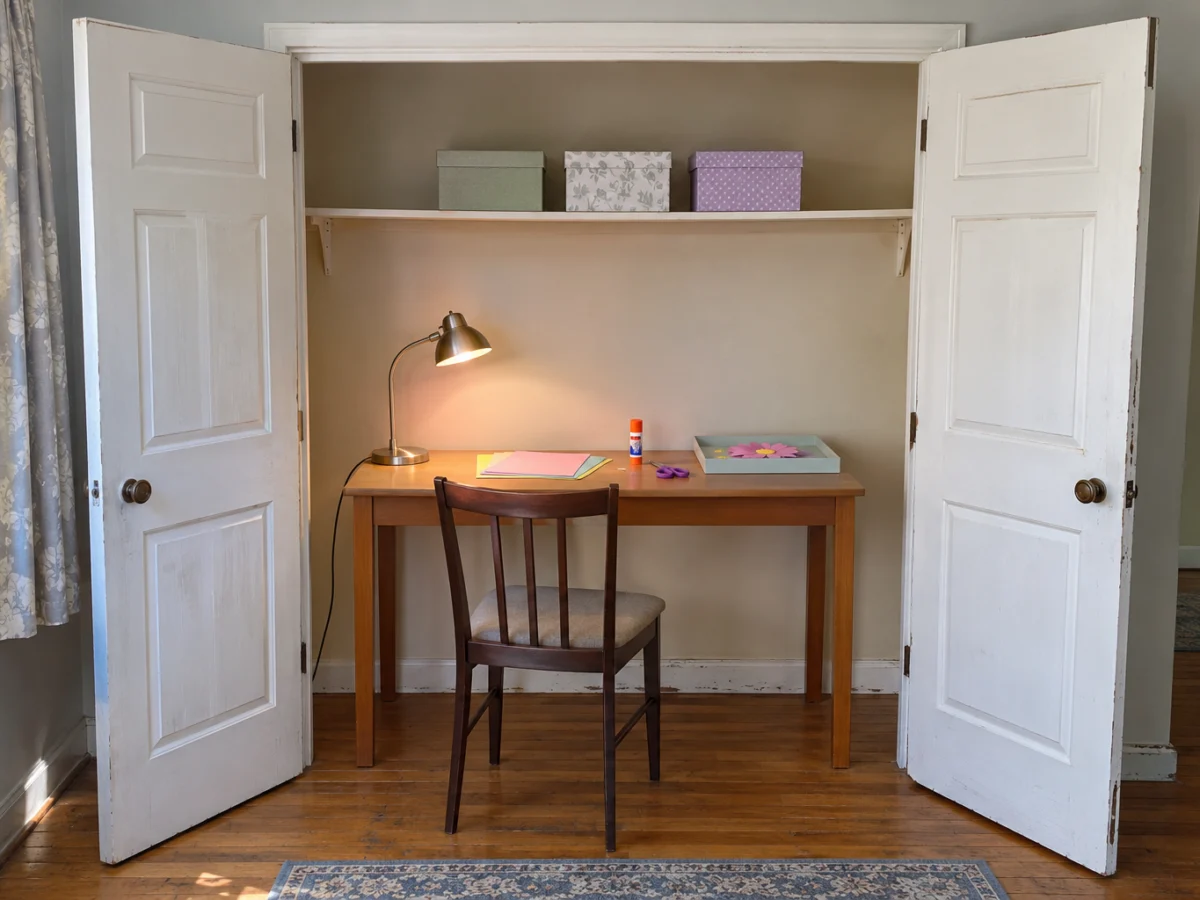
A closet workspace works when its doors can stay fully open while you craft and the chair has room outside the opening. Empty the floor, measure between the door hardware and check the baseboards. Then mark the proposed desk footprint with painter’s tape. Pull up a chair and sit within that outline before choosing furniture.
A paper-crafting closet, laid out
Imagine a reach-in closet with a freestanding desk centered in the opening. Keep the middle of the desk clear for a cutting mat. Stand cardstock in a file holder at one side, put frequently used punches in a shallow drawer and keep refill paper in a box on a shelf above. A task lamp sits at the back corner where its base does not steal the cutting area. Leave both door swings and the route behind the chair clear.
Check depth with the actual equipment
A narrow desktop may suit cards and embroidery, but a sewing machine needs space for the machine and the fabric moving around it. Set the real machine on a stable existing table and measure the working area it uses. Include knee room and the foot pedal. If that footprint will not fit the closet, keep the machine on a table outside and use the closet for supplies.
| Place | Useful contents | Avoid |
|---|---|---|
| At desktop height | Tools and materials for the current craft | Deep stacks you must unpack |
| Above the desk | Light refill packs in shallow labeled boxes | Heavy equipment overhead |
| Below or beside the desk | A small wastebasket outside the knee space | Cabinets that prevent a comfortable seat |
3. Give a spare room working space before storage
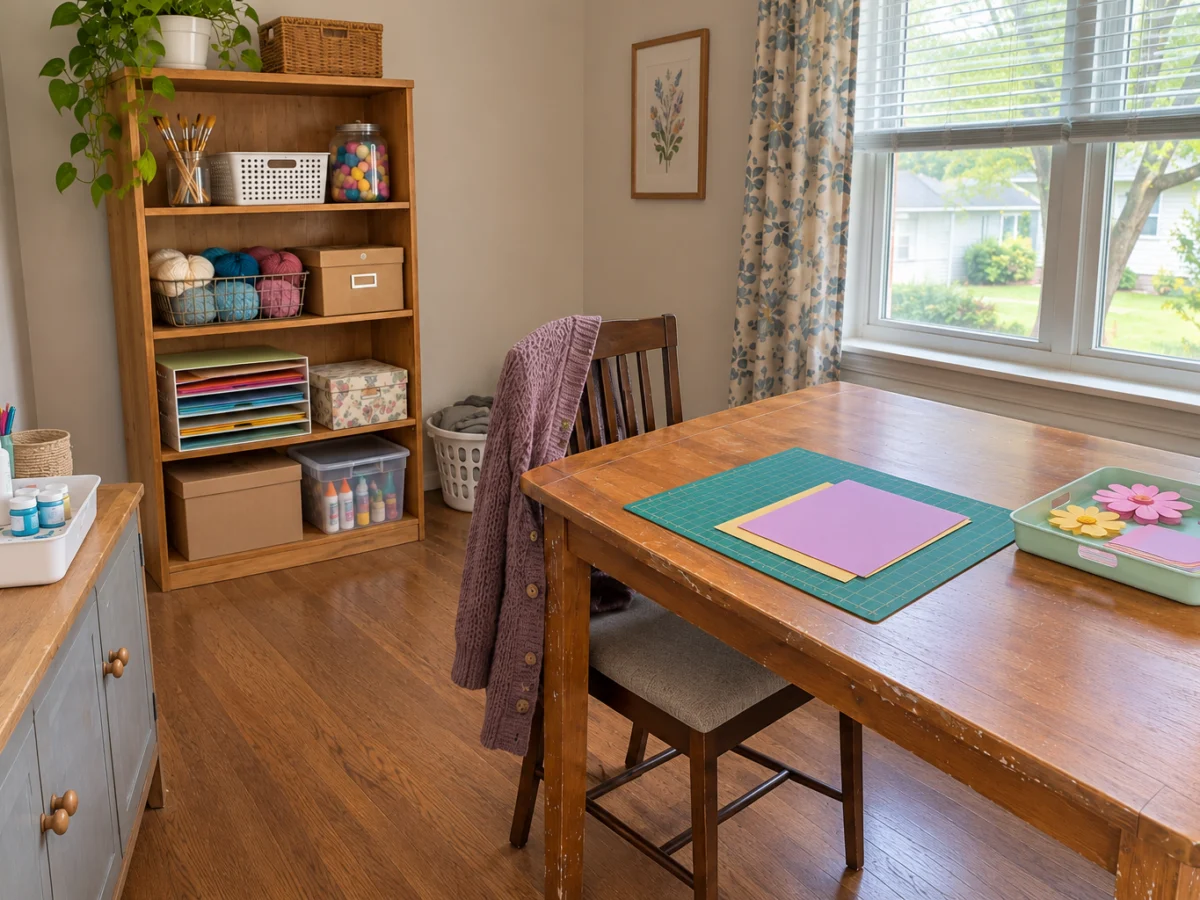
A separate room gives you permission to leave work out, so decide where that unfinished work will live. Set up the largest regular task first. If you cut fabric, spread out the fabric and cutting tools. If you make wreaths, set down the wreath form with room to turn it. Move around the table and open nearby drawers before adding more furniture.
When storage looks tidy but the worktop is crowded, move refill supplies to the edges of the room. Put heavier stock low and lighter occasional supplies higher. Keep frequently used materials near the task they serve: thread beside sewing, paper near cutting and brushes beside a washable work tray. Follow furniture instructions for loads and anchoring.
Make room for the work that waits
If several projects keep merging into one pile, assign one tray or shelf space to each active project. Add a note with its next task before putting it away. A tray marked for a birthday card is more useful than a basket labeled miscellaneous. When the active-project spaces are full, finish or put away a project before starting another.
Separate clean supplies from messy work
If a glue bottle keeps landing beside paper or fabric, give painting and gluing a washable tray on a separate surface. A second table is useful only when you have the floor space; a removable tray may be enough. Reserve somewhere undisturbed for pieces to dry. Keep clean paper and fabric away from that area, even after the brush cup has been emptied.
Storage purchases that create more work
- Buying a matching bin set before sorting Measure the supplies you intend to keep and the shelf they will sit on. Test the grouping in spare boxes first. Buy the sizes that fit those groups, leaving room to take things out.
- Putting every small item in a jar Choose divided boxes for tiny parts and shallow drawers for flat tools. A jar works for upright items you can grasp, but becomes awkward when the piece you need is buried at the bottom.
- Installing pegboard because the wall is empty List the tools that would actually hang there. If most supplies are folded fabric, paper or small loose parts, shelves or drawers may solve more of the storage problem.
- Treating a closet door as the whole solution Check lighting and usable outlets before committing to the desk position. Keep cords out of the chair path. A closed storage space does not provide ventilation for products that require it; follow their labels and choose a suitable work area.
Questions people ask
What should you buy first for a craft room?
Start with a stable work surface, a comfortable chair and enough light to see the task. Use containers you own while you test the layout. Your first storage purchase should solve a specific problem, such as keeping paper flat or moving unfinished work.
How do you organize a craft room on a small budget?
Sort before shopping, reuse sturdy boxes and label them by contents. Put daily tools close to the work surface and refill supplies farther away. Spend on one awkward part of the routine at a time instead of replacing every container at once.
Is open or closed craft storage better?
Open storage suits supplies you use often and can return quickly. Closed storage helps contain small parts and reduce visual clutter in a shared room. Try open access for everyday tools and labeled closed containers for refills, keeping the container depth manageable.
How can you keep a craft room from filling up again?
Choose a fixed space for scraps, refill stock and active projects. Stop adding to a category when its space is full, then use, donate or discard what no longer serves you. Leave the main work surface ready for the next task when you finish.
Made it? Tell us how it went