DIY Advent Calendar: 3 Refillable Builds and 24 Fillers
Build a paper-bag countdown in a shallow tray, or try matchbox drawers and folded cardboard tubes. Fill all three with inexpensive activity notes.
By Mustafa Demir
Updated November 18, 2026
Project at a glance
- Time
- Allow an unhurried afternoon for making, checking and filling; glue drying adds time for matchboxes
- Cost
- Reuse a tray and paper scraps; compare the cost of 24 bags or empty boxes before buying
- Skill
- Beginner folding and numbering, with adult help for cutting and small clips
- You make
- A 24-day paper-bag Advent calendar, plus matchbox and cardboard-tube alternatives
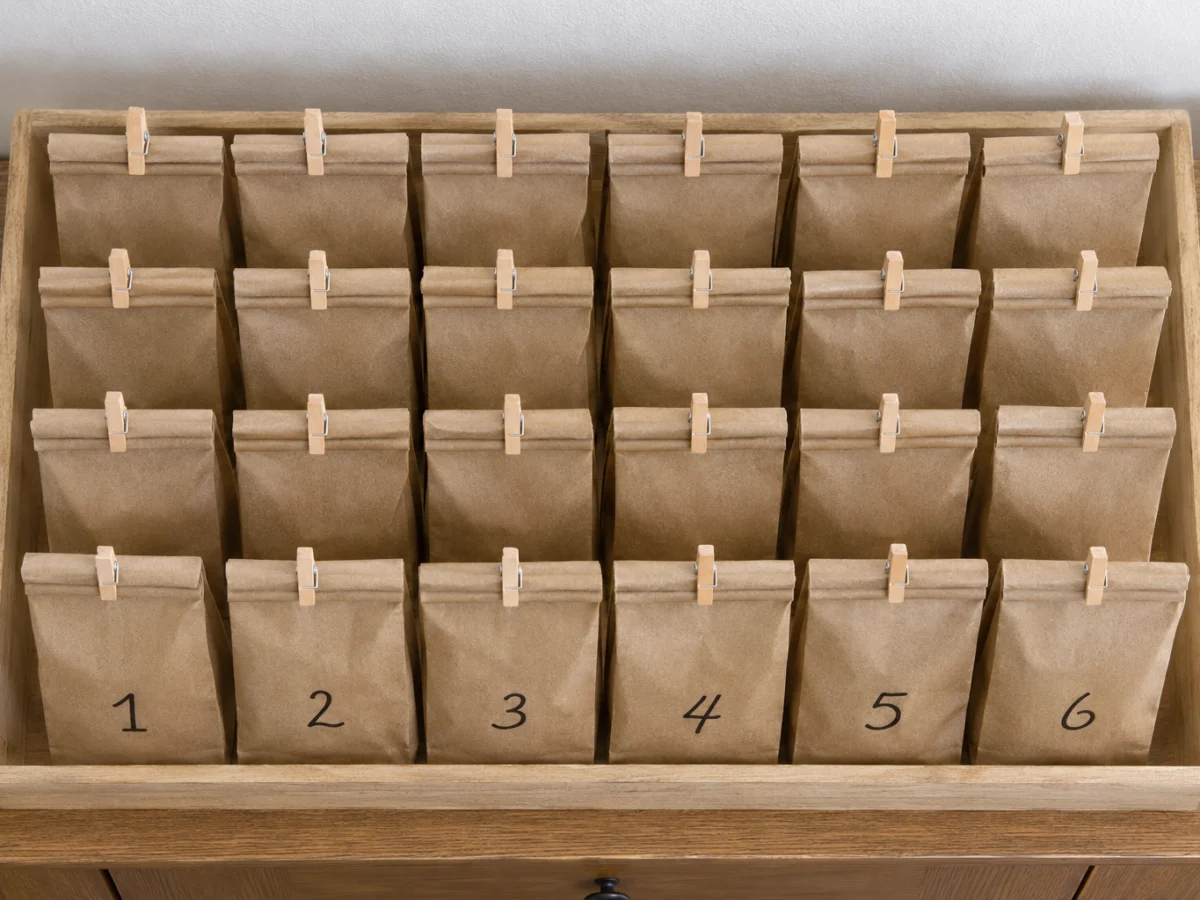
A DIY Advent calendar needs a place for each date, a closure that opens without tearing, and fillers that suit the people opening it. The paper-bag version below stands in a shallow tray. Each day, remove a clip, unfold one bag and save it for another December if the paper stays sound.
Choose the contents before decorating. A calendar of paper activity slips takes less space than one filled with objects, and it avoids needing 24 separate purchases. If your children would enjoy choosing a bedtime story more than getting another tiny toy, write that choice on a note. Place longer activities on dates when someone can actually help.
This guide includes three complete builds. Start with bags for roomier pockets, matchboxes for very small folded notes, or cardboard tubes when you have suitable clean tubes to reuse. For more seasonal projects, browse the Christmas crafts collection.
| Format | What fits | Choose it when |
|---|---|---|
| Paper bags in a tray | Folded notes, stickers, a bookmark or an item checked against the actual bag | You want flexible space and quick access |
| Empty craft matchboxes | Small folded notes, trimmed stickers and paper clues | You like drawers and can keep contents flat |
| Cardboard tube pillow boxes | Narrow notes, sticker strips or a measured wrapped item | You have clean tubes and enjoy repeating folds |
I would plan the notes before decorating the bags. My preference is to put the longer activities on days with room for them, then use small choices, such as picking a bedtime book, on busy evenings. A calendar should give you something to look forward to without leaving you with 24 extra errands.
What you need
- Flat-bottom kraft paper bags 24, approximately 3 x 2 x 6 inches Use identical bags; actual sizes vary
- Shallow tray or sturdy open box 1 large or 2 smaller Dry-fit the bags before choosing
- Small wooden clothespins 24 Reusable top closures
- Black marker 1 For clear front numbers
- Paper or light cardstock scraps Enough for 24 notes Use plain backs of saved paper
- Optional paper number labels and glue stick As needed Useful if ink shows through the bags
- Scissors
- Ruler
- Pencil
How to make it
Test one filled bag
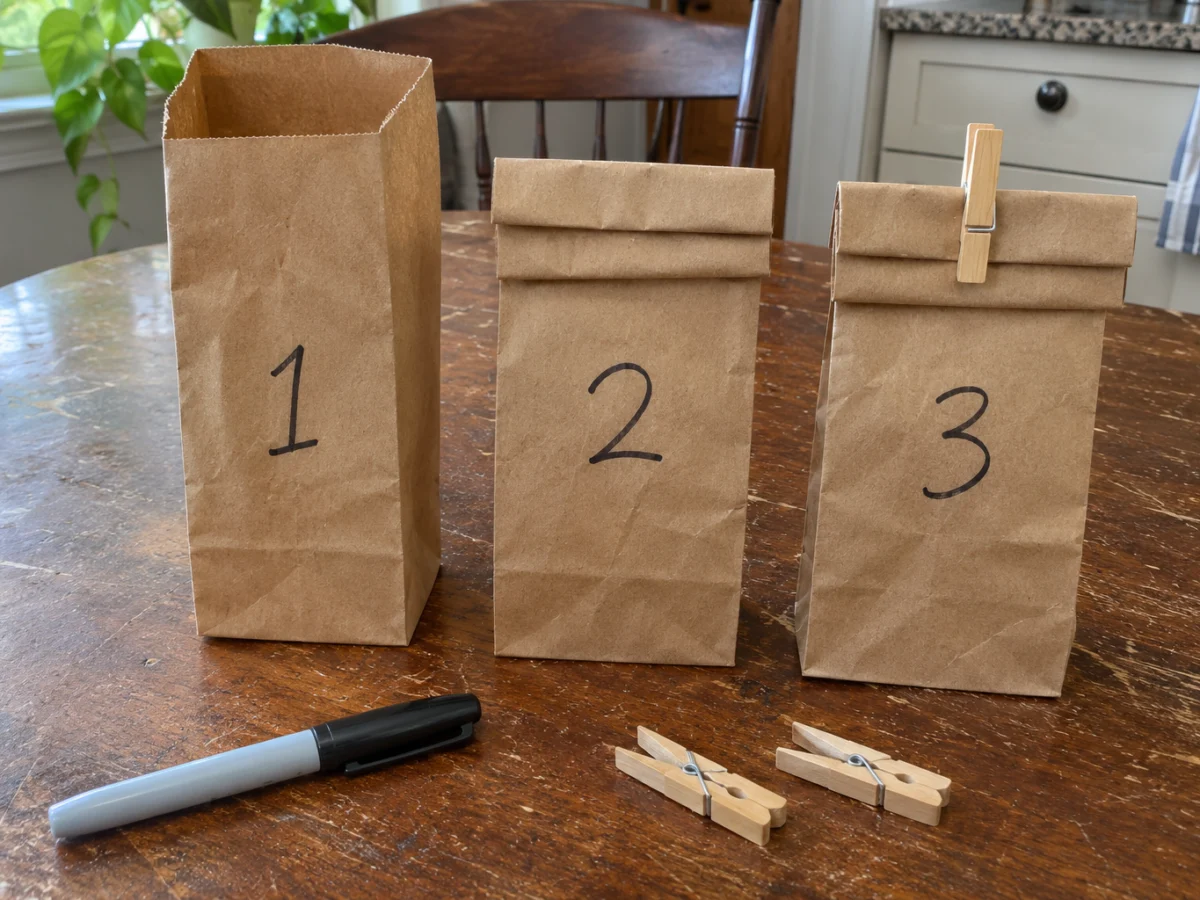
Place your largest planned filler in one bag and open the bottom fully. Leave about 1 1/2 inches empty at the top for folding. Fold the top down twice, about 1/2 inch each time, and add a small wooden clothespin. If the contents push into the folds, use a larger bag or replace the gift with a clue to its location. Do this before numbering all 24.
Number the empty bags
Flatten the bags and write 1 through 24 on their fronts. Keep the numbers below the folded top but high enough to clear your tray edge. Let the ink dry before stacking. If it bleeds through thin paper, number separate paper labels instead and glue them to the fronts. Leave the base folds and side gussets free of decorations.
Plan the daily contents
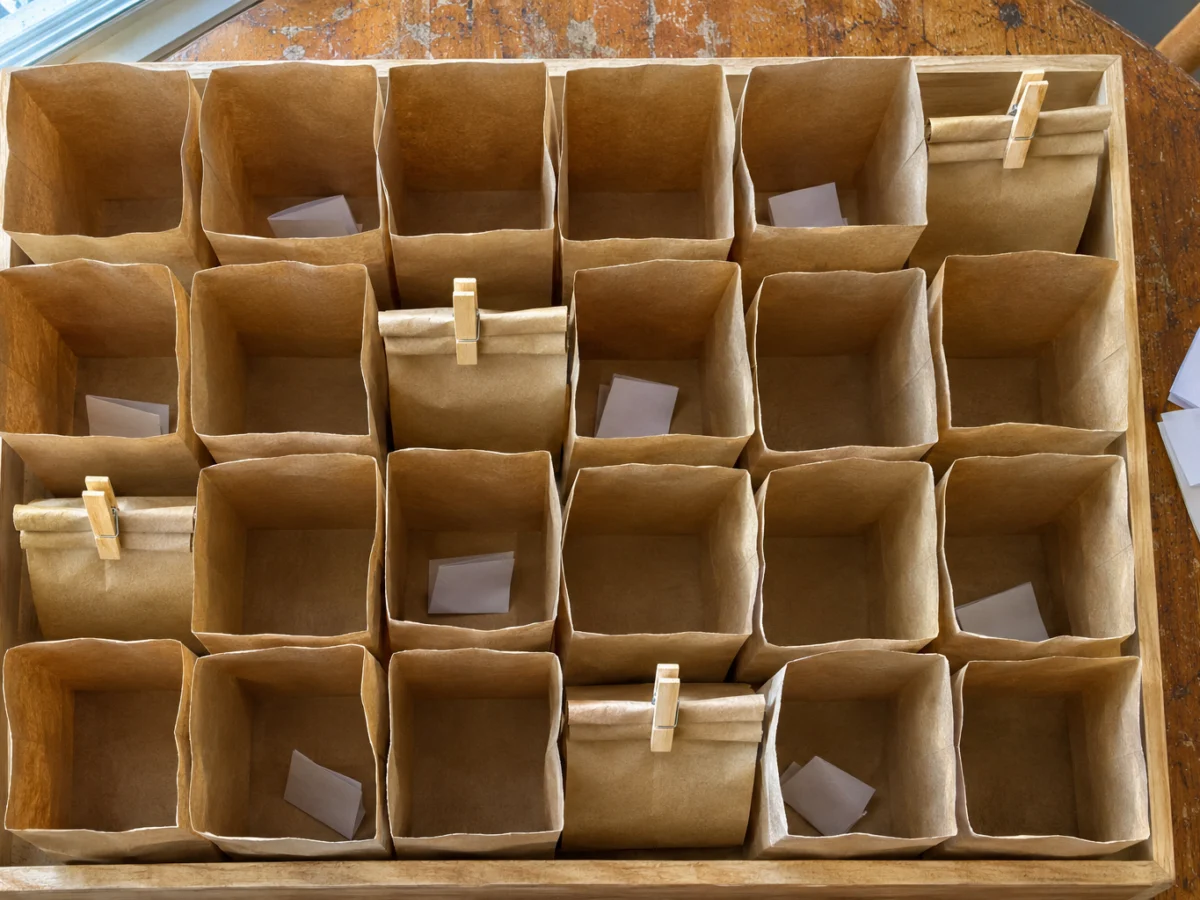
Cut 24 slips that fit comfortably inside your test bag. Choose the ideas below and write one on each slip, checking the date against your actual schedule. Lay each slip beside its numbered bag. This catches a missing date before everything is closed. Put any physical extras beside their matching notes and check the recipient can use them appropriately.
Dry-fit the tray
Open all 24 bag bases and arrange them six across and four deep, with fronts facing the same direction. A tray around 20 x 12 inches inside may suit these example bags, but the actual filled footprint decides. Bags must sit without being squeezed. Use two trays of 12 if necessary, and choose sides low enough to see the front-row numbers. Lift out a back bag to read it rather than adding unstable risers.
Fill and close the bags
Add the prepared slips and any checked extras. Set heavier contents at the bottom, using only enough to let each bag stand naturally. Leave edible items in their original wrappers. Repeat the two top folds and secure each with one clothespin. Avoid tape across the opening: daily tearing makes reuse less likely. An adult can keep and replace the clips when children need help.
Set out the countdown
Stand the bags back in order and check each base lies flat. Move the whole tray gently; a bag that tips during this check needs lighter contents or a better-supported position. Set the calendar on a stable surface appropriate to the household. On each date, remove the clip, unfold the top and take out the note. Save the empty bag and clip together.
Keep the bags standing and opening
The main snag is fitting the surprise without crowding the closure or tipping the bag. Give the container less to carry rather than forcing the paper. A flat note can stand in for a book, a larger gift or an activity elsewhere in the house.
If a bag leans forward, open its bottom folds completely and settle the contents at the base. If it still falls, remove the object and use a paper clue. A tray supports the group, but it cannot repair a split seam. Replace damaged bags before refilling them.
If the number disappears behind the tray lip, move the label higher or choose a shallower tray. Keep it clear of the folded top. Decoration that crosses a crease will bend every day, so put any small paper shapes on the flat front instead.
For children under 3, use activity notes instead of tiny toy fillers, and keep loose clips out of reach. The CPSC advises keeping toys with small parts away from this age group. Choose activities to suit the child as well. CPSC toy safety guidance
Make matchbox drawers
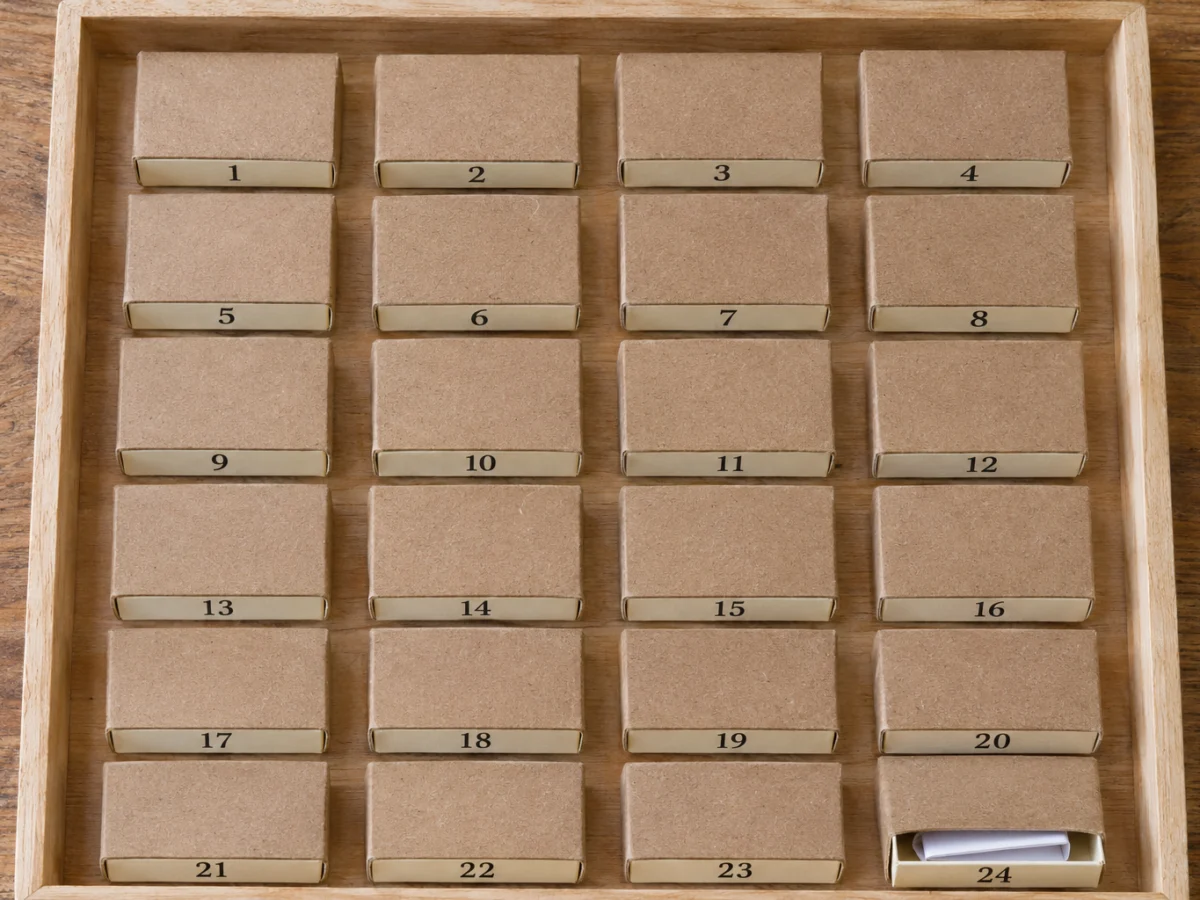
Use 24 new, empty craft matchboxes, never boxes containing matches. This version suits tiny paper surprises rather than a miniature version of every bag filler. Measure an actual drawer before preparing all the notes.
Materials
Gather 24 empty craft matchboxes, lightweight paper scraps, a glue stick, black marker, scissors, ruler and a shallow tray. The tray should hold the boxes flat in one layer. Set the drawers aside while decorating their sleeves.
| Step | What to do |
|---|---|
| 1. Wrap the sleeves | Cut a paper strip to wrap around each outer sleeve. Keep both open ends clear and place the overlap on the outside, where it cannot rub against the drawer. Glue the strip and let it dry fully. |
| 2. Check and number drawers | Slide each empty drawer back into its own sleeve to check the fit. Write a date from 1 through 24 on the drawer front, with the box oriented so that front can be found when you lift it from the tray. |
| 3. Fill each drawer | Fold each note to fit the drawer without bulging above its rim. Add only a small flat extra if it fits. A paper clue works better than a treat squeezed into a shallow box. |
| 4. Arrange the boxes | Lay the boxes flat in a single layer, four across and six deep, or another arrangement that fits your tray. Lift out the chosen box to slide its drawer open. Do not glue the boxes into a tower with blocked drawers. If a drawer jams, remove the contents and check for wet glue or a thick paper overlap inside the sleeve. Let glue dry and trim the obstruction. Use a thinner note if the box works empty but sticks when filled. |
Fold cardboard tube pillow boxes
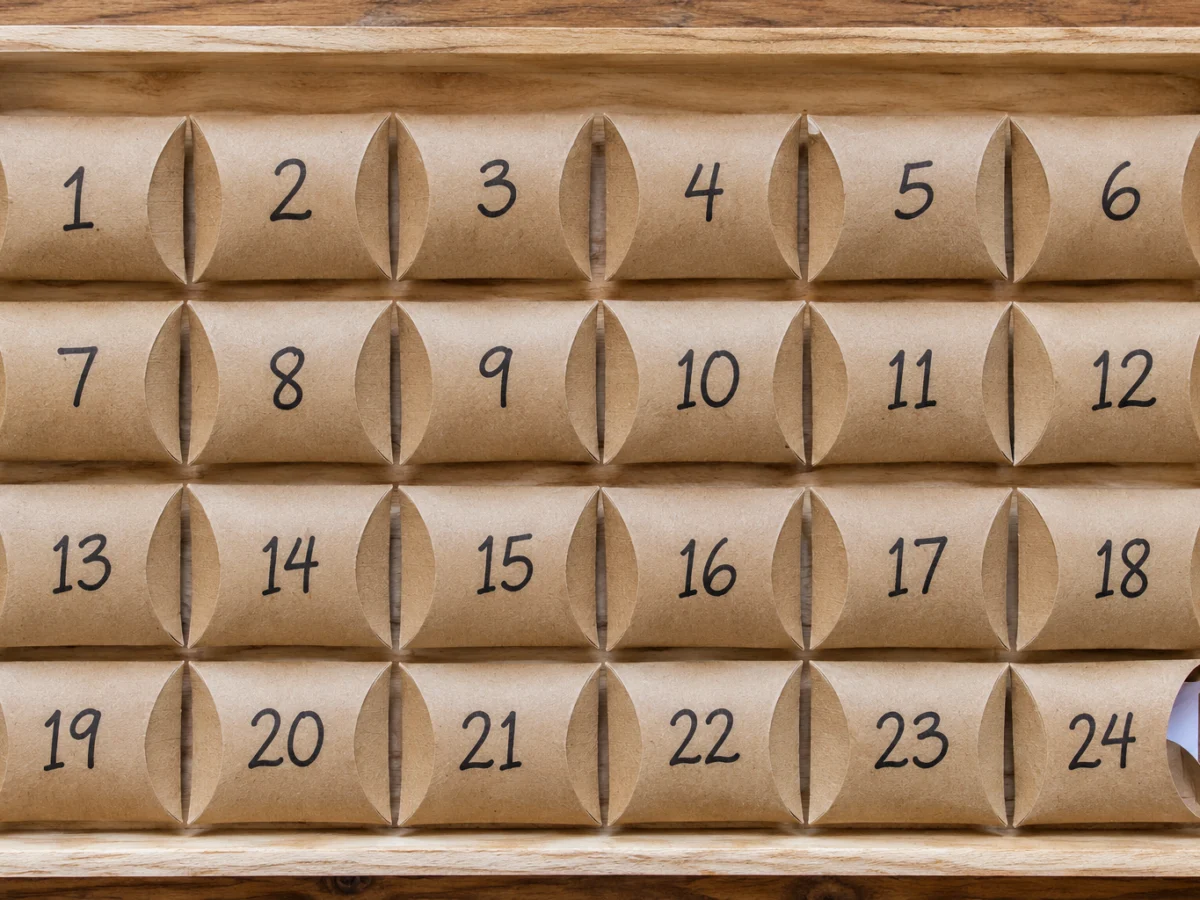
This version uses 24 clean, dry craft tubes or paper towel tube segments about 4 inches long. The overlapping curved flaps reduce the space at each end, so a tube that looks roomy from outside may hold only a narrow note. Practice on one before cutting the rest.
Materials
Use 24 suitable tubes, a black marker, scissors, a ruler, paper slips and a shallow tray. Have lightweight paper strips and a glue stick available if some tubes need removable belly bands. Adults should cut thick cardboard.
| Step | What to do |
|---|---|
| 1. Trim and number tubes | Cut the tubes to matching lengths and remove loose paper. Number each curved side from 1 through 24 before folding. Place each number where it will be visible when the boxes lie flat. |
| 2. Fold the first end | Gently flatten the first tube just enough to establish two opposite side creases. At one opening, press one curved half inward, then fold the opposite half over it to make overlapping pillow-box flaps. Work slowly rather than making a sharp straight crush across the end. |
| 3. Check the space | Test a narrow folded note inside, leaving room for the other end to close. Form the second pair of flaps. If the tube cracks or the flaps cannot overlap, replace it or use a more flexible tube before making the batch. |
| 4. Fill and arrange boxes | Repeat for all 24 and lay them horizontally in the tray, six across and four rows or a layout suited to your tray. If a flap springs open, remove bulky contents first. Then wrap a loose paper belly band around the middle, gluing the band only to itself so it slides off for opening. Open the flaps gently each day instead of tearing an end away. Keep any edible item in its original wrapper; a reused cardboard tube is not a food container. Replace tubes with split folds before using them again. |
24 inexpensive calendar fillers
Write these as paper slips so they work in all three builds. There are six ideas in each group. Spread the longer activities across free afternoons, and keep short choices for busy days. Use supplies and entertainment already available to avoid turning each note into an unexpected purchase.
Ideas 1 to 6 offer everyday choices, 7 to 12 make something, 13 to 18 reserve time together, and 19 to 24 make small connections.
Want a few objects too? Swap a note for an age-appropriate sticker, crayon or wrapped treat after checking the actual container. A clue can point to an item that will not fit. You do not need a physical gift every day.
| Everyday choices | Make something | Time together | Small connections |
|---|---|---|---|
| 1: Choose tonight’s bedtime book. | 7: Draw together with paper and pencils. | 13: Build a blanket fort. | 19: Write a holiday card to someone you know. |
| 2: Pick a song for a kitchen dance break. | 8: Cut paper snowflakes with adult help as needed. | 14: Take an evening walk to look at lights. | 20: Draw a card for a neighbor. |
| 3: Choose a board game already at home. | 9: Make a paper chain from scraps. | 15: Have breakfast in pajamas. | 21: Tell your favorite joke. |
| 4: Choose a family movie already available. | 10: Turn scrap cardstock into a bookmark. | 16: Play a round of charades. | 22: Choose a family photo to look at together. |
| 5: Choose a snack already in the cupboard. | 11: Decorate a paper ornament. | 17: Invent a winter story together. | 23: Take turns naming something kind about each other. |
| 6: Pick tomorrow’s breakfast from two available options. | 12: Hold a silly-face drawing contest. | 18: Read a favorite holiday story. | 24: Hide a paper star for a short treasure hunt. |
Refill and store for next year
After the countdown, empty every container and check the paper for stains, tears and dampness. Keep sound pieces and replace damaged ones. Remove the clips and flatten the paper bags along their existing folds. Store the numbered bags together in a dry box, with clips in a separate closed container.
Keep matchbox drawers in their sleeves so pairs do not get mixed. Open the tube flaps gently and store the tubes without heavy objects pressing on them. Save the filler list separately, then choose new dates next year before filling. Reuse depends on the condition of the paper and closures; no version needs to be kept after it stops opening properly.
Other ways to make it
One calendar for siblings
Put a shared activity on each slip. For personal surprises, write each child’s name on the note and use separate small packets only where they fit without crowding. Decide who opens each date before December starts.
A mostly paper countdown
Use only notes, jokes and paper clues in the calendar. Keep the daily containers consistent and place any larger supplies elsewhere. This is the most flexible choice when the same plan needs to work in bags, matchboxes or tubes.
Questions people ask
Does an Advent calendar need 24 or 25 days?
This project counts December 1 through December 24. If your household prefers to include Christmas Day, add a 25th container and note, then dry-fit the tray again before decorating.
Can the bags hang on a string instead?
These instructions use a tray to support the contents from below. Hanging bags changes the load on the paper, clips and attachment points, so keep this build in its tray rather than assuming the same closure will support it overhead.
What fits inside a matchbox calendar?
Measure the inside of your actual drawers. Small folded notes, trimmed stickers and paper clues are practical starting points. Box sizes vary, and thick folds can jam even when a note seems short enough.
Can the calendar be ready without 24 new gifts?
Yes. Fill it with the 24 activity and choice slips above, using things already at home. Check each promise against your time and supplies, then replace any activity that would be difficult to carry out.
Made it? Tell us how it went